
A little bit of everything

November 5, 1999 A Little Bit of Everything
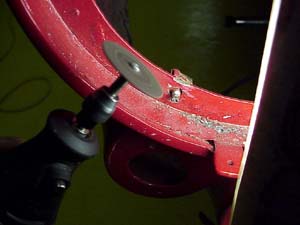

A few weeks ago I hit a dead end with the headlights because all the mounting screws were seized in the their capture nuts. (Isn’t it great how sometimes it sounds like I’m speaking a totally different language!) Well, in a moment of enlightment, I decided the way to get the nuts out was to grind them out. I borrowed a Dremel tool with a cutting disk from work and cut the sheared machine screws as flush with the nuts as I could. After the grinding, I pried the cage of the capture nut open to get the square nut and what was left of the screw out. The next day I went to the hardware store to find replacement square nuts figuring I was very close to finally mounting the headlights on the car. WRONG! Sears was my third stop, and they only had SAE square nuts. I not only want to replace the nuts with metric ones, but I’d love to put stainless nuts back to keep the screws from ever rusting as badly as the old ones. Anybody have a source?

I cleaned some more parts for painting. Since I’m working on the headlights, I worked a little on the headlight buckets. It looks like the previous owner had the buckets sand blasted, and primered. When I hold the buckets up to the light, I can see a few pin-holes, but the metal is still pretty strong. I figure if I paint them with Eastwood’s “corroless” and then apply a thick coat of paint over that, the buckets should last a while longer. The back of these lights see a lot of debris and water kicked up from the front wheels, but I don’t plan on driving the car through a ton of rain and snow. It was another warm day, so I was painting outside. I don’t know what I’m going to do over the winter when it’ll be too cold to paint outside.

While I was waiting for the primer to dry, I looked at the fresh air vents inside the car. The driver’s side vent was seized, so I figured this was a good time as any to figure out what was wrong. I got the cable out, and found that the shaft by the pull knob was frozen. I freed it up after soaking it in penetrating oil, but it’s still pretty stiff. It’ll probably be better after a week of soaking. While I was working on the vent, I decided to take the vent flap out to see if I could replace the rubber seal. The old seal is cracked and not sealing. Replacing this seal will help keep the drafts out of the car, when I take the car out for a spin maybe next winter! (notice how I’m pushing back the completion date?)

I actually ATTACHED something to the car! I put one of the rear tail light assemblies back on the car! This event will be short lived because I’ll probably remove it again when I get new gaskets for the assemblies. The old ones are too far gone, and nothing looks beter than new rubber gaskets on a freshly painted car! It nonetheless was very satisfying to plug the wires in, knowing that I’m that much closer to completing the project.


I stopped by the locksmiths to pick up my ignition, and door lock with their newly made keys. The blanks he was able to match were not exact, but worked well enough to turn the locks. He explained that the correct blank should be just a bit higher where the teeth of the key would become more pronounced, but there was enough meat for these keys to move my tumblers. H e charged me $20 bucks for each lock and made two keys for each lock bringing the total to a little over $40 bucks with the tax. I’ll worry about finding the right keys to my car someday in the future, but for now, I’ve got working ignition, and door locks! Now I can mount the ignition switch and begin checking the wiring with power to the switch!
Previous Restoration Day
Next Restoration Day
Ferrari Home Page
www.tomyang.net
Blog

Forum

Resource
