
It’s All About Windows

1/12/01 It’s All About Windows
The first thing I had to do today is measure the width of the window frames so I could get my order right with Re-Originals. The proprietor, Matt Jones, called me to make sure he was sending the right size window channel gaskets. He said that he carries 1/2 inch and 5/8 inch channels, so I found that mine would need the 1/2 inch stuff with the steel reinforcement. Hopefully, I’ll get the order next week sometime.

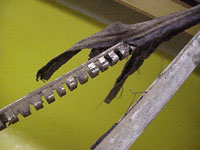
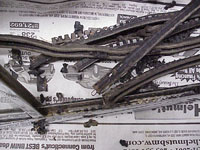
Since new ones will be coming in the mail, I decided to go ahead and remove the old window gaskets. This stuff, as I said earlier, has a steel reinforced core surrounded by rubber, and a felt channel. The window glass rides in this channel when everything is assembled. They are glued in place, but after thirty years of drying out, the glue came out relatively easy. Some scraping was needed to get all the adhesive and old rubber out of the door frame.
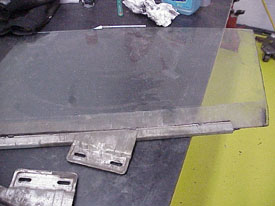
The next step was to clean the windows to ready them for installation. They were pretty filthy, especially the part below the door line where they couldn’t be cleaned when they were installed in the door. I didn’t clean them too thoroughly because I will probably get greasy fingerprints all over ’em when I install them in the door!
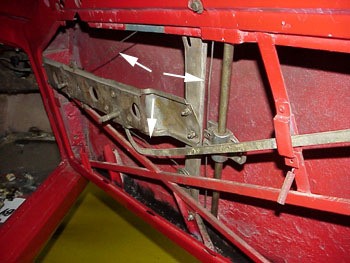
Now that the windows are clean, I decided to attack something I was dreading: the window mechanism. The right door window mechanism was removed by the previous owner to paint the door. I think after realizing how difficult it was to get it back into adjustment, they decided to leave the left door alone. The window mechanism on the right door was really out of whack! The cable that raises and lowers the window was all kinked up(white arrows), and one of the pulleys was bent. I started by completely removing the crank mechanism with the cable and managed to unwind some of the kinks. Next, I laid the pulley mechanism on my workbench, and carefully tapped the bent pulley with a screwdriver and hammer. Slowly, the aluminum pulley began to straighten out. In the end, it wasn’t perfect, but good enough to stop wobbling. In instances like these, I’ve learned from experience that you have to know when to quit while you’re ahead. Trying to achieve perfection is often when you really screw something up!
Next week, when the felts, and window gaskets come in the mail, we’ll see how my window mechanism really works. For now, it winds up and down pretty nicely!
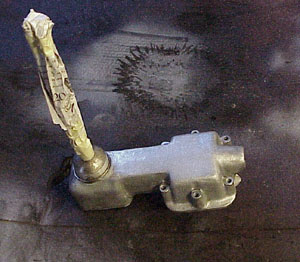
In between all the window work, I managed to paint the last part of the transmission! I picked up another can of “Dull Aluminum” Krylon paint, and finished off the shifter mechanism. I need to round up a couple of nuts and bolts, and that project will be coming to an end!
Previous Restoration Day
Next Restoration Day
Ferrari Home Page
www.tomyang.net
Blog

Forum

Resource
