
Bumpers

7/2/02
Bumpers
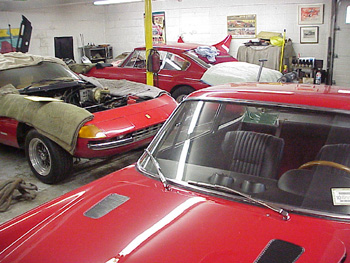
I was greeted by a sea of red Ferraris today. O.K., it was just three, but My 330 America was in the company of a Daytona, and a 365GTC.
I needed to work on the bumpers today because if I’m going to register and insure the car, I’ll need these mounted. The first issue I needed to address was to put new studs on one of the front bumper brackets. They used to take M8 bolts, but the old ones must have stripped out, so I had to figure out what my choices were. I felt welding the holes up and re-tapping was too dangerous because the heat could damage the newly chromed bumper. The next choice would be to put an oversize bolt in place, and tap larger holes, but M9 bolts are not real common at the hardware store, and M10s would be too large. I also wanted to keep the bumper hardware consistent.

The solution was to buy stainless steel M8 bolts, and turn the bolt heads down in a lathe so I could make M9 sized heads to fit in the oversize holes! A little bit of loctite applied on the threads, and everything worked great. Now all the bumper hardware can remain M8.

I soon had the front bumper mounted in place to see how it looked. She’s really starting to look like a real car!

I taped the ends of the bumpers to keep from scratching the paint while I was positioning the piece. The next step for the front bumper is to locate the side mounting holes in the body. Unfortunately, they were filled in when they did the bodywork, so I’ll have to figure out how I’m going to find the holes. There aren’t any good clues on the back side of this panel either, but I’m sure I’ll find them on closer inspection.

Although the front bumperettes mounted without any real problems, the rear ones had some issues.

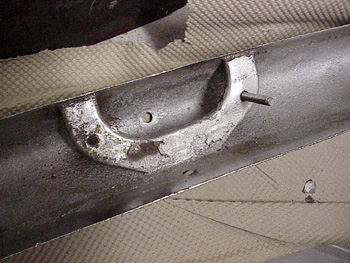
The bumperettes mount to the rear bumper by these studs, but this one broke off, so is too short to be usable.

The other one was sheared off at the base of the bolt. Both of these studs needed to be drilled out.

The one with the partial stud was cut flush so it would be easier to center punch, and drill.

After drilling, tapping, and loc-tighting (is that a word?), I mounted the bumperettes to the main bumper. I used a U-shaped gasket for all the bumperette edges.

At the end of the day, I got the rear assembly to this point. I still need to get some rubber inserts for the bumperettes, and I need to mount the side pieces. I’ll be back at it in a week and a half!
Previous Restoration Day
Next Restoration Day
Ferrari Home Page
Blog

Forum

Resource
