Upholstery VI
4/11/03
Upholstery VI: Transmission Cover

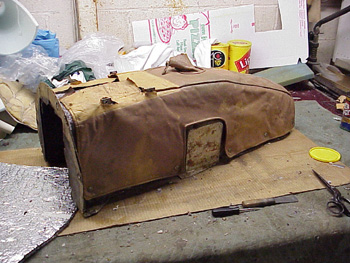
I started the day cleaning up the transmission tunnel for new padding and leather. It was covered in aluminum foil, fiberglass insulation, and tar-paper, in that order from the top layer to the bottom layer. The final layer of tar paper was pretty well stuck, but I managed to scrape most of it off. I wore latex gloves to keep the fiberglass from getting into my pores and itching my skin for the next couple of days. What I thought would take a few minutes of work stripping the transmission tunnel, took almost two hours!

I decided to replace the fiberglass insulation with a foil backed jute insulation I originally got for my hood pad. I hate fiberglass insulation because it’s messy stuff to handle, so I went with the jute material. The aluminum foil backing made gluing it to the aluminum transmission cover easy, but trimming it to fit was another issue. It was not easy stuff to cut with a razor, and cutting it with scissors was no easier. I used one of Frank’s crap scissors so I wouldn’t dull his upholstery scissors, but whatever I used, it was slow going because the material was thick and durable. I guess if I had used fiberglass, it would have trimmed to size pretty easily!
I paid close attention to all the hardware, making sure all the snaps were in place, and lined up. Some of the screws had sheared, so they had to be drilled out and re-tapped, so it took longer than I thought to prep the cover.

After the padding was glued in place, and the snaps installed, I reattached the old cover to check it for fit. I wanted to see if there was enough thickness in the padding for the leather to lay wrinkle free. I may add a layer of foam to this pad just to give it a bit more spring and to fill out some of the wrinkles, but we’ll make that decision when the new cover is sewn.

Although I didn’t get around to the door panels, Frank and I laid out the hardware to make a plan of attack for the door panels. We decided which pieces I could make, and which pieces were better left up to the Frank. I could transfer the holes from the old panels to the new ones, and Frank could work on remaking the door pockets.

There will also be some polishing to do in the chrome and aluminum pieces.
As this Upholstery Project continues, it’s becoming quite obvious how much work is involved in doing a Ferrari interior! In some ways, I’m coming home more tired than when I was turning wrenches on the car! Although we can all see how many details there are in the interior of a Ferrari, it’s a little daunting when I’m working on putting it back together. Things like the transmission cover seemed like a simple task, but ended up taking almost a whole day of work. I’m making good progress, but the end seems far away!


