Little Bits and Pieces

11/23/04
Little Bits and Pieces

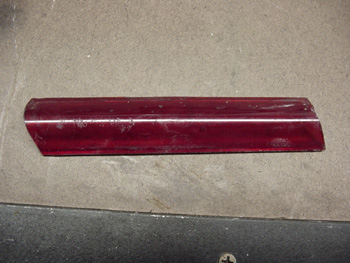
Although I didn’t polish these lenses today, I found this entry a good time to mention it. When I spend the weekends up at the house, I try to sneak off into the garage to get some Ferrari work done. I’ve been keeping these lenses up there for over three months looking for the time to get them polished, and I finally got to them last week! You can see the difference between the top one which is untouched, and the bottom one after some sanding and polishing.

After prying back the tabs holding these lenses in place, I sanded the surface until the scratches were gone. I started with 320 or 400 grit to get the deeper scratches out, and moved to finer sandpaper at about 1200.

By the time I got to 1200 grit, the lens looked like frosted glass.

The next step was to polish the lens on the buffing wheel. I used a special buffing wheel from Eastwood Co. made specifically for buffing plastic. It comes with plastic buffing compound, and works great. Now the lenses were ready to be installed.

Even though I buffed those lenses a week ago, through the magic of this website, I can show it mounted in the door panel! Another portion of the interior is complete!

Another loose end that needed to be tied up was the snaps on the transmission tunnel cover. This is a shot of the rear of the transmission cover just behind the front left seat. This corner gets a snap and is attached to a male snap end that is screwed to the car. These snaps were not installed because we wanted to check the fit before permanently mounting the snap. Now that everything is in place, I could accurately mark and mount the snap.

Here’s the tool used to install the snap. Now both sides are snapped in place and everything is lined up perfectly!

Another great score was this battery for my car. A fellow Ferrari owner bought this battery from a company in PA that makes reproduction batteries. They printed the correct logo, and reproduced the “tar top” look of the vintage battery. Unfortunately, this battery was too high for the car it was for, so I was offered the battery for my car! I believe the caps are the wrong color, but it will look far more authentic than the “DieHard” I was going to install. Thanks Jim!

Moving onto the gauges, I began installing the ones I had completed. I had to keep certain gauges out so I would still have room to get my hands behind to plug things in. Unfortunately I broke one of the glass lenses when I was taking the gauge apart, so it was taking some time to have the lenses made. I couldn’t install any more gauges until I finished replacing the glass in that one gauge, so things were put on hold.
Previous Restoration Day
Next Restoration Day
Home page


