
Polishing the Grille
6/18/05
Polishing the Grille: Day I
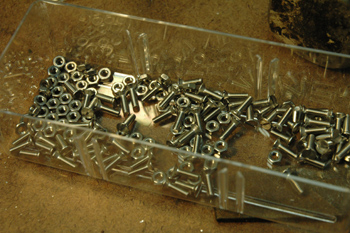
Before I could even start polishing the grille, I had to get the hardware to hold all the pieces together. I bought 100, 10 mm long, M3, flat head, slotted, machine screws, with matching nuts, washers, and lock washers from Metric and Multistandard. They are one of the few suppliers that offer a walk-in service even though they deal primarily in bulk wholesale orders. Although I probably could have ordered these through the internet, I still prefer looking and holding things in my hand to make sure I’m getting exactly what I need.
I’ve seen some grilles held together with pop rivets, and although I’m not sure if that was original, I know mine was originally held together with steel machine screws. I decided to replace these with stainless screws to cut down on the galvanic corrosion, and keep everything shiny.

Mark, at “The Panel Shop” suggested I fit everything together one last time with screws to make everything fit correctly. He warned that I would not want to make any adjustments after polishing the pieces, so I tediously reassembled everything again. While I had everything together, I made notes on which holes I would need to countersink for the screw heads.

I couldn’t help but mount the horse one more time to dream of the day when the polishing is done!

After I took everything apart, I made a wooden jig to hold the grille shell. Mark also suggested I mount the grille shell to keep the buffer from catching it, and bending it up.

I basically cut 1/4 inch and 1/2 inch plywood to the shape of the grille shell, leaving some extra room for some 2X4 bracing. When its all screwed together, the jig holds the shell in place, while offering access to the shell for the buffer.
Unfortunately, I don’t own a buffing attachment that will be able to do this job. I don’t think mounting a small buffing wheel on a drill will give me enough speed, and getting this grille up to my buffing wheel could be suicide. I think I need a motor with a flexible shaft for this job. I’m open to suggestions! I’m also open to borrowing!

Since it was a nice day, and sanding aluminum is a messy job, I moved my operations outside. I started with 320 grit on the egg crate grille pieces. I have a small electric palm sander that works great at getting a smooth surface on the aluminum. I can quickly inspect the pieces, and look for deeper scratches. If any scratches remain after the 320 grit, I go to a 150-200 grit paper, sand them out by hand, and finish with 320.

Eventually, all the pieces are brought to 320 Grit. The palm sander is great, but there is still a lot of hand sanding to get all to all the corners. The next step is to get the edges dressed. These pieces were originally cut with a laser, and although very accurate, have a slight “tooth” on the cut edge. I marked which side of each piece will be the leading edge of the grille, so these edges can be dressed by filing and sanding these slight marks away. With these edges perfectly smooth, the buffing will make these edges glitter in the light.

I still had a couple of pieces left to sand to 320 grit, but I made some good progress. I buffed the first piece to see the results, and I’m pretty excited. From 320 grit, all the pieces need to sanded using 600 and eventually 1500 grit before polishing. The patience and time I spend at this process will only make the grille look more spectacular.
Previous Restoration Day
Next Restoration Day
Home page
Blog

Forum

Resource
