
Exhaust, Transmission, and Overdrive
2/19/09
1747: Exhaust, Transmission switches and Overdrive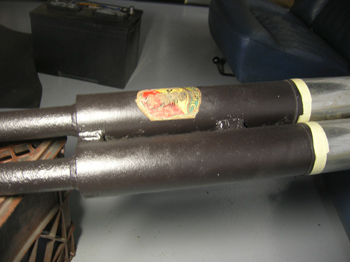
The Exhaust has been painted and ready to go back on the car. The original Abarth sticker was masked before I painted the exhaust, but this will the be the last time we’ll see it, as when the exhaust is hung, it’ll be obscured by the body of the car! We’ll know it’s there however!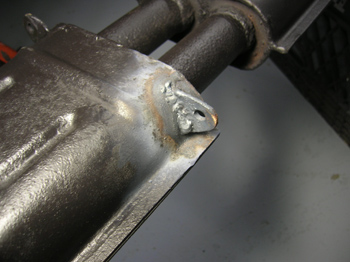
Upon test fitting the exhaust, I found one hanger was missing from the muffler. François torch welded on a new tab, so I could continue mounting the exhaust.
I replaced some of the exhaust hardware with stainless steel hardware. Much of the original LOBO bolts were missing and pretty rusty, so this was a logical and more durable replacement, especially since this car will see more road use than show use.
As I turned my attention away from finished exhaust, I started checking the transmission and overdrive unit. Early Laycock overdrive units installed in Ferraris shared the gear oil with the transmissions just as they do with most British transmissions fitted with overdrive units. Unfortunately, most British transmissions specified a lighter 30 weight oil for their transmissions which is the same spec for the overdrive unit. Ferraris are a little different. The early Ferrari transmissions use a 80-90 wt gear oil and feed it under pressure to the bearings and gear sets. Unfortunately, the heavier gear oil probably proved too heavy for the Laycock overdrive units to engage consistently, so some time in the late GTE model run, a seal was installed to separate the two sections of the gear box. In fact when I spoke to my John at Quantum Mechanics, my overdrive specialist, and he says that 80 percent of the problems with overdrives not engaging can be attributed to using too heavy of a gear oil. So, what to do when you have two different oil requirements for two different gear boxes?
I often feel too much knowledge is a bad thing and from the smell of the gear oil, the previous owner ran 80-90 without ever worrying about his overdrive working, but I wanted to insure the new owner had a reliable transmission and a properly working overdrive. During my visits to several shops I asked what they would do, and the consensus seems to try running a synthetic gear oil and hope for the best.
Before I installed new synthetic gear oil, however, I found a problem. The pressure port on the side of the overdrive was chewed up by someone trying to remove the plug. Wanting to check the overdrive for proper operation, and to fix the bunged up hex head, I tried to remove this plug without success. Eventually with several techniques, I finally got the plug out, but a new one had to be sourced. Luckily, Quantum Mechanics has a spare one to send me. At least now, the next person who works on this overdrive won’t think it was me who chewed up the plug, and curse me for being so sloppy!
I was checking the plunger switches on the transmission that operate the back up lights and the overdrive safety circuit, and I found both switches were not working properly. The carello switches are simple plunger switches that complete the circuit when the tip of it is depressed. For the back up light, it plugs into the rear of the transmission so when the car is put in to reverse, the shift lever depresses the the plunger, thus turning on the back up light.
The cover of these switches are not really water proof, and with years of moisture and weather, water gets inside and corrodes the brass contacts. With a little cleaning and a spray of contact oil on the reverse light switch, the switch was working again. We had some large shrink tube at the shop, so I heated some up around the switch. I’ll trim the top a little better, but this should seal the switch a little better from the elements. 
The Overdrive safety switch was another problem. The cap had fallen off, and the brass contacts were long gone. Replacement switches are available, but they don’t look anything like the original ones. Luckily, this switch is hidden inside the bell housing, and will never be seen again until the transmission is removed!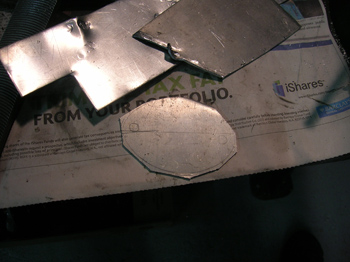
While François and I were working on the switch by the bell housing, we remembered the flywheel inspection cover was missing on this car. It’s an often misplaced piece as it allows one to set the timing on the engine and is often left off the car. There are a couple of sizes, but François had a template that fit 1747’s engine, and even an original one from an engine we’re working on.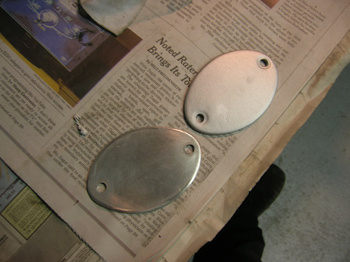
With a thick piece of aluminum, I was able to copy the profile of the original inspection cover. It looks like the original cover was a cast aluminum piece, but I tried my best to round the edges of the replacement part to match the original profile. 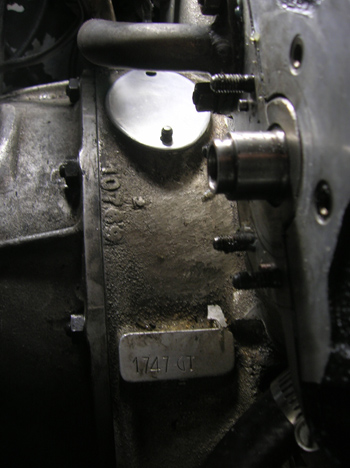
It’s not an easy part to showcase my handiwork, but another part was installed to complete this car.
MARK THE DATE: Saturday, May 2nd 2009
The Tomyang.net/ Radcliffe Motorcars Spring Event
12340 Owings Mills Boulevard
Reisterstown, Maryland 21136
Read about last year’s event.
Information on this year’s event.
Just a reminder, I’m looking for a new Vintage Ferrari Project. If you have, or know of a restoration project, please let me know. It would be great to restore another car on this website! My E-mail.
Previous Restoration Day
Next Restoration Day
Home page
Blog

Forum

Resource
