
1747 Shocks, and 10799 Valve Adjustment
9/27/10
1747 Shocks, and 10799 Valve Adjustment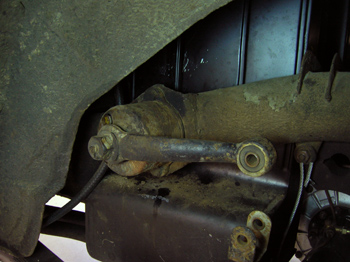
Last week I was stumped by an inaccessible nut holding the Houdaille (pronounced Hoo-Dai) shock. I spent the weekend thinking about the ways to remove this nut. Bending a wrench to get access to the nut was the first option, but if the nut stripped, I would have to drill out the bolt. Grinding it or torching it out would not be an option because of the proximity to the gas tank. Another option I did not want to exercise was removing the gas tank!
Francois picked out a spare wrench he had that I could bend, so I heated it up with his oxy-cetelene torch. I bent it just enough so the offset would be perfect. While I waited for the wrench to cool down, I soaked the nut in penetrating oil. 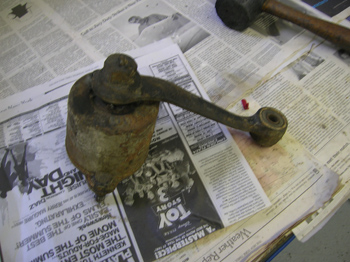
I so relieved when I felt the nut give way and spin off the hard to reach bolt. 
Even though it took a while to take one nut off, it took a lot less time than if the tank had to come out!
Basking in the glory of successful nut removal, I continued on with the GTC on the other side of the shop. Since this is a new car to us and the owner, we decided to pull the valve covers for a valve adjustment and do a tune up on this engine. We can help the owner spot any potential problems and set a baseline for future wear on the engine. 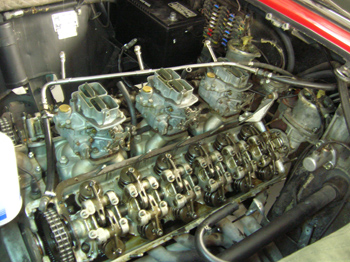
Removing the valve covers on a Columbo designed V-12 is a little more involved than other cars. The following parts have to be removed before the valve covers come off:
Air cleaner
Throttle linkage
spark plug wires, tubes, and distributor caps.
distributor angle drive needs to be loosened and to top bolts removed
chain covers
The adjuster screws on these engines are supposed to be slightly softer than the tops of the valve stems that they ride on, so the adjuster wears first. Nine adjusters out of 24 showed wear, but luckily did not damage the tops of their corresponding valve stems. I guess taking a peek under the valve covers was a good idea!
The GTC had black rubber fuel lines in place of the Yellow fuel lines originally found on Vintage Ferraris. People replace these hose with auto parts store rubber hose for a number of reasons: there was a batch of reproduction yellow hose that leaked fuel, sealing the ends can sometimes be problematic, and the stuff costs about $9 bucks and inch!
The yellow hose available today from the parts suppliers seems to work fairly well, and sealing the ends requires care and sometimes some sealant, but there’s almost nothing you can do about the price of the hose. I believe the stuff comes from the same supplier, so all the vendors mark it up accordingly. You’ll also need ferrules to complete the installation, and reusing the old ones usually won’t work because the outer dimensions of the yellow hose has changed in the reproductions.
Since we do a lot of these fuel lines, I decided to buy my ferrules in bulk to cut down on some of the costs of buying them individually. I’m following a tip I learned from Zac when he posted to a thread on my Forum.
Thread on Vintage Forum about Fuel line
If you’re only doing one car, it might not be worth going through all this effort, but we always need a supply of ferrules, and cutting them to size and plating them will be worth the effort.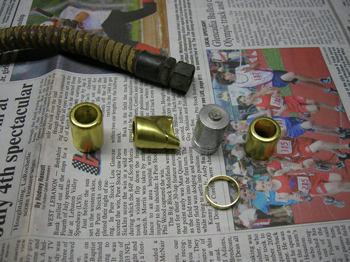
The Ferrules I purchased have the right diameters, but are a little long. After mounting the first one on my lathe to cut it down, I soon found the soft brass deforming from the cutter. Being an amateur machinist with no formal training, I decided to create an insert for the ferrules so they wouldn’t deform when I cut them down to size. I’m sure there are some professional machinists out there laughing at my mistake, but I’m still learning! 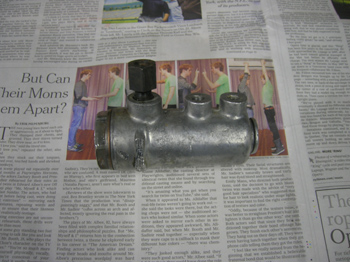
Speaking of machine work, I need some advice from some machine shop experts. We have another Brake Equalizer at the shop that needs to come apart, but this one is really stuck! A ton of heat was applied while a long wrench was used to try and get the large nut off, but nothing moved. Francois has had the nut machined off and had a machine shop make a new nut for really stubborn ones, but I was wondering if there are other techniques. I’ve heard of processes like EDM used at machine shops, and was wondering if there are any suggestions from the experts lurking out there. E-mail me for suggestions.
Reminder: If you’re looking for a Vintage Ferrari, or have a Vintage Ferrari for sale, please let me know. I would be happy to help you in any way that I can. I am not a broker, but occasionally hear of a good car for sale and can get them to the end user!
Previous Restoration Day
Next Restoration Day
Home page
Blog

Forum

Resource
