
Good Progress on GTC
11/17/10
Good Progress on GTC

I got the power booster back from Karp’s Brake Service, and it looks great! They offer plating as well as a rebuilding service, and Ron has found a very good plater to do the correct Gold Cadmium plating on this booster. 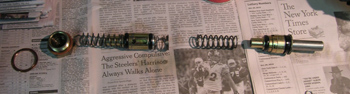
With the booster ready to go back in the car, I needed to take the brake master cylinder apart to check the seals and operation. The M/C was supposedly rebuilt, but it didn’t hurt to check the insides. There was one little mark on the inside of the bore which we honed out, and the seals looked fresh so it was put back together.
This corner of the engine compartment is coming together nicely. New fuel line, rebuilt brake booster, freshly plated resevoir bracket, and a new clutch slave cylinder, are all putting this car back on the road with all the correct details! 
As I worked on the little details on this GTC, I found the battery hold down rod was missing its tip. What usually happens is the nut or wing nut seizes on the threaded portion of this rod and it shears off the end of the rod when someone tries to unbolt the battery hold down. I found an appropriately sized bolt and we welded it to the end of the rod. Now the battery frame that I found in the trunk and go back on the car! 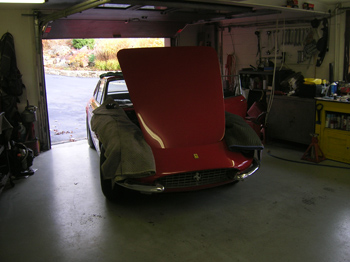
With all the work done on the car, we were ready to start her up! The fuel tank was filled, and coolant was added. I spent some time inspecting all the fittings under the car to check for leaks. The next step was to pressurized the fuel system with the electric pump, and watch the carburetors fill with fuel. One float was sticking open, but with a couple of taps from a plastic hammer, it cleared itself out. We rolled the GTC near the door, cranked her over and she fired right up. The work I had done on the ignition system was working perfectly, and Francois began his carb tuning.
As the car warmed up, we noticed the temp gauges were not working. After Francois was satisfied with the tune of the carbs, I tried to find the fault with the gauges. I traced it back to corroded fuse bus. It looks like there was a previous problem that someone tried to fix with some solder. Heat, dirt, and corrosion conspired against a good connection, but some contact cleaner and some movement completed the circut. Something more permanent may have to done here, but at least we know where some of the electrical gremlins live.
Speaking of electrical problems, starting the car reminded me that I needed to check the operation of the electric fuel pump switch on this car. The fuel pump was working fine, so an intermittant problem was in the switch. The center console had to come out to get to the switch panel, but luckily it didn’t take too long. With the swtich out, I oiled it with some contact oil, and excersized the movement. These switches don’t come apart easily, so I was glad it only needed some lubrication. 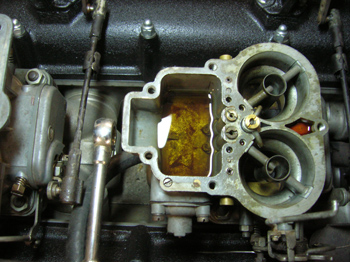
With the sticking carburetor float,we decided it was best to pull the carb tops to check for trash in the float bowls and float levels. With unknown history on this engine and previous repairs, we decided to run the engine first before rebuilding the carbs. If things work well, a rebuild would not be necessary, but as we suspected, there was some varnish and dirt trapped in the bowls. Taking this stuff out might help prevent the floats from getting stuck. I also reset the float levels while the carb tops were off.
Next week, we’ll do some more tuning, and take her out for a spin.
Reminder: If you’re looking for a Vintage Ferrari, or have a Vintage Ferrari for sale, please let me know. I would be happy to help you in any way that I can. I am not a broker, but occasionally hear of a good car for sale and can get them to the end user!
Previous Restoration Day
Next Restoration Day
Home page
Blog

Forum

Resource
