
Axle Seals and Exhaust Tips
3/16/12
Axle Seals and Exhaust Tips

The first thing I got to this week was to pull the rear hubs on a 330GT to replace the axle seals. I thought this car was ready to ship out, but the rear axle oil seal decided to start leaking. 
The leaking seal turned out to be rock hard and it was a wonder it took so long to start leaking. We decided it was prudent to check the other side as well to avoid future leaks. With the brake disc removed, I found mismatched bolts holding the hub together, so we found the right 14mm sized bolt heads so the next person who works on this car won’t be cursing about the need for different sized wrenches to take things apart!
The last large piece of the puzzle was the exhaust tips for the Survivor 250GTE. The original tips were rusty and patched several times, so it was decided it would be cheaper and smarter to find replacements. After asking several contacts and fabricators who was making Abarth exhaust parts, I was told of at least three shops that were making reproductions. Unfortunately, some of them would take too long for my time frame to deliver a set, not to mention cost weighed in on the matter as well. I finally called Mike at Timevalve Exhaust to see if he had any solutions. Timevalve is one of the exhaust specialists that make stainless steel reproductions of systems for several makes an models, one of them being Vintage Ferraris. After telling Mike about my problem, he told me he he had just completed a reproduction of the Abarth system, and was adding it to his catalog of Ferrari reproduction exhausts. Mike worked closely with Greg Jones, a long time restorer of Ferraris, in making exact replicas of the the Abarth system. With Greg’s knowledge and Mike’s abilities, I was sure the tips Timevalve offered to make for me would be perfect for this survivor car. 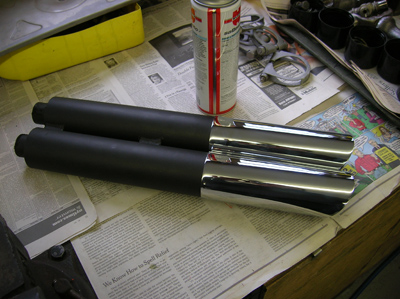
I needed them as fast as I could get them and Mike kept his promise by getting them made in a week and a half. This included sending the tips out for chrome plating!
The details were all accurately reproduced, including the little dimples at the bottoms of the tips. Not only do I have to thank Mike for getting these done so nicely, but also Greg Jones for doing all the Research and Development!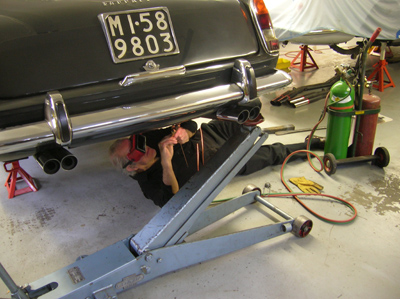
After getting everything lined up Francois got under the car to tack the tips to the exhaust pipes. I offered to bring my mig welder down to the shop to make tacking the pipes in place a little easier and quicker, but true to Francois’ style, he stuck with what he was familiar with and broke out his gas welder.
I guess in the spirit of preserving this car in original condition it was fitting to have the exhaust welded the way it was when it was new!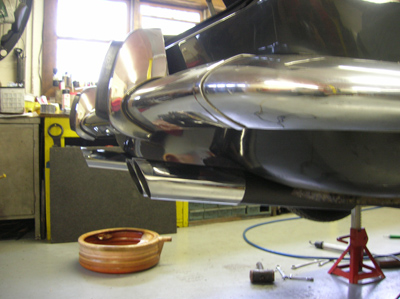
After tacking them together, Francois welded the pipes all the way around and we reinstalled the system on the car.
Now that the exhaust tips are done, we’re getting very close to completing this car. We plan on driving the car a little bit to break in the fresh engine rebuild and make sure all the mechanical systems are working properly, but we’re close!

Reminder: If you have a Ferrari related project, car, or idea you’d like to explore, I’d love to talk to you. I can also help if you’re thinking of buying or selling. This website represents what I love to do, and now it’s how I make a living, so if you’d like to do something together, let me know. It all begins with an e-mail!
Previous Restoration Day
Next Restoration Day
Home page
Blog

Forum

Resource
