
Wheels, Belts, Blinds
6/28/12
Wheels, Belts, Blinds

I found a new chrome plater near my house which seems to be working out well. Everyone in this business has a struggle with plating, and people like Bob Smith of Coachworks even resorted to building his own chrome shop. Francois and I luckily have a top notch chrome plater where we send all our restoration plating, but his level of work is not always necessary for all our jobs. Our “show” plater is one of the top platers in the country, but is a private shop and requires lots of time and money for his results. I have many clients that simply can’t afford such work, and simply want something plated that looks good enough. The balance is to find a plater that will do work that is very good to a cost. I met this new plater when I brought my Ferrari to a local car show, and he gave me his card.
All chrome platers tell you they do great work, but there is a lot of difference between opinions and fact. It’s true there is a diminishing return when trying achieve top level chrome, but there is a huge difference in the mid level range of plating. I had several discussions, and looked at samples of this new plater’s work. He’s a sole proprietor, and does all the work himself, which is what I like to see. I decided to make the leap and try him out with some chrome trim rings.
The trim rings on Campagnolo wheels are simple and tricky at the same time. They can get small dents from removing them from the wheels that have to be taken out by the plater, and the inner diameter fits very snugly on the hub of the wheel. I’ve spent a lot of time in the past sanding off extra layers of chrome and copper from trim rings that were over plated in this area. I made sure this plater understood how little material needed to be in this contact point to the wheel. Two weeks later, got the parts back, and they looked great. 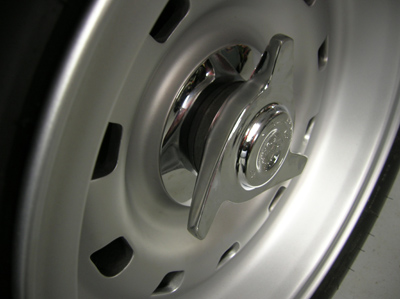
I still needed to sand a few trim rings to get them to fit on the hubs, but it only took a couple of minutes of time… I think I found a new plater!
I ordered a set of belts for the 330GT at the shop and installed them in the car. The car came with fixed length seat belts, which the new owner and I decided to replace with inertial reelers. With fixed length belts, once you’re belted in and adjusted, you can’t move within the seat. The reelers allow you to lean forward to reach the controls, and still hold you in place when you need them to.
The third point anchor on old Ferraris is a little low, and not ideal for a belt mount, and I discussed this with the owner. In a perfect world, they should be at or above the occupant’s shoulder height. The decision to continue using this low mounting point is a compromise of either having a low third point mounting, or simply go with lap belts in the front seats. I think I’d rather have some kind of three point seat belt.
We decided to only install lap belts in the rear seats. Trying to engineer a third mounting point for the belts would have been too time consuming for the occasional use these belts will see, so I installed new mounts behind the rear seat panel.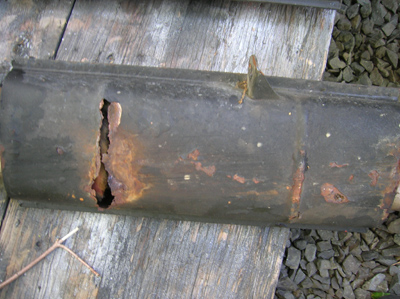
There was an exhaust leak on the 330 that needed to be addressed. The Ansa system was showing the usual rust found in these exhausts. Moisture pools in the lowest point of the mufflers and pipes, and eventually rusts from the inside out. 
Unfortunately, when we removed the exhaust to see if we could patch the hole, we found the pipes leading into the muffler had also rusted through. 
The owner will probably replace this whole system with a stainless steel unit in the future, but we felt there was still some life left with the rest of this system. Luckily, I had a section of exhaust I salvaged from another car that looked like it would work better than trying to patch the old section. We’re always trying to be conscious of the time we spend on these cars. It can get expensive very quickly, and finding easy solutions saves everyone time. I’ll hang this portion under the car, and figure out what we’ll have to do to make it work. 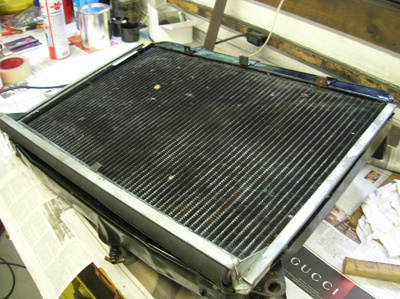
For the last several months the owner of a GTE and I have been collecting parts to make up a radiator blind, and all the pieces are finally coming together. I sewed a new vinyl blind, riveted it in place, and installed it on the roller, but when I went to install it onto the radiator, I found a problem.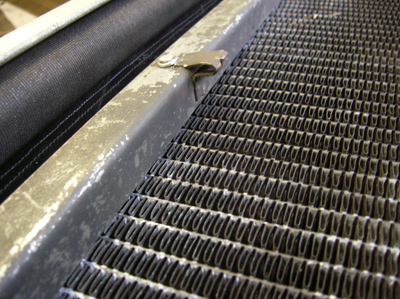
The core on this radiator had been replaced with a different core than what was stock for these cars, and it’s dimensions were slightly different. With the radiator blind installed, it would scrape along the core when the blind moved up and down. Just short of putting in a new core, I decided to remove some material from the blind to clear the core. Unfortunately, it’s silly little things like this that eat up a lot of shop time!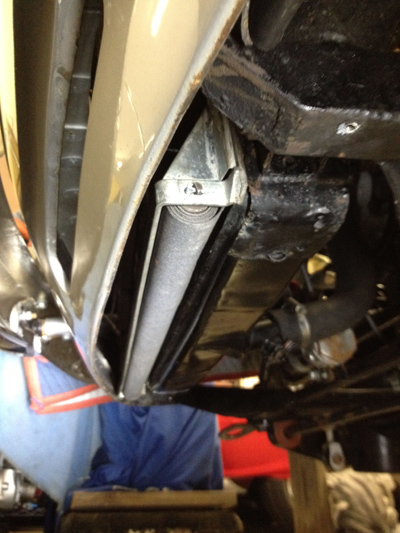
Getting the blind installed was no easy task either. The clearance in the front of this car was very tight and required me to install the blind after the radiator was installed. Getting to the nuts was another struggle, but eventually, everything was installed and fitted. I have to admit, it likes to go up more than it likes to go back down, but she works!

Reminder: If you have a Ferrari related project, car, or idea you’d like to explore, I’d love to talk to you. I can also help if you’re thinking of buying or selling. This website represents what I love to do, and now it’s how I make a living, so if you’d like to do something together, let me know. It all begins with an e-mail!
Previous Restoration Day
Next Restoration Day
Home page
Blog

Forum

Resource
