
330 Gauges, Brakes and 275GTS Bodywork
9/22/12
330 Gauges, Brakes and 275GTS Bodywork
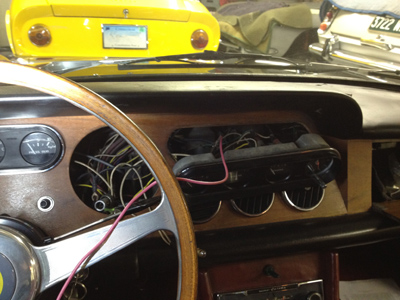
I’ve been trying my best to get some cars out of the shop this week. Two 330s are so close to leaving for the homes of their new owners, and yet we keep getting delayed by little hiccups. On one of our final test drives, the fuel gauge on the black 330 started acting up. It worked fine for all the weeks we’ve had it, and yet now the gauge decided to start jumping all over the place. I was not looking forward to pulling the center gauge cluster on this car because it had an evaporator unit behind the dash, making access to these gauges a real problem. The Tachometer had to be removed to gain access to the left side retaining hardware holding the cluster in place…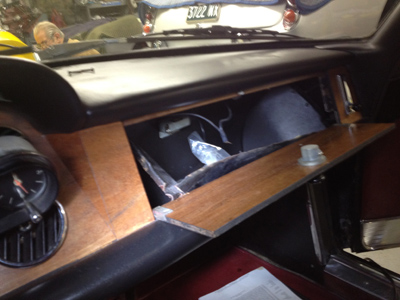
While the right side retaining hardware can only be accessed by partially removing the glove box! The access through these areas was fraught with sharp edges and a tight squeezes for my hands. It took days for the scuffs, cuts, and bruises to heal!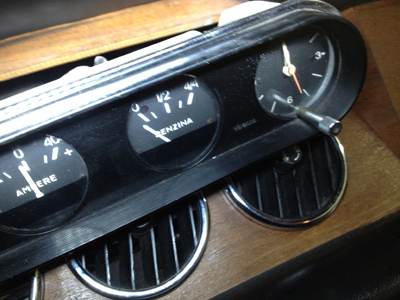
After removing the gauge cluster, I found the gauge was starting to go bad. The sender was working correctly, and the wiring was intact and working properly. I got the gauge to settle down a little bit, but it will eventually have to be repaired.
The Silver 330 at the shop was waiting for a newly rebuilt booster to arrive back from the rebuilders. The plating looked great and it should have been done back when I sent the master cylinder out. Here’s where I wonder if I should change my policy about brake rebuilding. In the interest of fixing only what was necessary, this 330 was diagnosed with a bad master cylinder, but there was no way of knowing if the booster was working properly with a faulty M/C. With a rebuilt master cylinder, it became evident the booster was not working properly either, so that was sent out later. A lot of time could have been saved if I simply sent both units out the first time, but I never want to be accused to doing unnecessary work. Sometimes you just can’t win!
To add insult to injury, removing and reinstalling a booster on a SII 330 is a real pain in the butt! One hidden nut caused hours of removing and reinstalling parts to access it with a wrench! I went home with more cuts and sore hands, again!
A couple of weeks ago, we discussed the bodywork needed on a 275GTS we’re restoring. Here’s the video about the work.

Speaking of the Panel Shop, they made a 330GTC lower radiator pan cover and I had them make a couple of extra ones. These fiberglass pans are mounted just below the front valance, protecting the radiator from stones and road debris. Unfortunately, this pan is not strong enough to withstand parking curbs and other immobile objects, so they often get cracked. If anyone needs a new replacement, e-mail me!
When we were making these pans, I had them make sure to put a slight bow in the pan to fit the profile of the lower valance. These should fit much better than the ones I’ve seen. This pan fits a 330GTC, and probably 330GTSs and maybe even 275GTSs.

Reminder: If you have a Ferrari related project, car, or idea you’d like to explore, I’d love to talk to you. I can also help if you’re thinking of buying or selling. This website represents what I love to do, and now it’s how I make a living, so if you’d like to do something together, let me know. It all begins with an e-mail!
Previous Restoration Day
Next Restoration Day
Home page
Blog

Forum

Resource
