
GTE Exhaust and Carb Service
11/16/12
GTE Exhaust and Carb Service
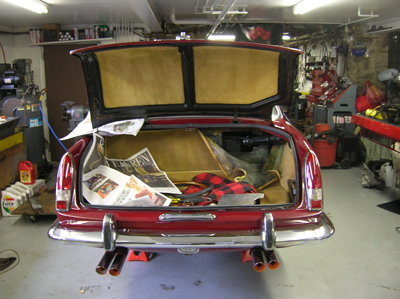
The work continued on the GTE we have at the shop which included fabricating a missing panel, and installing a trunk seal.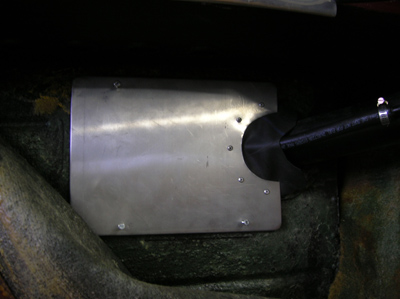
I could have fashioned a simple flat plate for this panel, but instead made a reasonable copy of the original plate including a the rubber seal and retainer. Although it will be hidden behind the carpeting, I’ll know it was correct!
This car had the incorrect trunk seal, so not only was it not sealing the trunk from the elements, but it was also allowing the lid to rattle against the body work. I often find poorly fitting trunk seals the entry point for exhaust gases into the passenger compartment, and it’s the first place I check when a customer complains about the smell. You can just make out the correct cross section of the trunk correct seal from the small pieces at the bottom of this picture.
Unfortunately, the previous shop tried to fix some the sealing and rattling issues of the incorrect trunk seal by gluing extra pieces of weather stripping to lid. I tried my best to scrape the old glue off with a heat gun and my fingernails. My fingernails gave out before all the glue came off that day! I would have used another type of tool, but when trying not to remove paint in the process, I find only a fingernail can give you to feel and control for this kind of work. If you have a better suggestion, please help save my aching fingers!
The new trunk seal was installed. One lip is longer, and it is glued towards the outside of the trunk. I know this because I paid close attention to 2259, the survivor GTE that still had its original trunk seal. 
We finished installing the ANSA exhaust on the GTE this week. The owner wanted a louder than stock exhaust, so we advised removing one muffler from the three found on this system. We replaced the muffler section with a straight pipe, and welded it in place. 
We removed the rear most muffler on the rear section of the exhaust, and had the owner come over and test drive the car. It definitely changed the character of the sound by giving it a deeper rumble at idle and a growl at wide open throttle. I think we just avoided the risk of having this system drone from unwanted resonance, so the owner was happy. 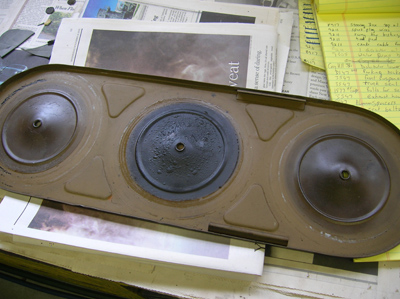
The owner wanted us to make sure everything was tuned correctly, and we suggested we wait until the new exhaust was done since that would affect any work done on the tune of the carbs. When I pulled the top of the air cleaner, I could see evidence of back firing through the carbs, especially the center one. We advised the best thing was to strip the carbs, clean them out thoroughly, and proceed from there. 
As I took things apart, I took notes on missing parts that needed replacing, like this throttle rod clip that was wired in place instead. Luckily, we have a few spares at the shop to make it right.
With the tops of the carburetor removed, I felt justified in doing a thorough cleaning. Rust and sediment was collecting in the bottom of the fuel bowls and surly getting past the main jet and fouling up the works. It wouldn’t take much of this debris to clog up an orifice deep inside the body of the carburetor.
Each carb was stripped, soaked in cleaning solution, washed, and reassembled.
br>

Reminder: If you have a Ferrari related project, car, or idea you’d like to explore, I’d love to talk to you. I can also help if you’re thinking of buying or selling. This website represents what I love to do, and now it’s how I make a living, so if you’d like to do something together, let me know. It all begins with an e-mail!
Previous Restoration Day
Next Restoration Day
Home page
Blog

Forum

Resource
