
Sorting Ignitions, and Engine Assembly
2/5/13
Sorting Ignitions, and Engine Assembly
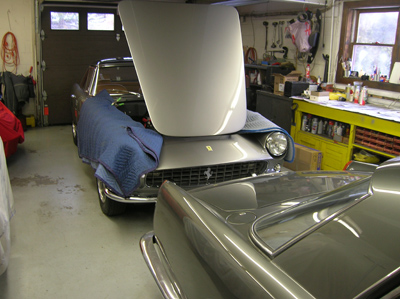
Francois asked me to work on the timing on the second PF Coupe we have at the shop this week. He was busy with another project so he had to leave me with the work. This car was serviced by another shop, and he found the 7/12 bank was not timed properly and the distributor needed to be statically timed to the marks on the flywheel. Removing the distributor angle drive to adjust the timing on this particular car was not very easy because of the way the throttle linkage obscured access to the nuts and bolts, but after a bit of struggle, I managed to get the darned thing timed. When I fired up the engine to check my work, however, the marks were still not showing up where they were supposed to with the timing light. I double checked my work, but still didn’t see the marks with the timing light. I stood staring at the idling engine and listened to her running poorly. No amount of adjusting of the distributor advance changed the way the car ran. I started feeling like Francois set me up with a challenge to see if I could figure it out, but whatever the case, I was determined to solve the problem.
I went out back and felt the temperature of the exhaust pipes and found them pretty cold. I cut off the engine and checked the the spark plug boots. On a hunch, I checked the continuity of the spark plugs to where they were supposed to show up at the cap and found they were all wired wrong! 
I grabbed a set of ignition wires off another engine we had at the shop and plugged them in. The engine immediately ran better now that the 7/12 bank was firing on all cylinders! I went back and reassigned the wires to their correct order. I was amazed this engine even ran at all, or how someone could make such a big mistake and not catch it, but I guess I almost missed it myself! When I told Francois the next day what I found, he told me he had nothing to do with the problem, but was glad I figured it out. 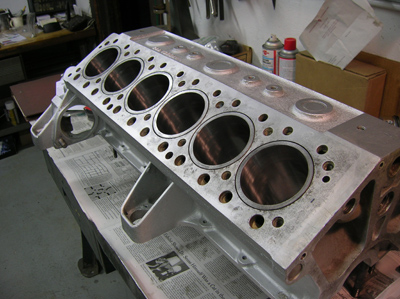
I feel we have a revolving door with engine rebuilds at the shop. One left last week, and another one is ready for reassembly this week!
The block was thoroughly cleaned, and painted, and I put an order in for new motor mounts.
New valves were lapped and checked.
The heads on this engine needed a lot of work in the form of welding and repair before the new seats could be installed.
When this engine was first brought to the shop, we found a couple of dropped valve seats and some damage to the heads from chunks of metal flying around in the combustion chamber. It took some time, but our machine shop managed to repair all the damage.
I started the process of marking all the new pieces and mating them to the rods. After the pistons were installed to the rods, the bearings were installed, and then came the measuring and filing of the end gap on the rings so they could be installed on to the pistons. It was all pretty methodical, clean, and quiet work. It was nice break from the suspension and exhaust work I’ve been doing the last few weeks which used hammers, pry bars, and a sawzall!

Reminder: If you have a Ferrari related project, car, or idea you’d like to explore, I’d love to talk to you. I can also help if you’re thinking of buying or selling. This website represents what I love to do, and now it’s how I make a living, so if you’d like to do something together, let me know. It all begins with an e-mail!
Previous Restoration Day
Next Restoration Day
Home page
Blog

Forum

Resource
