
330 Engine, 330 Disassembly
3/1/13
330 Engine, 330 Disassembly

I turned my attention to some of the ancillary pieces to the 330 engine rebuild like the water pump. Since this engine was from a Series I car, the water pump is different from later units. The bearings were different than the later 330 water pumps, so I removed them first to measure the dimensions before ordering the parts. This extra step added time to the rebuild, but it was necessary to get the right parts the first time. 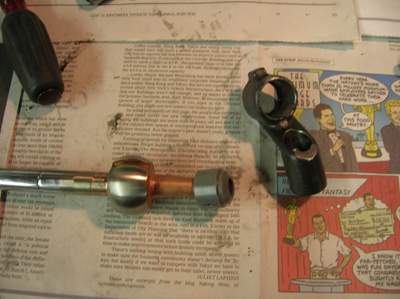
While waiting for the water pump bearings, I assembled the shifter linkage from the transmission. I sent the shift lever out for chroming a second time after the owner’s chrome plater got a little carried away with the first chrome job. Extra plating was where it wasn’t supposed to be, and was binding in the shifter socket. Working with my plater to carefully remove the extra plating, and carefully fitting it to the shifter, I managed to get everything to fit. The next problem was getting the new nylon bushing to fit with the shift lever. I wasn’t sure if the plating was causing the problem, but I had to machine the nylon bushing a little shorter so the shifter would work smoothly. When I finally finished, everything worked perfectly.
Although we still had to check the valve timing on the engine, I jumped ahead a little bit and began wiring up the ignition. Oil seals had to be fitted, and the wires needed to be routed and cut to fit. The firing order on a V-12 Ferrari engine is 1-7-5-11-3-9-6-12-2-8-4-10, but since these engines are timed like two six cylinder engines, all you really have to remember is the first bank, or 1-5-3-6-2-4 to wire the ignition. Since the spark plug tube is tapered, the front wire is run first and set into #1 cylinder for the right bank of cylinders. The second wire in the tube would show up as #5 on the distributror cap and is marked accordingly. Rubber o-rings and a steel wire keeper needs to be threaded onto the loom before the wires are secured to the distributor cap. With the 1/6 bank done, the 7/12 is done in the same fashion but with #1 cylinder as the last wire to be threaded through. It makes more sense when you see it done in person, so I apologize for the confusion!
About a month ago we had a 330 GTC arrive at the shop. The new owner and I have been discussing a game plan on what to do with the car. My advice was not to restore this car, but to paint, re-chrome the brightwork, and reupholster the interior. Mechanically, this car is in pretty good shape and restoring it would only make it marginally better.
We planned a bare metal respray, so we began by removing all the chrome. 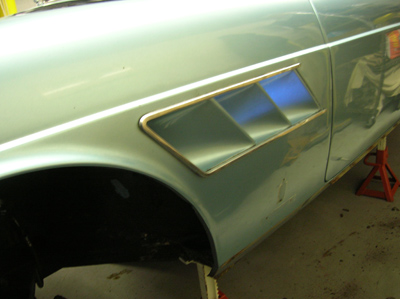
Some parts came off easily like the bumpers and lights, but I was left with the task of taking the side vents off. 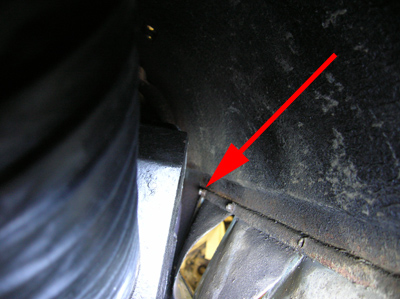
Access to the little 6mm nuts that hold the chrome strip in place is very tight, and extreme care had to be taken not to shear off the studs from rusty fasteners. My hands were pretty scraped up rubbing against the rough undercoated inner panels, but I managed to get one side out. I took a break and found something else to do before attacking the other side so my hands could recover!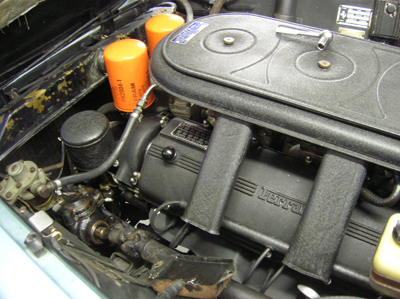
The engine compartment is pretty crusty, but I believe could be cleaned up without removing the engine. Some parts will be removed for servicing and painting, but we’ll take it one step at a time.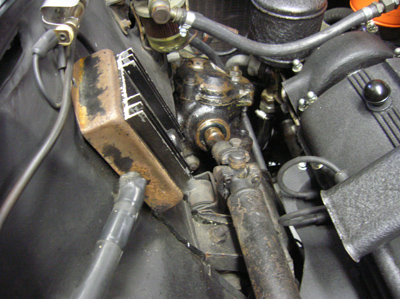
The previous owner installed an early version of a CD ignition system similar to a MSD box, but I wanted to remove this unit to return the engine compartment back to a stock look. 
This unit was also leaking the resin that insulated the inside of the CD box leaving a hard melted plastic residue on the inner fenders. 
Things like the brake booster will probably be removed to rebuild and re plate. Little things like the brake reservoir bracket will also get plated to make the engine compartment more presentable. 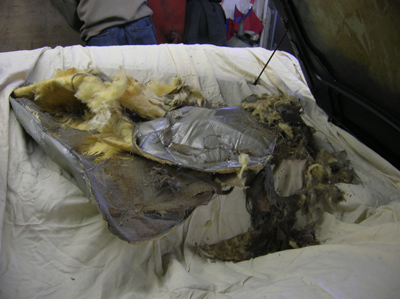
The old hood pad was removed. The special silver mylar material has been a tough thing to match for many years. Several manufacturers have come close, but I recently found a supplier that makes one that is spot on. 
The underside of the hood was scraped and cleaned.
Save the Date! May 4th 2013
6th Annual Radcliffe/Tomyang.net Spring Car Show
12340 Owings Mills Boulevard
Reisterstown, Maryland 21136
Register to show at the Radcliffe Website or call 410-517-1681

Reminder: If you have a Ferrari related project, car, or idea you’d like to explore, I’d love to talk to you. I can also help if you’re thinking of buying or selling. This website represents what I love to do, and I would be happy to help guide you through the Vintage Ferrari world so if you’d like to do something together, let me know. It all begins with an e-mail!
Previous Restoration Day
Next Restoration Day
Home page
Blog

Forum

Resource
