
Three 330s
4/18/13
Three 330s
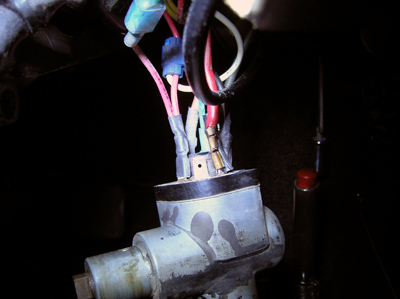
The first 330 I worked on this week was the Series II 2+2. All the to-do were completed, but one nagging issue needed to be addressed. The ignition switch was a little sticky, and I suspected it had something to do with the key. 330 ignition switches turn about 210 degrees from off to the start position, but this switch would hang up at the accessory position, and sometimes at the start position. The keys would also come out at the accessory position which may have explained the previous owner’s complaint about always having a dead battery.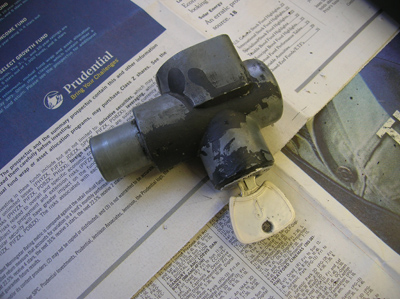
After removing the two screws that hold the ignition lock in place, I took the assembly to my locksmith. I hope he can find and fix the problem!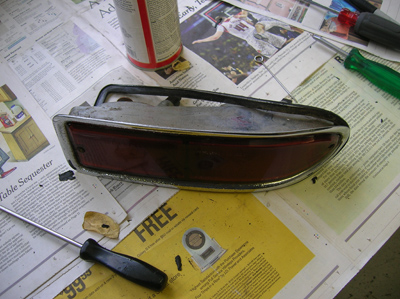
The second 330 was the GTC undergoing a bare metal respray. All the chrome is going to be refinished, and it’s deceiving how much chrome is on a car until you take it all off! It’s also deceiving how much work there is to get the parts ready for replating. 
The tail light assemblies needed to have the light sockets removed before the housings could be sent out to the plater. By carefully bending the tabs to the light sockets, the parts can be coaxed out.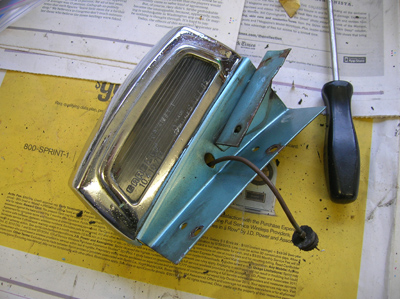
The license plate lights needed to disassembled with the fixture rechromed and the bracket painted body color.
There are a ton of little pieces that I’ll need to keep track of when sent to the plater. 
There are also a ton of big pieces!
The third 330 I worked on this week was another GTC. During a test drive, Francois heard a knocking sound from the rear suspension. In order to narrow down the source of the noise, we removed the rear coil over shock assembly to see if the noise was coming from the control arms. 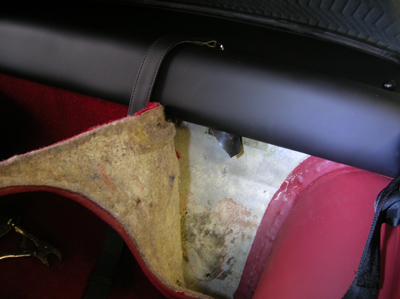
GTCs have an access hole behind the rear panel so the bolt securing the shock can be removed. With the shock out of the way, we didn’t find anything wrong with the suspension, which led us to the shock making the noise. 
We bought a set of rebuilt shocks in exchange for the old ones. 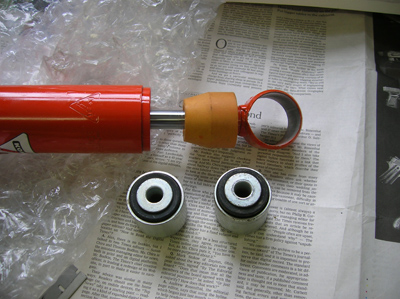
Before the rebuilt units could be installed, we had to press in new eye bushings.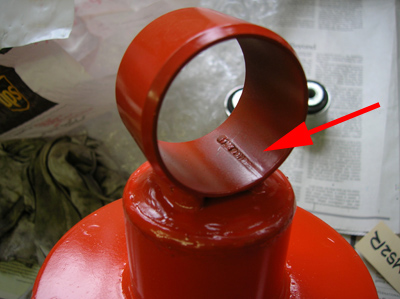
Three of them went in fine, but I noticed an imperfection on on shock that needed to be addressed before the bushing could be pressed in. A weld had penetrated into the shock eye and would interfere with the bushing if I didn’t file it down. 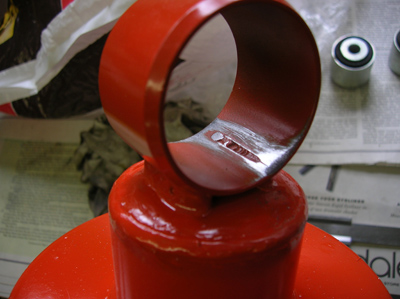
Knowing how such a little imperfection could stop the bushing from going all the way in, I spent a few minutes with a file to save a lot of trouble later on!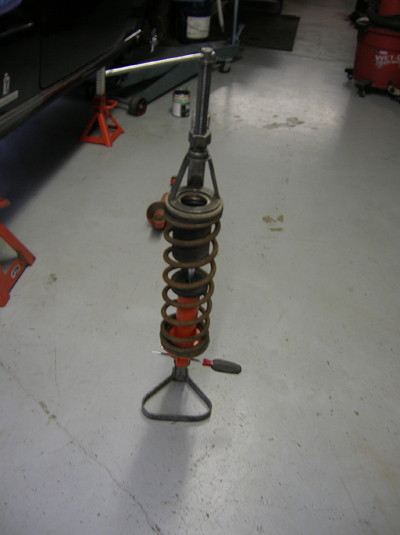
I used Francois’ Ferrari Factory spring Compressor tool to put everything back together. The screwdriver was put in the shock eye so I could get the top and bottom eyes to line up while the spring was installed on the shock. 
The shock was installed one turn from full soft which is a setting Francois likes to start with on GTCs. Next week, the newly painted wheels should be ready, and this car will be back on the road!
Save the Date! May 4th 2013
6th Annual Radcliffe/Tomyang.net Spring Car Show
12340 Owings Mills Boulevard
Reisterstown, Maryland 21136
Register to show at the Radcliffe Website or call 410-517-1681

Reminder: If you have a Ferrari related project, car, or idea you’d like to explore, I’d love to talk to you. I can also help if you’re thinking of buying or selling. This website represents what I love to do, and I would be happy to help guide you through the Vintage Ferrari world so if you’d like to do something together, let me know. It all begins with an e-mail!
Previous Restoration Day
Next Restoration Day
Home page
Blog

Forum

Resource
