Battery Bracket and Hold Down
1/11/14
Battery Bracket and Hold Down

I started a little project to make some battery hold down brackets. These brackets are often missing or using incorrect replacements on Vintage Ferraris, so we’re constantly making them for cars that come into the shop. I thought making a couple of extra ones would probably not be a bad idea.
There are a couple of details to the battery tray that I’ve covered in past, but feel that it would be a good time to review. In the picture above, #1 shows a tube attached to the top frame of the battery hold down. There are two, one for each side of the hold down. #2 is pointing to a threaded lug that the ground strap and negative battery cable attach to on the lower battery tray. #3 shows the position of a loop welded to the lower tray. These details come from a 250GTE, but are common on most of the other 250GT cars but I would check the battery dimensions. The 330 cars are similar in detail, but slight changes in the position of the hold down rods and even hooks for the washer bag may make each 330 bracket different. 
I have found the lower tray is made of a thicker angle iron than the top sheet metal frame.
Since we’re on the topic of battery trays, it would be a good time to talk about good grounds. On the few original cars I’ve seen, I’ve only found one ground strap between the ground lug on the battery tray to the engine block, but nothing from the battery to the body. The chassis ground is through the battery tray and its attachment to the body. Check to make sure this connection is solid and secure because some strange electrical issues can arise from such a simple faulty connection. 
The fixed rod is welded directly to the lower frame.
A pivoting rod is welded with a securing loop. 
The top frame is welded sheet metal angle pieces. We have found brazing the tubes for the securing rods to the top frames keeps from distorting or burning the thin tubes when attaching them to the frames. 
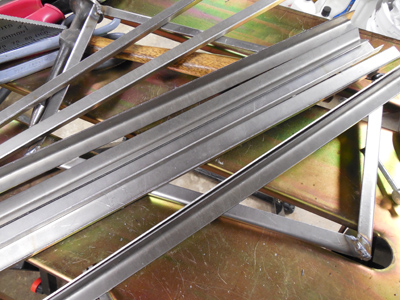
I cut and bent some steel for the brackets so I would have enough to do other sizes, but cut some of them to fit the GTE bracket.
I fabricated a few frames and tacked the tubes in place with some spot welds. I’ll braze the tubes the rest of the way, and I’ll have some spare battery top frames available for the next car missing this top frame!

Reminder: If you have a Ferrari related project, car, or idea you’d like to explore, I’d love to talk to you. I can also help if you’re thinking of buying or selling. This website represents what I love to do, and now it’s how I make a living, so if you’d like to do something together, let me know. It all begins with an e-mail!
Previous Restoration Day
Next Restoration Day
Home page


