
275GTB/4
10/10/14
275GTB/4: Fuel and Steering Shaft
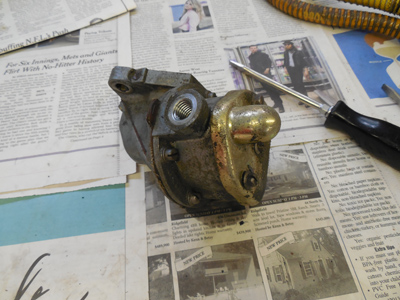
The mechanical fuel pump had parts that needed plating. The top cap was incorrectly plated gold cadmium, which needed white cad plating, along with all the screws that held the whole unit together. 
I removed the mismatched and old yellow fuel lines with the incorrect collars so I could make new lines with correct feurlles and plated ends, but noticed a strange split in the middle of one of the hoses. At first I thought the hose had been cut or abraded through, but on closer inspection, I found something I had not seen before. 
The normal yellow sheathing on Ferrari hose is made of several layers on materials, with an inner spiral wound wire, white string, a rubber liner, yellow sheathing, and an outer spiral wound external wire. Somehow, this hose had just the outer yellow jacket and external wound wire, but inserted inside was simple autoparts store rubber fuel line! Someone may have painstakingly managed to insert this black rubber hose into the yellow sheathing to mimick the correct hose. The split I found in the longest length of hose was possibly to feed the hose into the sheathing from two pieces of yellow hose. I imagined the longer the length, the harder it must have been to slide the inner hose into the sheathing. This method explained the why the wrong cable ends were used, because they were simply for looks! If my theory doesn’t sound right, could there be hose out there that was orignally manufactured with regular rubber hose inside?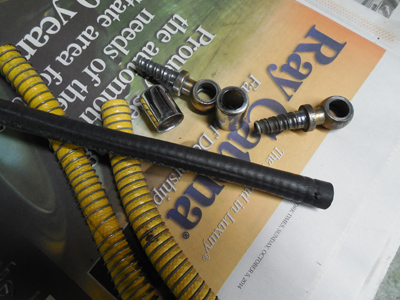
Correct yellow hose is not cheap, and someone may have gone through great lengths to create a reasonable facimile, but I noticed something wrong the first time I saw the line. I just couldn’t put my finger on it until further investigation. If I could spot a problem, I’m assuming a judge would see the same thing. The next time you see the fuel lines, there will be correct parts, finished correctly, and installed correctly!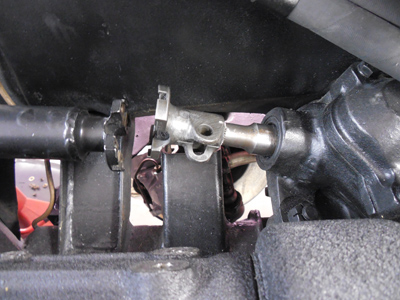
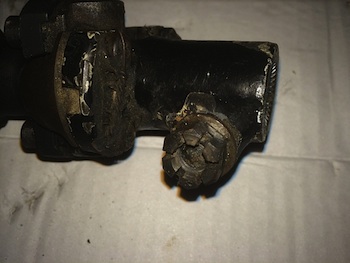
More indescriminate black paint was found on parts of the steering shaft. The usual detailing notes I use for this area is as follows:
steering shaft: Semi-gloss black with paint going all the way down to the end before the u-joint.
u-joint: natural steel (removed in this picture) or paint See discussion below
bolts securing u-joint: black oxide
safety wire securing u-joint: black oxide finish
steering shaft yoke with female splines: black paint
castle nut and pinch bolt on steering yoke: black oxide with a cotter pin (Ferrari style cotterpin treatment which I’ll cover later along with yellow paint daub)
steering shaft going into steering box: black paint
There are witness marks that line up the steering box, shaft and yoke that should have the steering wheel lined up straight.
Cornelis, a Ferrari collector in Europe sent me this picture of a original steering yoke with paint on it. He also thinks some ujoint sections are bare steel because they were replacements. More data points!
All these little details sound anal, but is not that bad when you’re doing them right the first time. What’s time consuming is undoing the damage done by someone with a spray can trying to make everything “nice!”

With just a couple of weeks to go before the Fall Party, we’re collecting names and planning a nice Fall afternoon of Vintage Ferraris! I have a pdf I can send you for the location. Email me.
Set the Date! Tomyang.net Fall Party
October 25th, 2014 1pm-5ish
Westbrook, CT.
Vintage Ferrari gathering in New England. Come join Tomyang.netters for an afternoon of fun, food, and Ferrari talk!
Please contact me to RSVP and for directions to the party!

Reminder: If you have a Ferrari related project, car, or idea you’d like to explore, I’d love to talk to you. I can also help if you’re thinking of buying or selling. This website represents what I love to do, and now it’s how I make a living, so if you’d like to do something together, let me know. It all begins with an e-mail!
Previous Restoration Day
Next Restoration Day
Home page
Blog

Forum

Resource
