
Fan Belt, Tie Rods, Brakes
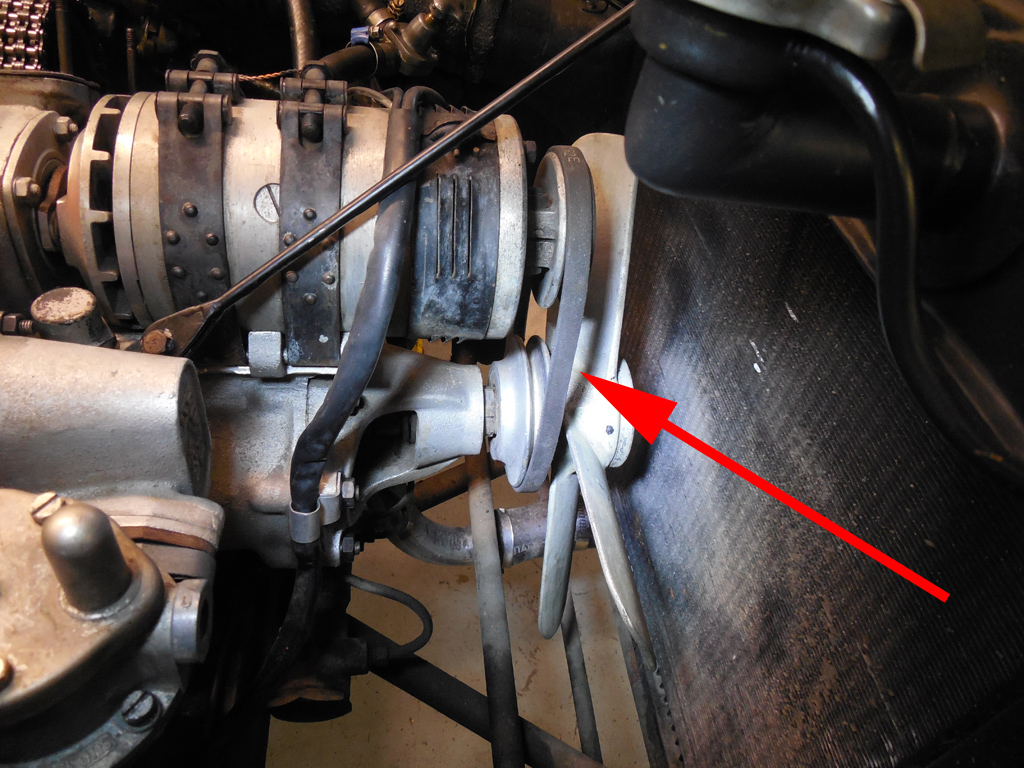
The fan belt on the PF Cab we were working one needed to be replaced. It was a little too wide, and was showing visible cracks in the rubber.
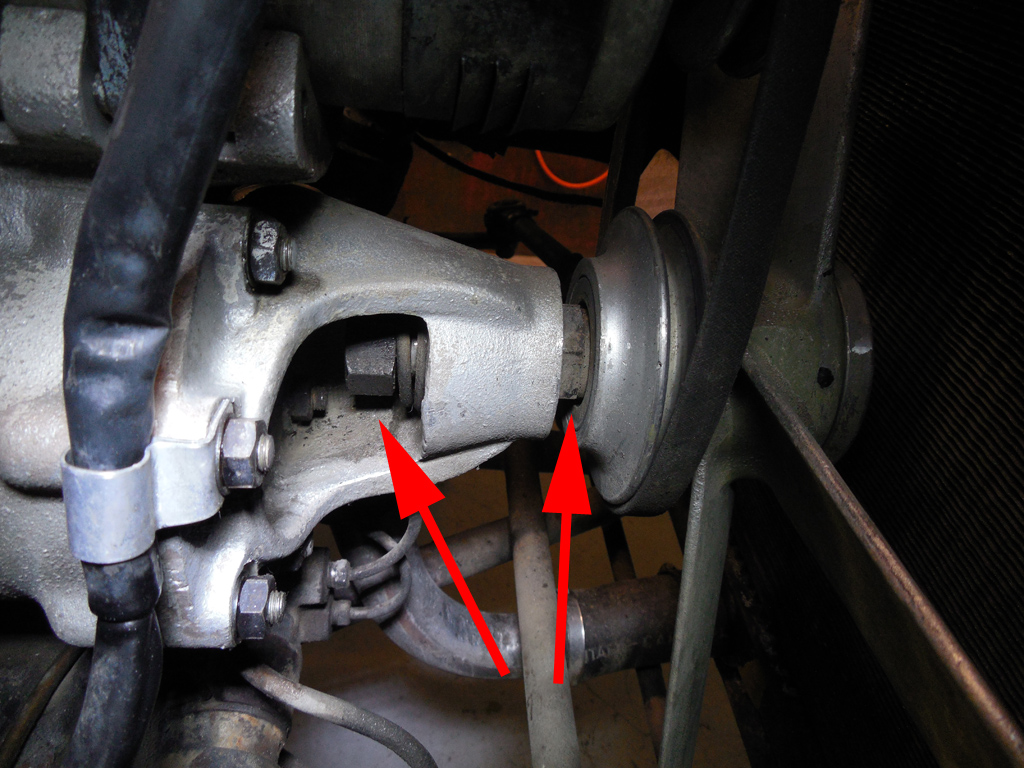
The belt on these early 3 liter Ferrari engines is driven from the generator pulley that is coupled to the engine. There is a lock nut that secures an eccentric bolt that releases the the tension on the fan belt. Hopefully a trip to the auto parts store will find a suitable replacement.
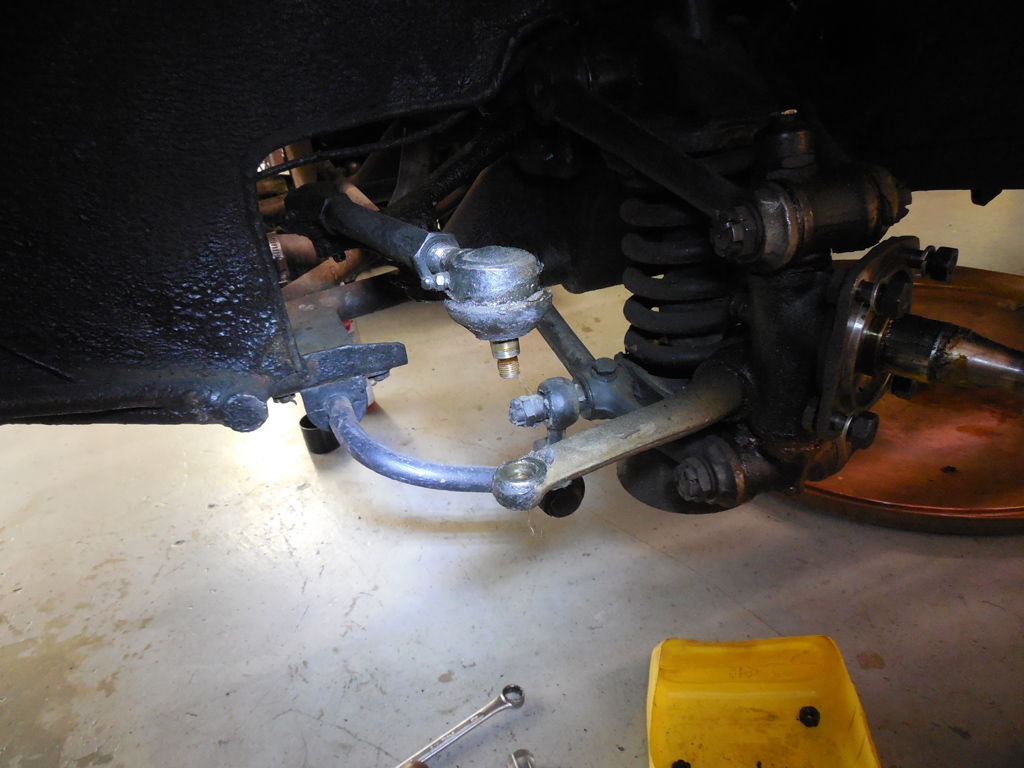
This PF Cabriolet it largely original, but the owner wants to make it safe and roadworthy. Despite the mileage, the tie rod ends were pretty worn out, so we replacing all of them to make sure we won’t have any problems. I could have used a pickle fork to remove them, but I used the old hammer method. This DOES NOT mean to beat the threaded end of the tie rod end out, but rather to place two hammers on either side of the knuckle that secures the tapered tie rod end. With the securing nut removed, and just the right blow from a hammer against the knuckle and second hammer, the jarring will make the tapered end pop out of the knuckle. It’s a neat trick when done properly, and doesn’t damage the tie rod end.
An added tip from a reader:
Learned this trick from my father many years ago, has the added
advantage of not tearing the boot on the Tie Rod end. Works equally
well for ball joints if you can get “on” them. One thing you might
want to mention is that removing the nut completely exposes the
threads and a misplaced blow may damage the threads quite a bit, and
for someone trying this for the first couple of times, it’s very easy
to miss when you make that swing until you get the hang of it. I
always leave the nut on, and run it down to cover the end of the tie
rod, then you can tap the end without fear to see if you have loosened
it. Sometimes very useful when the tie rod is above the spindle.
Gary

I’m patiently waiting for parts to come back from plating to assemble the 275GTB/4 for a show in Florida in January. Although I don’t have a lot of control over the plater, he knows I need these parts back soon! Until then, I assembled the master cylinder with new seals. The master cylinder was rebuilt with a new stainless steel sleeve, so when everything is cleaned up and reassembled, it’ll be ready to go back in the car!
Blog

Forum

Resource
