
330GT Engine Compartment Disassembly
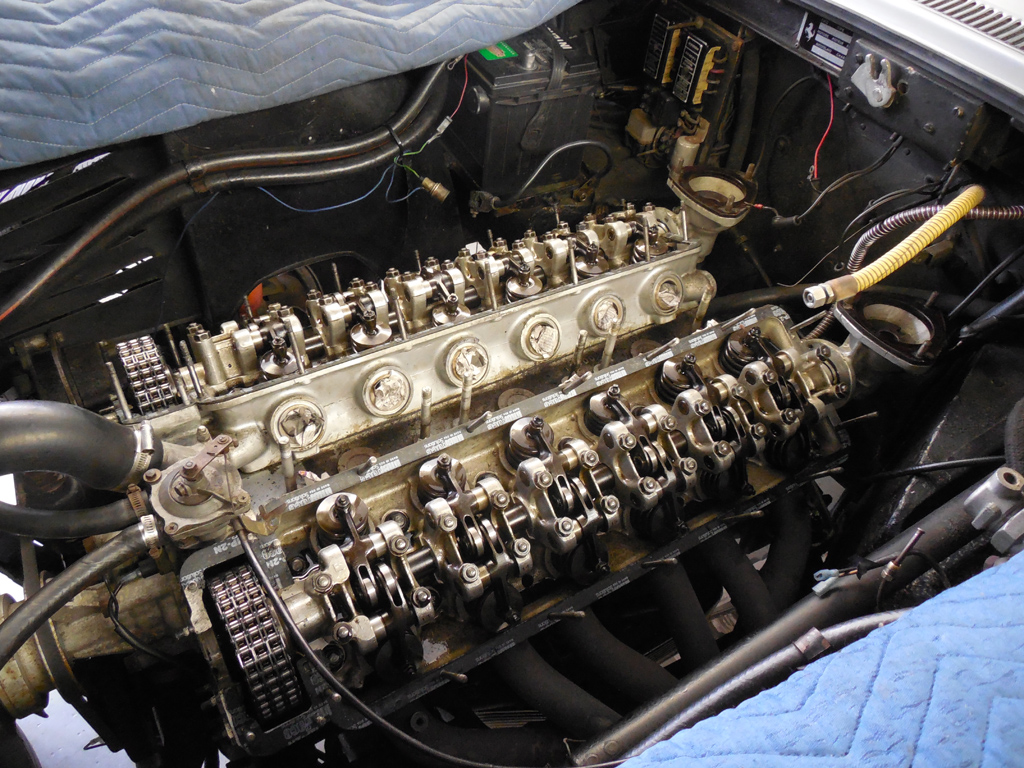
I removed the timing chain and valve covers, along with the fuel lines, carbs and intakes to strip and prepare the parts for painting and plating.
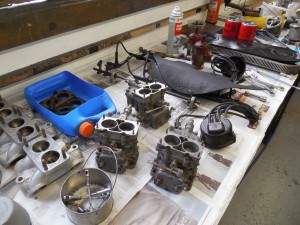
All the various parts needed to be disassembled and sorted into its appropriate pile for their correct finishes. If I spotted any problems with the pieces, now was the time to take some notes and start a plan for the repairs or the sourcing of parts.
Although I’ve disassembled dozens of these throttle linkages, I always take a picture before I take it apart because it makes it so much easier to put it all back together. Most of the parts get black oxide plating, but the bearing holders get black wrinkle paint.
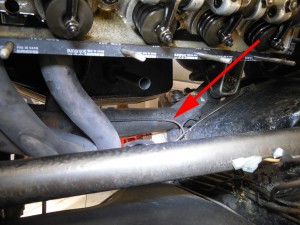
I started to investigate into pulling the front brake line to fix the problem described in the last post. I decided the best plan of attack would be to remove the rear most exhaust header to get better access to the brake line. In a perfect world, the engine would be removed, and I would have all the room in the world to bend and run a new line, but it’s always a compromise of time, money, and perfection. I will find the happy medium by taking out just one exhaust pipe!
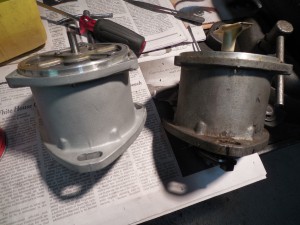
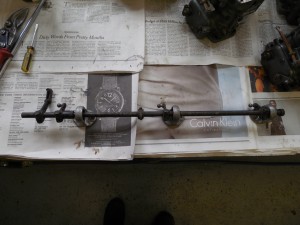
The distributors were pretty grungy, so they were disassembled and cleaned. They originally came in a natural aluminum finish which really absorbs dirt and grease, but a degreasing and media blasting makes a world of difference. Unfortunately, most of the distributor has to be taken apart so the housing can be blasted, but the results are worth it!
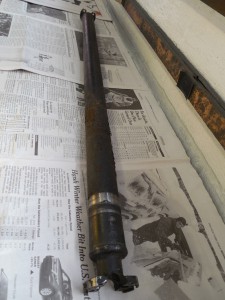
After looking at the steering shaft, I decided the best plan of attack would be to remove the shaft from the car for refinishing. I’ve had luck painting the steering shaft in situ, but this one was just too messed up. The brake reservoirs sit over the steering shaft in the engine compartment, so brake fluid often gets spilled on the steering shaft. The paint gets stripped, and the unpainted steel rusts. The rust on this steering shaft was going to take a little more work than light sanding and a coat of paint, so it was easier to address the problems out of the car.

After removing the hood, I took a closer look at the various pieces of hardware on the hood to see if they needed any attention. The previous shop painted the hood the correct semi gloss black, but didn’t remove the hood latch springs. The spring steel pieces were originally finished in black oxide, and there was a good reason. Paint would just chip off from the flexing of the spring as we what happened here.
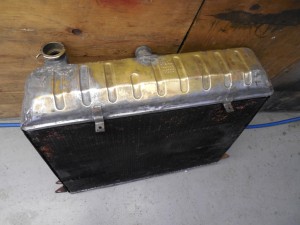
With the hood off, we were able to remove the radiator to strip, clean, inspect and repaint.
Blog

Forum

Resource
