
Dino Service, and 250 Engine Assembly

Work continued on the Dino 246GT we have at Francois’ shop.

I took a bunch of photos of the engine compartment of the car before I took the valve covers off because I don’t work on these Dinos all the time. It’s always good to have reference photos to see where a particular pipe or hose was routed when its time to put everything back together. The other thing I noticed on this engine is the valve covers were painted black wrinkle which is not the correct finish for Dinos. Despite the low mileage on this car, someone must have had these valve covers refinished in black wrinkle. Sometimes, owners will have these painted black to cover up the staining that can occur on the plain aluminum finish if left original. We’ll have to see if the owner will let us return this back to the original finish.
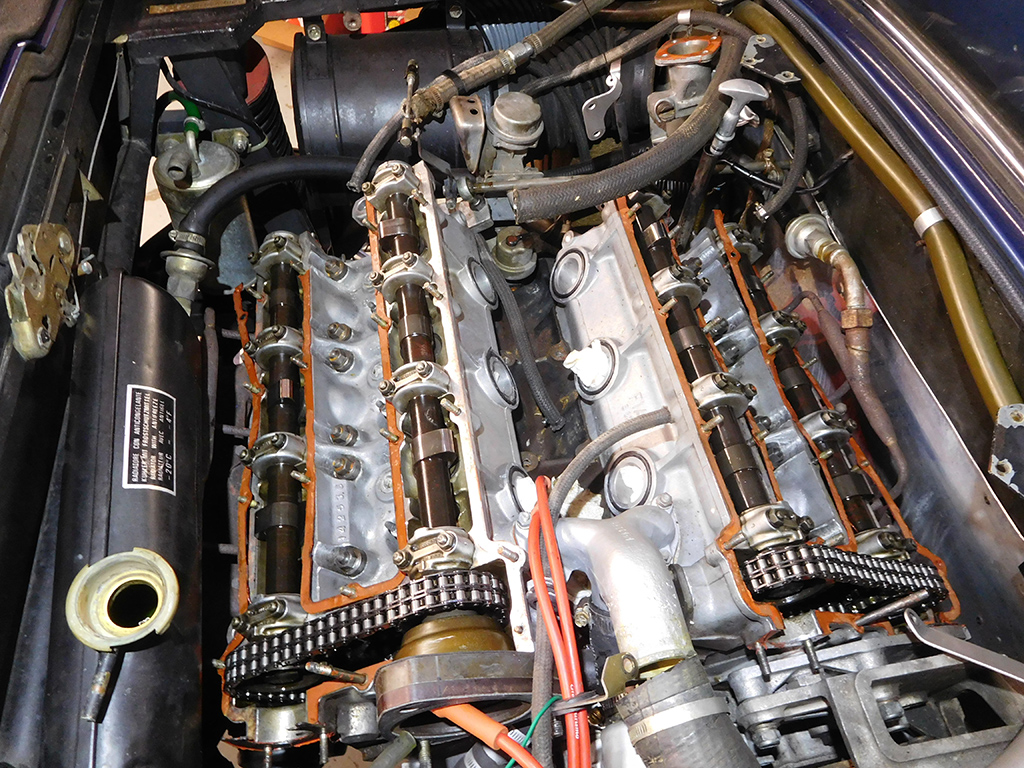
Performing a valve adjustment is quicker in some ways on a Dino because there are half as many valves, but the transverse engine position makes access a little harder, so the time kind of balances out.
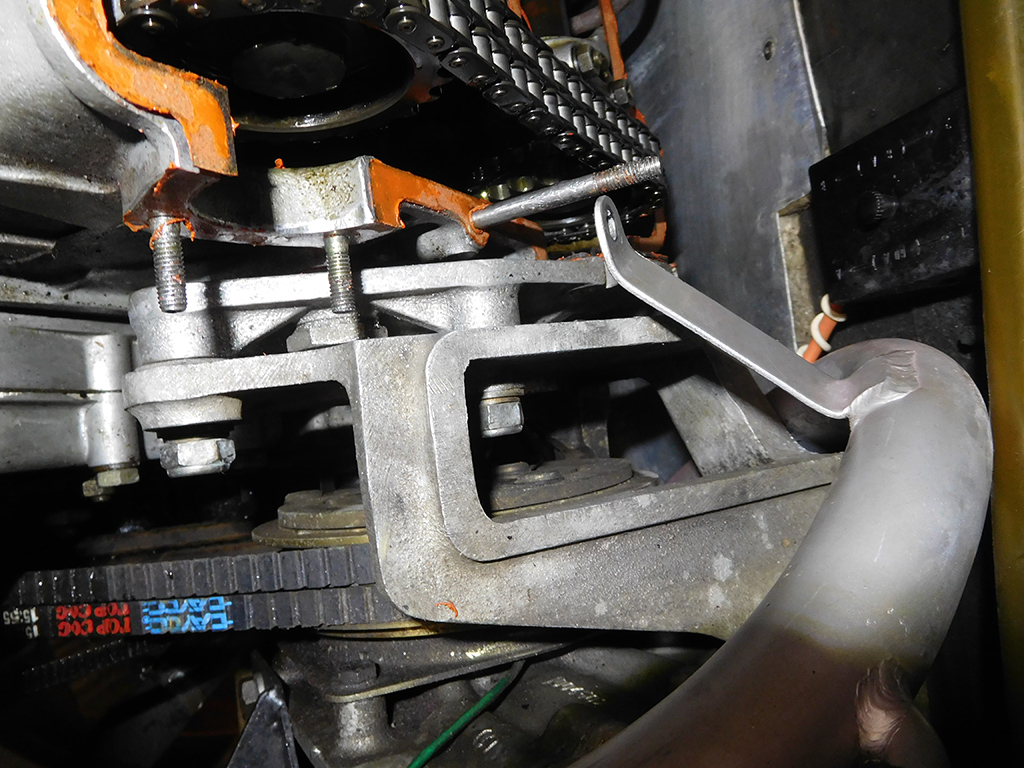
The biggest struggle was to remove one end cap on one of the valve covers. They cover the ends of the camshafts and one of them was sitting behind the air conditioning compressor bracket. The gasket on this cap had to be replaced to avoid oil leaks, but it wasn’t easy to get this guy out. I had a conversation with myself as I assessed the situation, “well, to get the cap off, I have to slide the A/C bracket away from the block, to move the bracket I have to unbolt the A/C compressor and move it out of the way, to move the A/C compressor, I have to take the two belts off, to get the A/C belts off, I have to first take the alternator belt off, to move the alternator…”
To get this one little cap off, it took hours to move everything else out of the way to get to it! I love Dinos!

After spending some time working on the Dino, it was pleasant to work on a 250 engine on an engine stand with access all around!

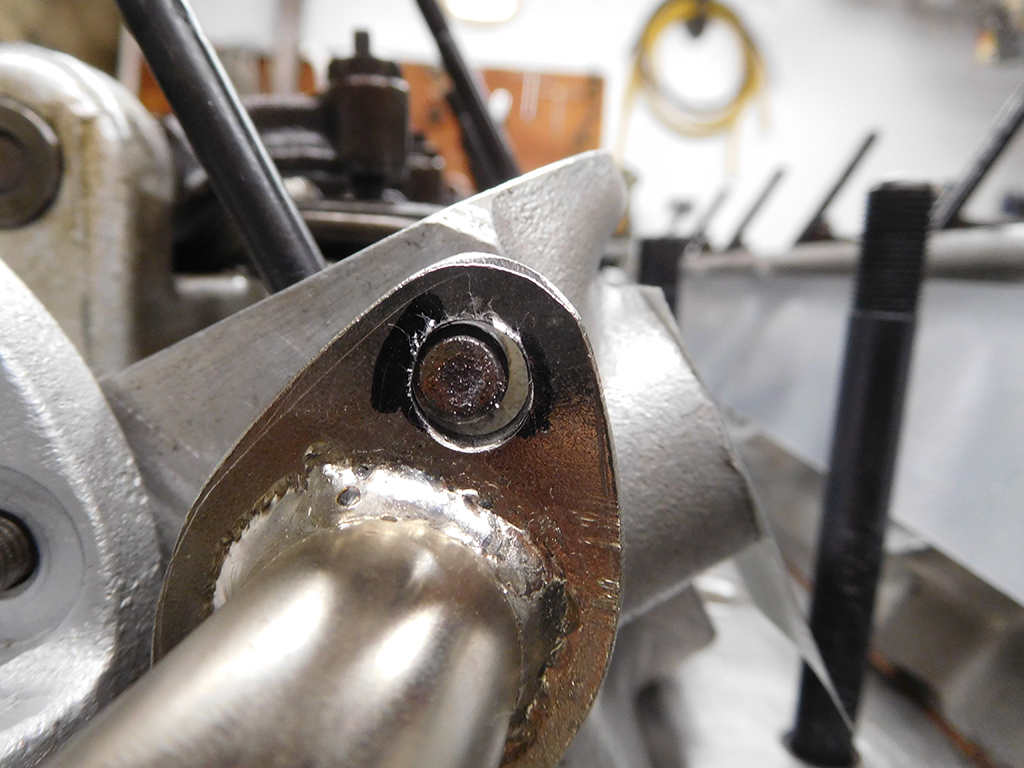
This engine came to our shop disassembled, and we were missing a bunch of parts, including some of the bolts for the oil pan. These are special M8 bolts with 1.0 pitch, so I had to special order some to replace the missing ones.

Most of them were installed with bolts and nuts, but a couple of them are screwed into the engine block. I cut these down to a precise fit, and cleaned up the threads on a lathe.
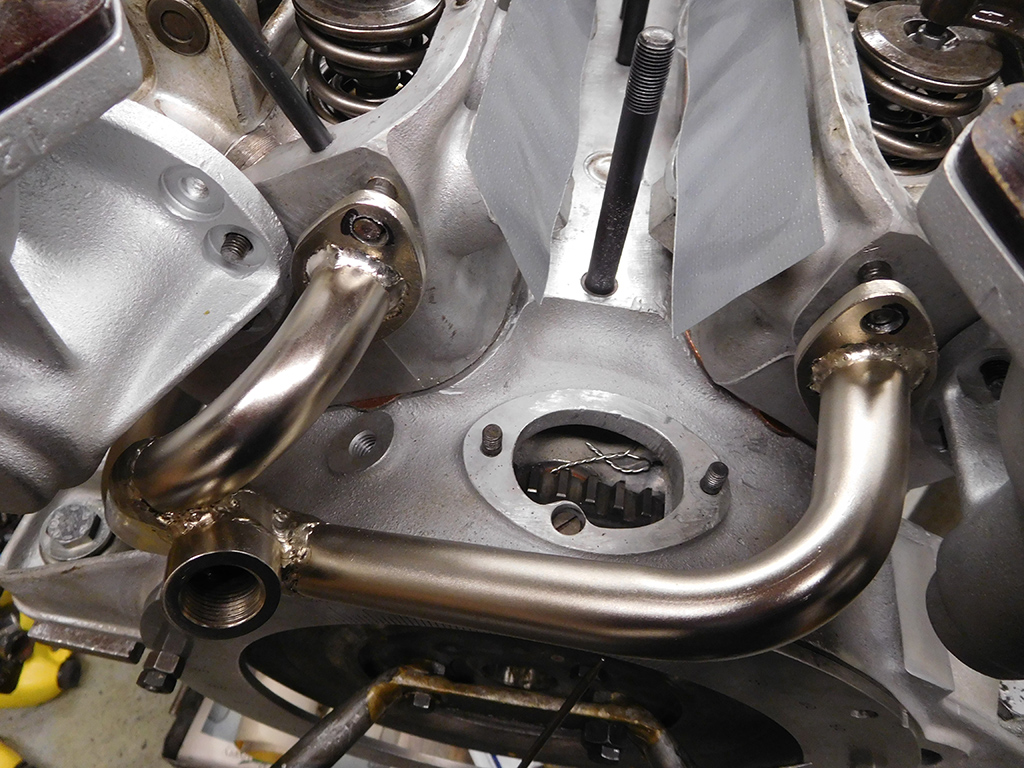
Speaking for fitting parts. We bought a reproduction water pipe for this 250 engine to replace the old one that was pretty corroded and thin. The replacement part was very nice, and correctly nickel plated, but it didn’t fit quite right.
I had to file out the holes on all four connections so the pipe would fit the heads. The gasket with sealant will insure everything is leak free, but I’m sure glad I checked the fit of these parts before trying to install it on the engine. NOTHING on a Ferrari is “plug and play!”
Watkins Glen
I plan to drive to Watkins Glen on September 15th for the Ferrari Club of America National Meet with my 330 America. I’m planning to caravan out with Sam in his 365GTC/4 around noon. He will be coming from the east, and meet up with me around Albany near I90 or Hudson NY heading west towards Watkins Glen. Anybody want to join us?
Blog

Forum

Resource
