THE VINTAGE FERRARI SPECIALIST

2023 Annual Pledge Drive

December 2, 2023


It’s that time a year again. I only ask you support this Website once a year, and your donations really help me keep this website going, not only with the costs of servers, domain names, and regular expenses, it also but it also let’s me know you appreciate the time and effort it takes to keep this little corner of the Internet going! The world has changed through the last two decades of my running this website, and I can see how it affects the viewership. Social media pushes a lot of content directly to your phones these days that I can see less and less people look to websites like these for entertainment. I’ve had to change some of content and the way you get it but I still like the permanence of a website. Try finding a post about something important on Facebook a few days after you saw it!

I have spent more effort, however, on my YouTube Channel, but I don’t think it has taken away from the blog entries. I’m still trying my best to post a blog post at least once a week, along with a new video every week as well, so your donations really helps motivate me to keep going!


If you’d like to send money via USPS, you can send checks here:

Tomyang.net LLC

P.O. Box 36

Hollowville, NY 12530

Here’s a quick recap of 2023 (click on the photos for more) :

I had quite a few Dinos at my shop last year, and the year started with this GTS. It was newly purchased car, and I had to sort it out for the new owner like fuel hoses, wipers, and a tune up.

The highlight of Cavallino in January 2023 was dinner with the usual suspects of the Vintage Ferrari world!

I got to drive a real 289 Cobra while I was down in Amelia Island this year, thanks to Roger Morrison!

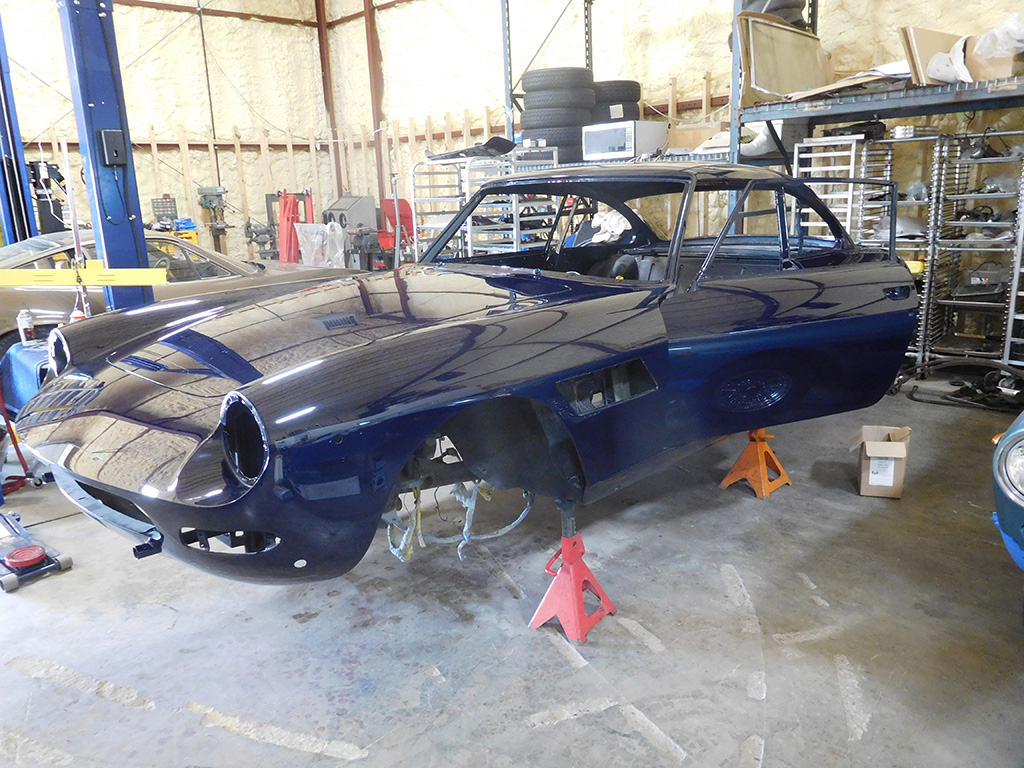
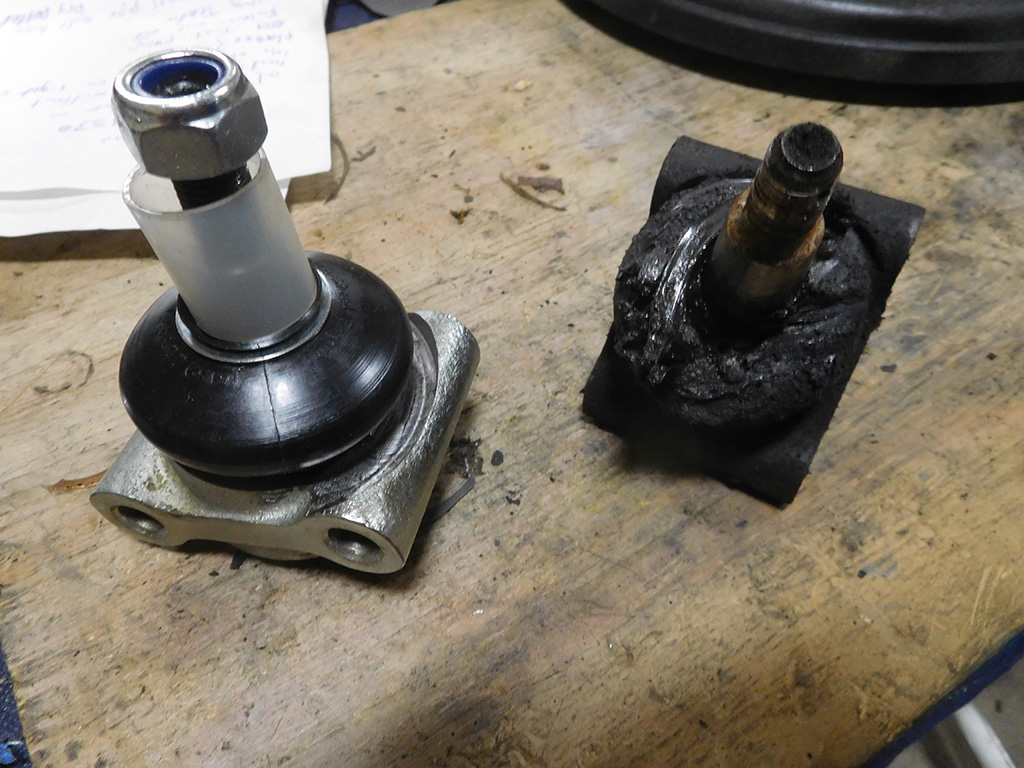
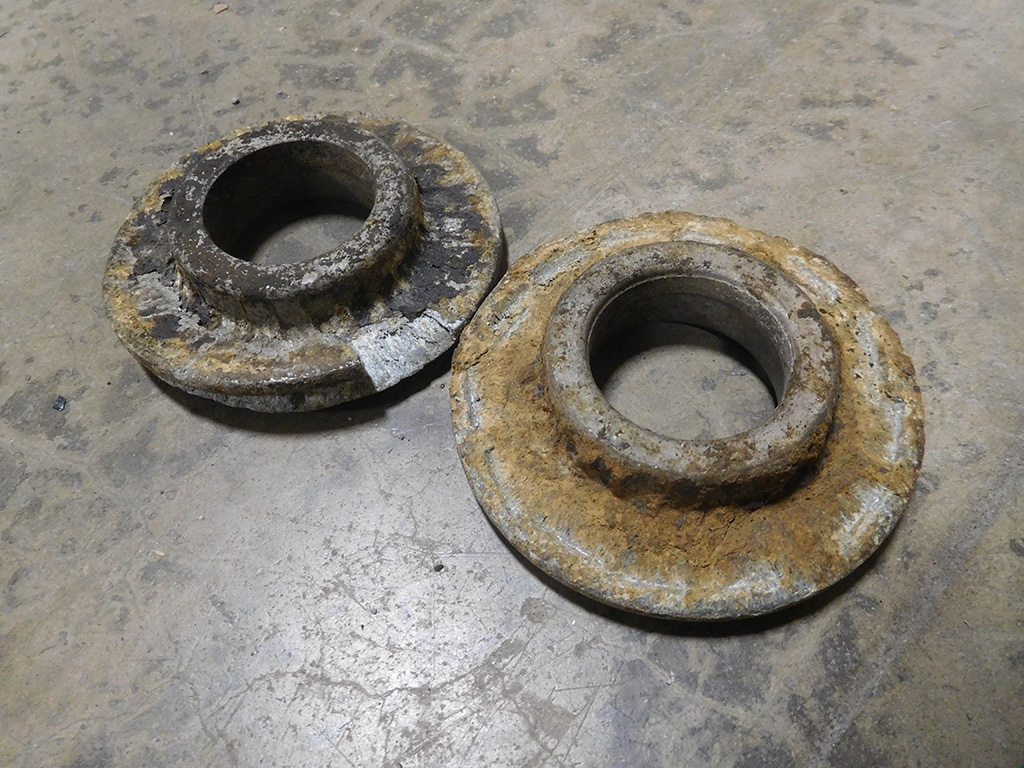
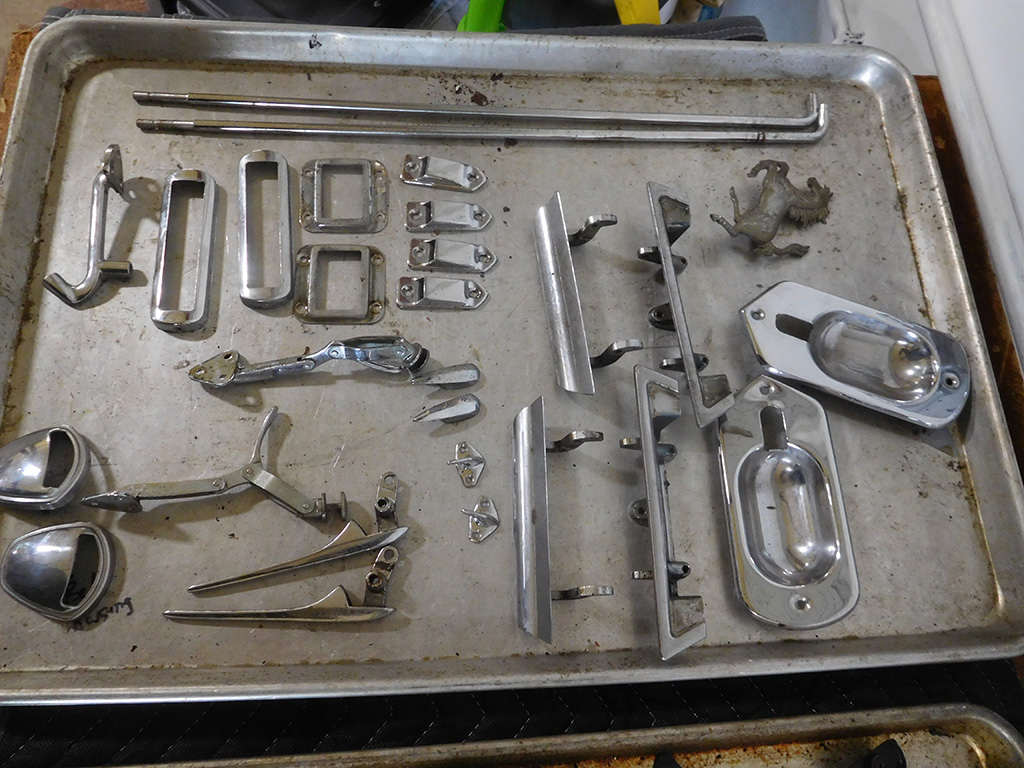
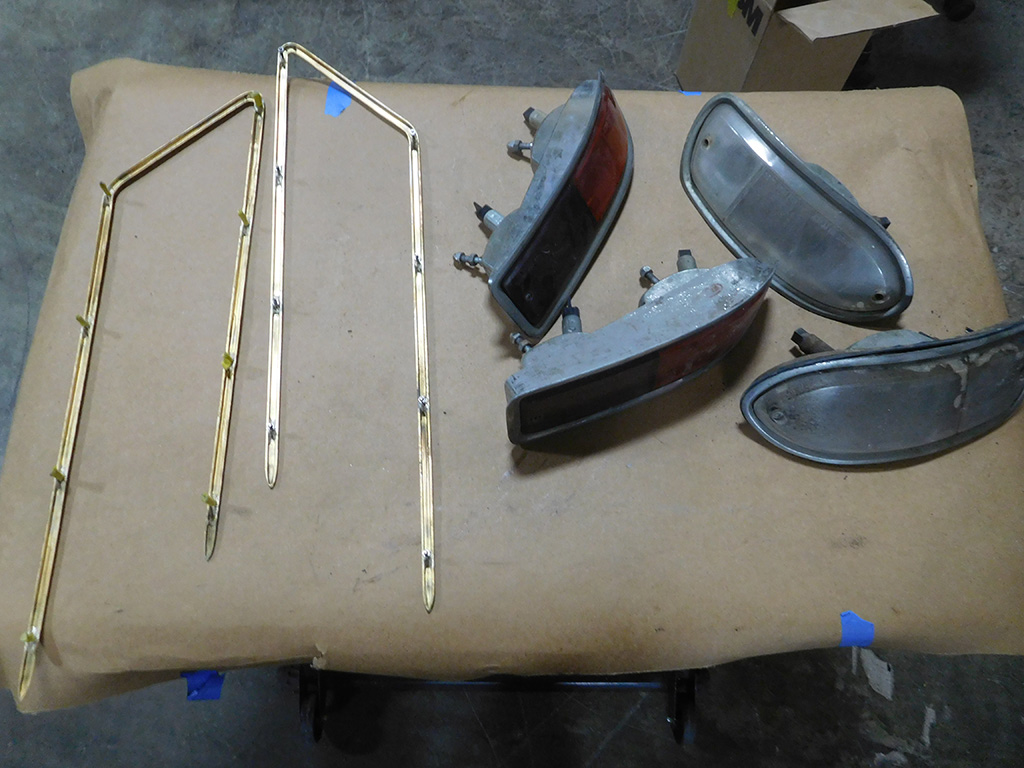
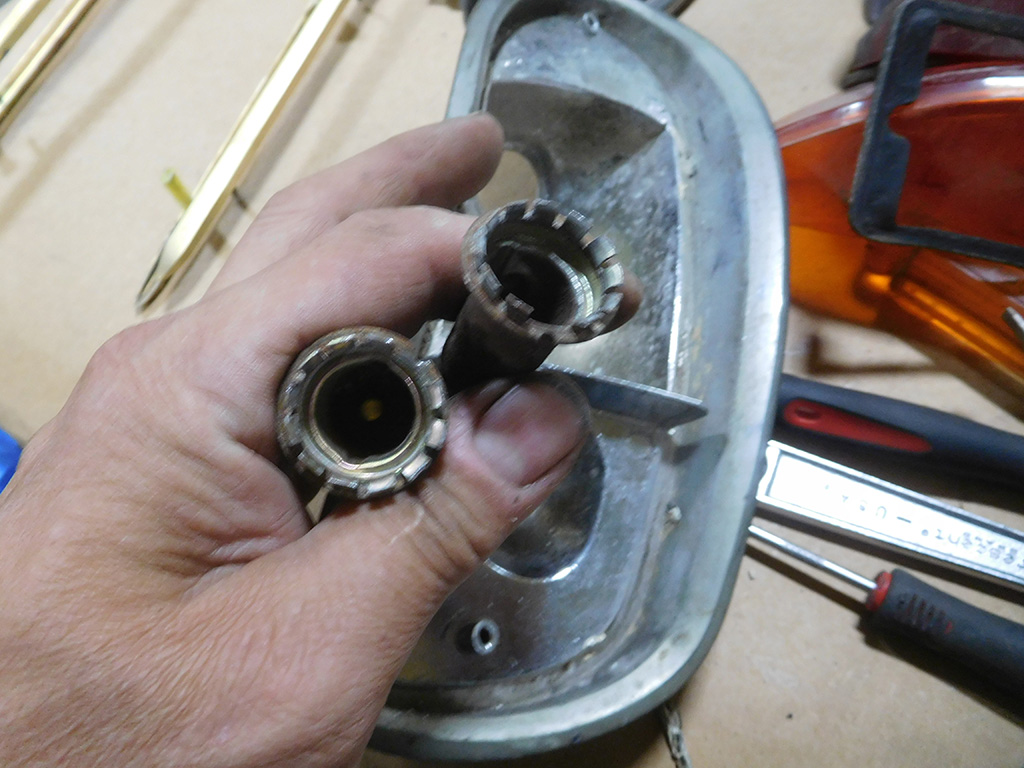
A 330GT 2+2 came back from paint, and so it began the long process of putting it all back together!

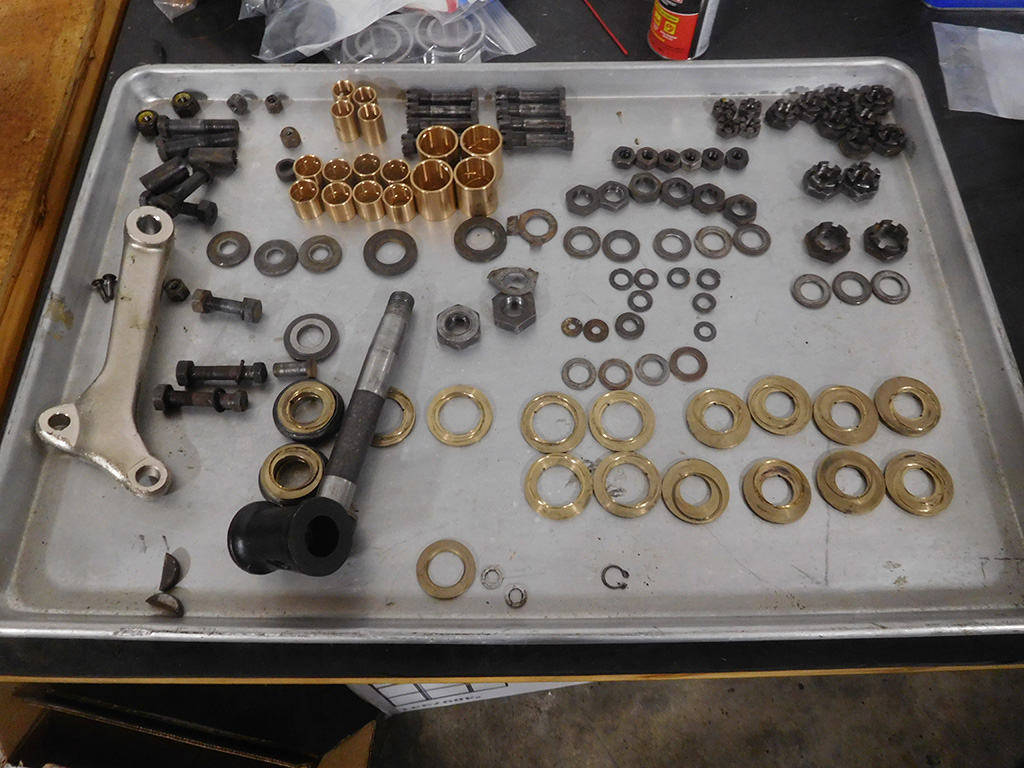
Much of the summer was spent sorting parts and putting them back on the 330!

Another first for me in Monterey this year was when I got to not only drive a LWB Cal Spyder, but also break down in one!…and, and, fix it on the side of the road! All in one day!

Coming back home, I got a little outside of my comfort zone and worked on a Maserati Ghibli Spyder.

After judging again at Audrain, I was invite to drive with Sam in his 365GTC/4 on the New England 1000. What fun!

Thanks for letting me share my car adventures with you and your support through the years. This volume of work would not be possible without your support and enthusiasm. I’m looking forward to more next year, and bringing you along with the ride!


Ferrari 330GT Heater Controls

November 25, 2023


Under the dash of the 330GT I’m restoring is a pair of heater control levers. There are five levers in total with three mounted on the dash and a pair mounted under the dash. The under dash levers divert the air from the blower motor towards either the foot well or the defroster vents.

I removed the lower levers to check their operation and repair what was needed. These levers are not moved very often and can seize through the years, and now was the time to check if they were working properly.

Sometimes it just take a little bit of “exercise” to free up these cables, but when rust build up inside the sheathing, it can lock the levers solidly that no amount of pulling or pushing will move this cable. This little bit of surface rust on the cable was enough cause problems!

With everything out of the car, it was easier to replace the solid internal wire and external sheathing with new parts that I had in stock at my shop. I carefully pried open the sleeve that held the original cable in place and re-crimped the new sheathing in place. I greased the wire before assembling everything and got it ready to reinstall in the car.

Concours 330GT Trunk Seal

November 21, 2023


I have a SI 330GT at my shop that I’m prepping for Cavallino in January, and it’s just about ready, but I noticed something going on with the trunk seal. It was shrinking and the seam where the two parts meet was getting larger. This seems to be a common occurrence with the rubber we’re getting. Many times, I’ve installed door seals, cut them to exact lengths, only to watch them pull away from their perfect fit several months later. I don’t know if it’s the rubber formula the manufacturer is using, but we seem to be stuck with this problem.

Normally, the seam can be joined with a daub of cyanoacrylate (Krazy glue) glue, but as the rubber shrinks, the force often is too much for the glue to hold. To remedy this issue on this car, I slid the gasket together, stretching a little along the way. This could cause the corners to pull, so I had to use some silicone glue and some clamps to permanently glue the corners and the ends together.

I hope after being installed for the last few years, the gasket has finally stopped shrinking, and this glue will hold it’s seam!

Ferrari 365 GTC/4 Ball Joint and Fuel Filter

November 18, 2023


I circled back to the Ferrari 365GTC/4 I had at my shop when the parts came in the mail. The upper ball joint boots were torn, and allowing dirt and moisture inside, so I ordered a new pair.

Replacing the ball joint was well worth it even though I didn’t see any visible play in the joint, but with the old ball joint in my hand, I could feel the ball and socket moving with some rough spots.

The trunk area had a mouse nest that needed cleaning before I addressed the fuel filter, and to see what other damage the rodents might have inflicted.

I clamped off the fuel lines to remove the filter assembly and take a closer look.

I’m really glad to have spent some extra time to move the lines and inspect them carefully, as there was a small section of fuel line that looked like a mouse started chewing through! The critter hadn’t gone all the way through the line, but I wonder if it stopped as they started to taste fuel? If the mouse had continued, all the contents of the fuel tank would have sprayed out of this hole!

I don’t know what fuel line would stop a mouse from chewing through, but I replaced the line with some synthetic sheathed rubber line to see if that would work any better.

Ferrari 330GT Locks


I’ve been working on getting a batch of chrome plating out to my plater, and one set of parts that were left were the door and trunk locks. The locks have to be disassembled so they can be chrome plated. I took the three locks to my local locksmith, and he managed to disassemble the door locks, but had trouble with the trunk lock. They finally gave up and stopped before damaging the lock.

The set screw that held the lock cylinder together was seized in the lock and no amount of penetrating oil or pressure would move the screw.

After soaking the lock in oil overnight, I tried some more. With the set screw already chewed up, I tried the next level of force by hammering the edges of the screw with a sharp point hoping to force the screw to turn with no luck.

The last resort was to put the lock in my Bridgeport and drill out the screw. I started with center drilling the set screw, then drilling down the rest out with a drill bit. I say this all the time, but I love my mill!

I managed to drill right down the center of the seized set screw and disassemble the lock. I also made a new set screw, cleaned up the threads of the lock cylinder, but will have to get a finer saw to cut the tiny screw driver slot in my new set screw. The lock surround can now join the rest of the parts for chrome plating!

Ferrari 365GTC/4 Diagnosis

November 12, 2023


I got a 365GTC/4 in my shop to see if I could get it started. The last time I saw this car was at Francois’s shop a few years ago, but it seemed to be having some trouble starting. After several attempts by the owner, he decided to send it to me for further investigation. Click on the picture above to see the YouTube video I posted about it’s repair.

Externally, the carbs looked great, but inside, was another story. The lack of use caused the old fuel to gum up the accelerator pumps and jets. Each time the car had trouble starting more fuel was pumped into the carburetors, and after sitting some more, the fuel would evaporate and leave even more residue. This car didn’t stand a chance without having to partially disassemble all the carburetors!

Once I got the car started, I assessed the condition of the rest of the car. Damp storage was wreaking havoc on the exhaust system, and it was getting to the end of its useful service life. Having these gaping holes below the passenger compartment was probably not very healthy leaking large amounts of CO into car. We ordered a new set of mufflers.

I also found two upper ball joints with torn boots leaking grease. These joints will wear exponentially faster when the grease is not allowed to do its job contained inside the ball joint!

The leather surfaces inside the car was largely original, but were a little dry and getting stiff. Since the car was going to be at my shop for a few weeks, I went ahead and moisturized the leather with some leather conditioner. I tented the seats with some plastic sheeting to contain the conditioner to help the leather absorb a little more moisture instead of having the conditioner evaporate into the air.

Moving into the trunk area to replace the fuel filter, I found a nice little mouse condominium. They really made a mess with stuff pulled out from other parts of the car and gathered in clumps in the trunk. I removed two carcasses, and a whole lot of dropping from back there before I could replace the fuel filter.

Ferrari 330GT Shock Absorbers

November 4, 2023


With the front suspension almost done, it was time to turn my attention to the rear suspension on the 330GT. The rear suspension on 330GT 2+2s have leaf springs and coil over shocks to suspend the rear axle. The rubber components on the rear shocks had deteriorated so badly, it looked like it was melting!

After compressing the coil springs, I disassembled the shock assembly and cleaned up the mess. It looks like the shock oil had leaked out and began dissolving the rubber parts.

After cleaning, I removed the paint on the shocks to confirm I had the correct shocks for this car. The rears were marked Koni 82R 1322 and had a date code stamped 11-65 which fell in line with the manufacture of this car.

The front shocks were 82H-1321 and had a date of 11-65.

These shocks were in pretty bad shape and had a lot surface rust just like the rest of the car, but I’m going to try and have these shocks rebuilt to see if we can save the correct date codes.

Ferrari 330GT Front Suspension Assembly

October 29, 2023


I need to give a shout out to my friend Greg Jones in Florida. He’s a long time Ferrari restorer, and has saved me and my customers numerous occasions and the latest save was providing me with two little clips that secured the king pin nut on a front suspension I was working on. Trying to describe this to one of the parts suppliers when all they want is a part numbers can be frustrating, and making one from scratch, whether through laser or water jet would prove to be expensive for just two damn clips! I called Greg, and he happened to have a bag of them from the last time he had to order a bunch for the two he needed! He was happy to send me two and save me the time and energy it would have taken to get these two pieces ordered or made. Thanks Greg. My customer and I thank you!

With all the pivoting parts to the front suspension of the 330GT restoration put together and greased, it was time to install the front spring. Despite a pretty safe spring compressor I use, I am always scared to death with the potential energy stored in a spring when compressing it enough to install in the suspension.

The original spring keepers were pretty rotted and I didn’t feel comfortable using them to retain the spring in the front suspension. I bought new ones to install in the suspension.

Unfortunately, these keepers did not arrive until after I installed the spring cups, so I didn’t notice this slight dent that prevented the keeper from sliding easily into the cup. These parts needed to slide freely so the large C-clip could be installed.

I used my torch to heat up the spring cup so I could hammer out the dent and make the cup as perfectly round as I could.

I am always relieved whenever a suspension component is installed, and I still have my life, limbs, and fingers unharmed. It might just be my caution, but this kind of work always makes me happy when it’s done!

330GT Fuel Filters and Pickup

October 27, 2023


Continuing with the restoration of the fuel system, I worked on the rear fuel filter assembly. The original painted stencil was still surviving on this piece, so I will try to save it instead of stripping the paint and stencil off the canister portion of the housing. The paint on the top portion was pretty gone, so I’ll strip that part and repaint.

The smell of old gasoline is kind of like the smell of dead animals, it’s hard to describe, but you know the smell when you smell it!

The fuel pick up tube also needed some love. It had a pretty thick layer of varnished gasoline attached to its surface.

The tube itself was also badly clogged, but I managed to clean it out and knock off all the debris stuck inside. After thoroughly cleaning up the tube, I inspected the surface closely, as these tubes have been known to crack along their length, causing suction issues when the fuel level drops below the cracks. This one looked pretty good.

More 330GT Chrome

October 21, 2023


I already dropped off a batch of parts with my chrome plater that will get stripped, polished and replated, but there was still more coming.

Through the years, I’ve come up with a process that I follow when it comes to certain pieces that takes a few more steps than simply taking the parts off the car and sending them out to plater. The chrome trim that goes around the extractor vents on a 330 first goes to the plater so he can strip the old chrome off, exposing the brass underneath. I get these back and fix any broken studs that need repair or silver soldering back in place. We fit these pieces to the car and make sure they’re not bent or distorted, and bend them back into shape before sending them back to the plater. From there, the process of chrome plating continues. The reason we do this extra step is I’ve learned if you send these pieces out in one step, the acid stripping will inevitably remove too much of the threads on the studs where the nuts won’t go back on. You need good threads so this thin trim piece will draw tight to the body work when everything is done. Also, checking for fit can really only be done before plating if any changes need to be done. Once the chrome is on, you live with what you have.

I have to remove the turn signal and tail light assembly light fixtures before sending the housings out for plating. I have to carefully bend back the tabs to release them from the housing being careful not to break any because they will have to be bent back when the housings come back with new chrome!