Photo Survey - Everybody Please Read!

Moderators: 330GT, abrent

User avatar
Tom Wilson
Posts: 1152
Joined: Tue Sep 03, 2002 1:01 pm
Location: Los Angeles, CA
Contact:

Photo Survey - Everybody Please Read!

Post by Tom Wilson »

Tom Yang and I have been discussing the problems people have been having figuring out how to post photos on this site. Also the fact that of those who know how to post photos, many post them too small to see clearly or so large that they take forever to load and one has to scroll right to read the text. So, we have written instructions on how to post photos, which after being thoroughly tested by you guys, will be made a stickey at the top of the forum for future users.

Please read the following instructions and let us know if they do or do not make sense. If you have not been able to post photos before, try our method and see if it works.

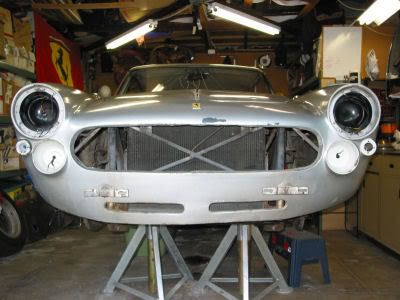
As for the size of a photo, we need to define a standard width that everyone can see properly. I have posted photos at the bottom of this post, with a width of 400, 500 & 600 pixels. Please let me know the size that works best on your computer. When we have a consensus, we will modify the instructions accordingly.

We look forward to your input!

Tom Wilson
Series III 250 GTE, # 4247


Many people have been having trouble posting photos on this site, so Tom Yang and I thought we would explain the process of getting pictures to appear on your post. With the advent of web based photo storage sites, the process has become quite easy. If you do not have a personal web site (usually one is included with your web access account) or are not up to the hassle of learning to use it, get a free account at PhotoBucket.com or a similar site. For the purpose of this tutorial, I will be using PhotoBucket.

1. On your profile on Tom Yang’s forum, make sure you have checked “Yes” to the statements “Always allow BBCode:” & “Always allow HTML:”.

2. Most digital cameras take pictures that are too large for use on the web, so a smaller, more manageable picture needs to be created. Smaller photos also load faster and make the thread easier to read. To adjust the size of your photo, open it in Photoshop, Corel Paint Shop, Microsoft Office Photo Viewer or similar photo editing software. Go to the “Picture” or “Image” menu (or other depending on the program) and choose “Resize”. In the appropriate space, type in a width of 400 pixels and let the program calculate the height. Please use a width of 400 pixels, as oversized photos make text hard to read on the site.

3. Go to the “File” menu and “Save As” a JPG image in an easy to remember location (you can delete this smaller version of the image after it has been uploaded to your Web Storage Site).

*4. Now the photo must be sent to a website that will store it and allow it to be seen by other websites. If you have a PhotoBucket account, log into it and go to the “Image Upload” tab. Enter the number of photos you wish to upload. Browse for the photo(s) you wish to use and enter a description if you want (this description will not appear on the Restoration Board). Click on the submit button. After the image has been submitted (but before sending it to the Restoration Board), you may move it to an album, which will help in organizing your photos. I have created an album called “TYang” just to store the photos for this board.

5. In order for the Restoration Forum to find the photo(s) you stored on the internet, you will have to have their address. Just like your computer uses a file path to identify a specific file, the Internet requires an IP address to find files. To get this address, go to your PhotoBucket account (and album, if appropriate) to find the photo you wish to show on your post (note: you may have to scroll down to see it). Copy the address that is labeled “IMG”.

6. Go to the Restoration Forum and start your post or reply. Paste in the copied address where you want it to appear in your post. It is usually a good idea to hit enter before and after the photo address, so that the site keeps the text above and below your photo instead of trying to work around it.

7. Push the “Preview” button. Note: It is important to always use the “Preview” button! If you don’t, we will see all your mistakes!

8. You should now see your photo and text. Once you have corrected your spelling errors and are satisfied with your post, click the “Submit” button.

9. Your photo post is complete!


* If you are using your own website instead of PhotoBucket to store photos, skip steps 4 through 6. Instead, go to your photo on your website and copy the address of the image from the address toolbar of your browser. After you start your post or reply, hit the “IMG” button (which will write Image). These tags help the computer identify the address as a photo, not text. Without them, you would see the address written out in text format. Repeat for each photo you wish to post (though it is best to hit “Enter “between each photo, so they do not run together). Now hit the “Enter” key and write your text.


Image
400 Pixels Wide

Image
500 Pixels Wide

Image
600 Pixels Wide
Matt F
Posts: 232
Joined: Mon Aug 18, 2003 4:22 pm
Location: Pittsburgh, PA

Post by Matt F »

600 Works best for me!
1967 330 GT 2+2 #9453
User avatar
sam231
Posts: 374
Joined: Tue Feb 08, 2005 5:25 pm
Location: Providence, RI

Post by sam231 »

Not being a technofile, thanks for the info.
'72 365 GTC/4 # 14953; ex-owner 330 GT 2+2 # 8025 :>(
User avatar
330GT
Posts: 1642
Joined: Wed Sep 04, 2002 9:30 am
Location: Seattle, WA
Contact:

Post by 330GT »

This has been needed for a long time. Tom needs to turn it into a sticky.

A couple of suggestions:
1. The easiest way to get the address needed (step 5) for the picture is to bring it up in your browser. Then right click with your mouse on the picture and select 'Properties'. A window will open that shows the full internet path name under the Address: URL section. Select the whole path starting with the HTTP through the .jpg. It usually wraps for more than one line. But you can select the whole thing at one time and then right click somewhere in the selection and select Copy. I got the path for the 400 pixel picture this way:
http://i107.photobucket.com/albums/m290 ... 00X228.jpg
No messing about trying to put the file name and website address together and I don't care where the picture is stored. This works on all pictures wherever they are, even eBay ones.

2. The width is critical. I have my monitor resolution set to 1024x768 which is pretty typical. The picture at the width of 600 pixels makes my browser have a scroll bar at the bottom, thus you have to scroll back and forth on each line to read the text. This makes the text hard to read. So a width of 400 should be the max size. When I post pictures on my restoration forum, I use a size for the shorter side of 200 pixels, which makes the longer side about 266 pixels.

3. File size needs to be considered in that there are still some people without high speed internet connections. The 400 size is ~40K. The 500 size is 66k and the 600 one is 94K. The smallest will take 10-15 seconds to download with the largest over 30 seconds, and this is per picture. A thread with several pictures can take minutes. The size of 200x266 that I use on my website typically results in a 15K picture size. Of course, one can post a smaller version that hotlinks to the large one if you want to deal with a little HTML. Not difficult, but PM me if you want instructions.

4. File persistence also has to be considered. Since the picture is being hosted somewhere else, if it gets deleted, moved, etc. it disappears from the thread on Tom's message board. So when posting a picture from an eBay auction (and yes I'm guilty), consider that it may be gone a few minutes after the auction is over. Further, if you close your PhotoBucket (or whatever) account, all of the pictures you've posted will disappear. This also applies to ones hosted on your ISP if you change ISPs.

5. If you forget to click on the *IMG button at the right time when you are writing your text (for embedded pictures), you'll find that it always puts the "[img]"%20header%20at%20the%20bottom%20of%20the%20text,%20not%20where%20the%20cursor%20is.%20%20So%20when%20this%20happens%20to%20me,%20I%20just%20type%20in%20the%20"[IMG]",%20paste%20in%20the%20picture%20URL%20and%20then%20type%20in%20the%20trailer%20"[/img]" where I want the picture to appear in the text.

6. If your picture does not appear when you select Preview, you need to check four things:
A. First you have HTML and BBCode enabled in your profile. If not, get it done and start over.
B. You have checked the Disable HTML or BBCode boxes at the bottom of the Post a Reply screen.
C. You don't have [img]and[/img] right before and after the URL of the picture. Go back and look at the text in the 'message body' section to find this type of error.
D. The URL is incomplete (it needs to start with HTTP and end with .jpg) or there is an error in it. The easiest way to verify this is to copy it, open a new browser window and paste it into the Address field. Then click on Go. If it appears, then the URL is OK and look elsewhere for the problem.

Have fun with your pictures. I'm looking forward to seeing more in these posts.

Caveat, these directions work on a Windows PC running Internet Explorer as the browser. Your mileage may vary.
Regards, Kerry
http://www.330gt.com 330 GT Registry
http://www.parrotbyte.com/kbc/ferrari 250 PF Coupe 1643GT, 330 GT 2+2 8755GT, 308 GTS 23605
User avatar
Tom Wilson
Posts: 1152
Joined: Tue Sep 03, 2002 1:01 pm
Location: Los Angeles, CA
Contact:

Post by Tom Wilson »

Thanks Kerry - I know I can always count on you to to provide a well thought out, detailed response. That is just what we are looking for.

Your comment about obtaining a photo address (step 5) is good and I will incorporate it into the final instructions (which will be a sticky). However, it will be on the "*" section, as it works best if you are storing your photos on your own web site (as you do). But, if you are using PhotoBucket, the address is listed right below each photo, in three different formats (Url, Tag & Img). The Img address already has the [img]&[/img] tags attached, so I thought copying that was the easiest solution for PhotoBucket users.

Good comments on photo size. We will tally up the responses here to determine the final size. For my own information, did the 500 pixel version make you to scroll right when reading text? I also specified only the width, as some photos will have different width to height ratios and I did not want to distort them with fixed sizes. If we determine a width, the photo browser will calculate the proper height. Besides, other then download time, differing heights do not cause the problems that differing widths do.

As for file persistance, this will always be a problem. Posters may let their photobucket account lapse (hopefully not, as it is free!), but they may also let their personal websites lapse as well. I may let my site go, as I am so frustrated with trying to learn how to make it work! The only way around this would be to have Tom save the photos on his site, but the cost and work load are prohibitive. We want to make this site easier for him so he has more Ferrari work time to entertain us with!

Your comments on locating the IMG tags and problem solving will be incorporated as well. This is another example of how using PhotoBucket makes things much easier.

I hope people try posting photos and help us tighten up this tutorial. The clearer we can make the instructions, the more people will post photos. And I do love the photos!
Tom Wilson - Series III 250 GTE, SN 4247 GT
Curator of the 250 GTE Register
http://www.250GTE.com
User avatar
tyang
Posts: 4070
Joined: Wed Nov 27, 2002 10:28 pm
Location: New York
Contact:

Post by tyang »

I Tom W. and I will post this as finished instructions when we hear from everyone with suggestions. It will be stuck to the top of the forum for everyone to use.

If you are not that technical, you are perfect to try these directions to see if they work. Please use this thread to post some trial pictures to see if the instructions make sense. I do this stuff so often, it's hard to be objective with instructions on posting. It's also hard to tell if we're confusing you.

Tom
'63 330 America #5053
User avatar
Tom Wilson
Posts: 1152
Joined: Tue Sep 03, 2002 1:01 pm
Location: Los Angeles, CA
Contact:

Post by Tom Wilson »

And as long as you are posting trial pictures, see if you can make them of your car! We would love to see them.

By the way, another question the other Tom (not Tom S.) and I have covered is when should you post a large number of your photos and when when should you post a link to an album in a site like PhotoBucket? Too many photos take forever to load, but can be interesting as well. Should we make a rule of thumb to cut it off at 5 pictures? 10? 30?
Tom Wilson - Series III 250 GTE, SN 4247 GT
Curator of the 250 GTE Register
http://www.250GTE.com
rschmoll
Posts: 35
Joined: Thu Mar 11, 2004 4:29 pm
Location: Boston

Post by rschmoll »

[quote][/quote]"Of course, one can post a smaller version that hotlinks to the large one if you want to deal with a little HTML. Not difficult, but PM me if you want instructions."


I really enjoy seeing the larger/ HI Res pictures that Kerry posts. Is this process easy enough to include in this instruction? It give us with higher bandwith the option select pictures of interest to see detail.

Best regards,
Ron
Ferrari 330 GT engine s/n 7025
Ferrari 330 GT chassis s/n 6815
User avatar
Art S.
Posts: 830
Joined: Wed Sep 04, 2002 9:05 am
Location: Princeton NJ
Contact:

Post by Art S. »

Tom,

600 looks best.

Art S.
1965 330 2+2 series 2 7919
User avatar
Tom Wilson
Posts: 1152
Joined: Tue Sep 03, 2002 1:01 pm
Location: Los Angeles, CA
Contact:

Post by Tom Wilson »

I agree John; I like big pictures. Unfortunately, though, that is not a feature that is available on PhotoBucket. However, I suppose you could post a standard size photo with a link to a larger size below, which would be pretty easy. All you would have to do is post the standard sized photo, then on the next line type , then enter the address of the larger ... then type. Using the URL and "Close Tags" buttons would to the same thing.

It would look like this:

Image
http://i107.photobucket.com/albums/m290 ... esktop.jpg


Maybe Kerry can provide us a script that would allow you to click on the photo to link to the larger version. It is worth looking into.
Tom Wilson - Series III 250 GTE, SN 4247 GT
Curator of the 250 GTE Register
http://www.250GTE.com
User avatar
Tom Wilson
Posts: 1152
Joined: Tue Sep 03, 2002 1:01 pm
Location: Los Angeles, CA
Contact:

Post by Tom Wilson »

That is interesting... The image I transferred to PhotoBucket was 2265 pixels wide, but when I click on the URL I got an 800 pixel version. I have no idea why it got shrunk!
Tom Wilson - Series III 250 GTE, SN 4247 GT
Curator of the 250 GTE Register
http://www.250GTE.com
User avatar
330GT
Posts: 1642
Joined: Wed Sep 04, 2002 9:30 am
Location: Seattle, WA
Contact:

Post by 330GT »

Ok, you asked:

<a href="http://www.parrotbyte.com/kbc/ferrari/i ... chased.jpg">
[IMG]http://www.parrotbyte.com/kbc/ferrari/i ... _small.JPG[/IMG]</a>

I had to disable the HTML and BBCode in this post so you can see the code. The next post will have what would actually happen.

The 'href' field points to the file that is displayed if the hotlink is clicked, i.e. the full sized picture. The IMG field is the small version that is displayed in the thread.
User avatar
330GT
Posts: 1642
Joined: Wed Sep 04, 2002 9:30 am
Location: Seattle, WA
Contact:

Post by 330GT »

Here is the same code activated. If you click on the image, the larger version will be displayed.

<a href="http://www.parrotbyte.com/kbc/ferrari/i ... chased.jpg">
Image</a>

Note, there isn't much difference in size in my example, poor choice of pictures to display!
Regards, Kerry
http://www.330gt.com 330 GT Registry
http://www.parrotbyte.com/kbc/ferrari 250 PF Coupe 1643GT, 330 GT 2+2 8755GT, 308 GTS 23605
User avatar
Tom Wilson
Posts: 1152
Joined: Tue Sep 03, 2002 1:01 pm
Location: Los Angeles, CA
Contact:

Post by Tom Wilson »

OK...Nobody panic. This is not as difficult as it may seem!

Here's what you do. When you copy a photo to PhotoBucket, copy a large and a small version. To tell them apart, add the suffix "-Large" and "-Small" to the name. Then, copy Kerry's code into a Word or WordPad document and save it in an easy to find location. Go to Photobucket and copy the URL address for each photo. Substitute these address' for Kerry's address (the words from HTTP to JPG) in his code. Put the Large address in the first section and the small address in the second. Now substitute XXXXXXXX for the name in both sections. Mine looks like this:

<a href="http://i107.photobucket.com/albums/m290 ... -Large.jpg">
[IMG]http://i107.photobucket.com/albums/m290 ... -Small.jpg[/IMG]</a>

So, when you want to post photos, copy this text from the document and paste it into your post. Now change both of the XXXXXXXX's to the name of your photo. My photo "Front.jpg", would look like this:

<a href="http://i107.photobucket.com/albums/m290 ... -Large.jpg">
[IMG]http://i107.photobucket.com/albums/m290 ... -Small.jpg[/IMG]</a>

Now we should have a small (400 pixels wide) version, which if you click on it, will go to a large version (800 pixels wide). Interestingly, my photo should be larger than 800 pixels, but PhotoBucket seems to be cutting it down! We will see how it works in the next post, when I re-enable HTML & BBCode.
Tom Wilson - Series III 250 GTE, SN 4247 GT
Curator of the 250 GTE Register
http://www.250GTE.com
User avatar
Tom Wilson
Posts: 1152
Joined: Tue Sep 03, 2002 1:01 pm
Location: Los Angeles, CA
Contact:

Post by Tom Wilson »

If my logic is correct, you should be able to enlarge this photo:

<a href="http://i107.photobucket.com/albums/m290 ... -Large.jpg">
Image</a>

As it turns out, you can even enlarge it in the preview mode, so I know that it works. Cool! Thanks Kerry!

Now, if I can just remember how to create Hot Keys, I can assign one to type that text when I hit it. That would work nicely too.
Tom Wilson - Series III 250 GTE, SN 4247 GT
Curator of the 250 GTE Register
http://www.250GTE.com
Post Reply