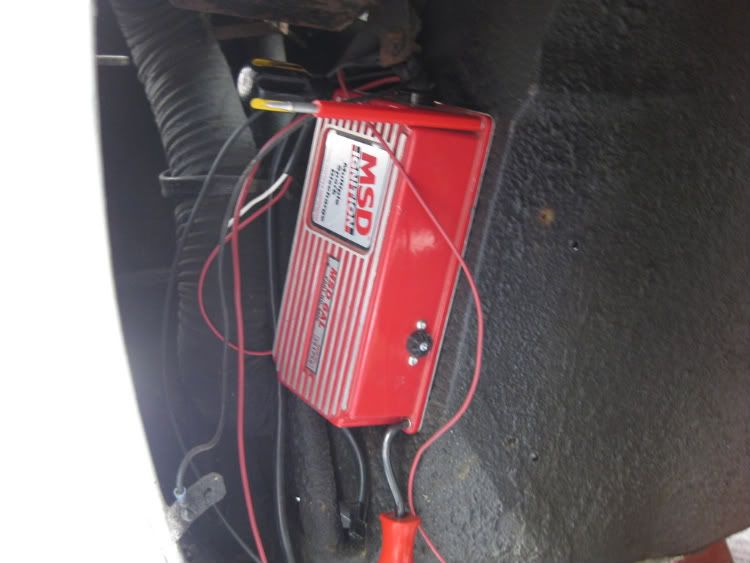
I just finished mounting the first MSD box in the passenger side front wheel well at the rear. I was able to drill three of the mounting stud location holes into the engine bay and it made them easily accessible with the battery removed. The fourth mounting stud hole I had access by removing the interior kick panel. It is tight in there and you will need a right angle drill to be able to fit and drill the four holes. You have to mount the MSD box as far forward as possible behind the rear wheel well to insure that the three mounting studs remain in the engine bay for accessibility. It actually fits like a glove in this location. I faced the harness towards the top and the MSD harness was routed through a stock opening at the battery tray. Very slick.
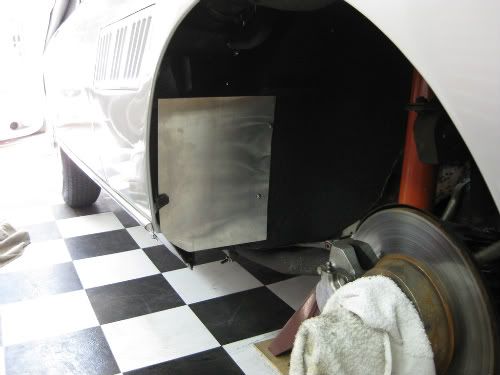
The second pic is of an aluminum shield that I fabbed and mounted to help protect the MSD box from road grime. I plan to mount the second MSD box in the same fashion on the drivers side.
Nice work. So you don't have a splash shield already installed? There should be one that seals that area following the contour of the inside of the fender.
I see you have a rag draped over the greasy hub. How many times did you get yourself dirty before you covered it with a rag? :-) I often put the knock off back on the hub when I take off the wheel to keep myself from getting grease all over myself!
I was a little unsure, but I thought that there should be a factory shield there, as well as on the other side. They were obviously missing when I bought the car. I saw the mounting screw holes for it. In fact I used the existing holes to mount the shield I fabbed. I may go back and do another one following the contour of the fender. I'd really like to take a look at an OEM one before I do one.
See http://www.parrotbyte.com/kbc/ferrari/I ... Panels.htm for more information on the splash shields. You really need to fab them. Otherwise, that whole area will pack up with dirt. This is one of the major rust areas on a 330.
I found that short sections of plastic downspouts work well to cover the greasy axle.
I decided to remake the splash panel on the passenger side. I first built a template and then used the pattern to cut out the sheet metal. The template also makes it easy to locate the holes correctly when drilling the sheet metal.
Here is the final install/mounted MSD box. Note the rubber mounts which only come with the 6AL version (rev limiter option). If you use the 6A, it does not come with the rubber mounts. They can be ordered seperately for $15.
This is the fabricated splash panel after mounting it for the final time. I undercoated it on both sides before installing it. Note the rubber mounted to the fender side of the panel (Can also be seen in the 1st pic). I took vacuum hose and slit it lengthwise with a razor blade. I then used 3M weatherstrip adhesive to secure it to the edge of the panel. I then bent the panel to the final desired contour.
Update: The pic shows the Bosch blue coils painted the Marelli red. These coils come with the correct brackets, which I needed as both of my brackets were cracked/broken. The ballast resisters have been eliminated. Note the Marelli decals on the bases of the coils. Both MSDs have been mounted in each front fenderwell respectively and have been wired, except to the distributors. I have hidden the wires up and under the firewall overhang. Tom has the distributors and is checking the curve, dwell and sequencing the points for me.
Both the pages in my GTE owner's manual as well as the 330 GT
owner's manual show that the ignition terminals of the coils
are equidistant of the firewall.
Rudy van Daalen Wetters wrote:Both the pages in my GTE owner's manual as well as the 330 GT
owner's manual show that the ignition terminals of the coils
are equidistant of the firewall.
I understand what you're saying Rudy and it is an easy fix. The orange wires to the positive posts on the coil are from the MSD. The ignition leads now go to the MSD. Do you think that it still is an issue?
Here's a pic from today with MSDs installed and wired (Wires hidden). The distributors are installed now along with the new Pertronix plug wires. I'll work on setting the timing tomorrow and fire her up.