Horn Detailing

Moderators: 330GT, abrent

Post Reply
User avatar
carello
Posts: 203
Joined: Sat Apr 22, 2006 12:52 pm
Location: eastcoast
Contact:

Re: Horn Detailing

Post by carello »

John Vardanian wrote: 1. Has anyone found a close match for the little domed (slotted) machine screws in hardware type stores or do I need to fuss with re-plating these? I'd settle for stainless steel.
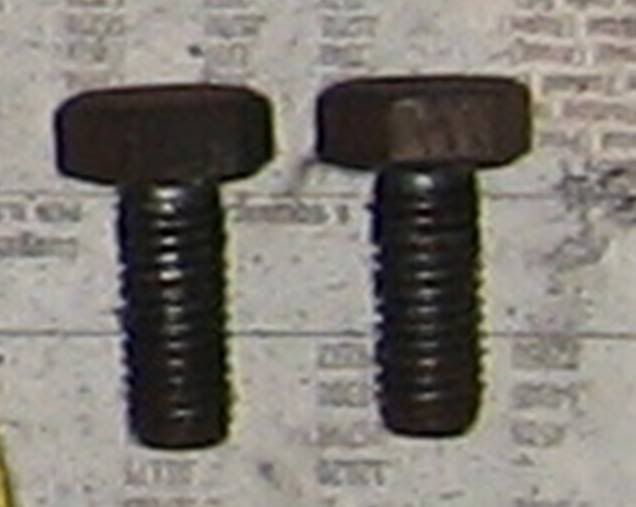
John , i think many hdwr stores will handle 4mm x 0.7thread x length - oval head slotted machine screws.
John Vardanian wrote: 2. Same question as #1 but on the pair of acorn nuts that hold the Bakelite cap onto the bottom of the compressor barrel.
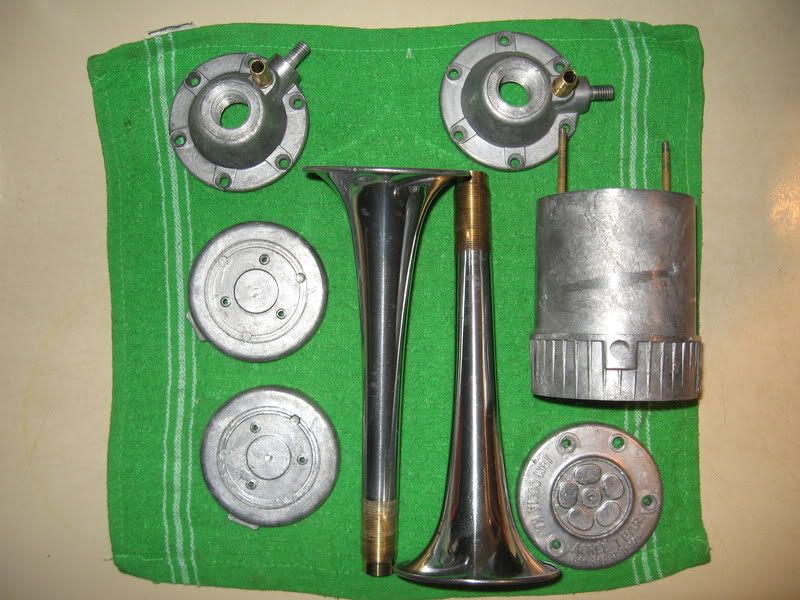
i would replate or paint the oem acorns and be done.
John Vardanian wrote: 3.The four sets of large fasteners that hold the compressor and the trumpet bracket to the engine bay, what are these? Lobo? What is their finish?
I would (on this Fiamm application only) use unmarked, zinc plated, hex head, 8mm bolts - NOT EASILY FOUND!
John Vardanian wrote: 4.The trumpet bracket, should this be plated or hammer toned?
IHMO, silver zinc plated.

Just a general comment on restoration finishes, One of the details that seperates a trophy car from the other beautifull restorations is the correct use of plated fasteners. We have all learned at an early age that stainless steel does not require much attention, where as clear zinc starts failing quickly if not attended to. However one of the details that a concours judge is very aware of is the use of stainless to replace these period finishes, but more than that, it means you chucked the oem fasteners. So if you are driving, and you want bling, stainless is king. If you want 1st at a show, IMHO, you want the exact correct oem pieces with correct plating.
John Vardanian wrote: 5. How polished (shiny) are you supposed to have the trumpets before applying the translucent red paint?
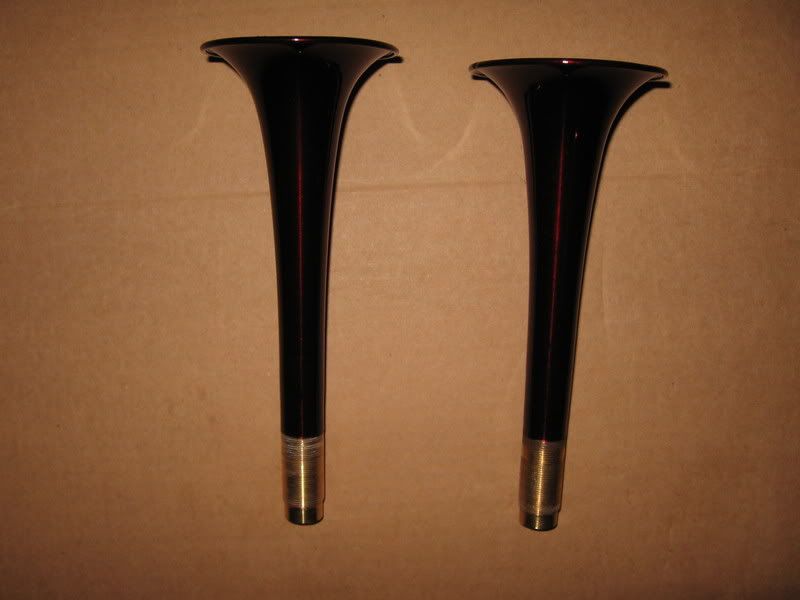
Without the use of any chemicals, IMHO, you need to impart a nice, discernable spun finish to the outside. The inside bell buffed with 0000. Prior to paint you need total decontamination with no contact of human hands. An acetone wash is what i would use. Most likely this candy red paint on Fiamm trumpets subject has been discussed a dozen times per year for last 50 years, so there have got to be other ideas .

I hope this will give you some good ideas - Craig
User avatar
carello
Posts: 203
Joined: Sat Apr 22, 2006 12:52 pm
Location: eastcoast
Contact:

Re: Horn Detailing

Post by carello »

Nice exploded view photo John! thanks.
you can shop for "Oval Head Slotted Machine Screws Metric"
Image
John Vardanian
Posts: 1908
Joined: Wed Sep 04, 2002 12:13 am
Location: San Francisco Area

Re: Horn Detailing

Post by John Vardanian »

Thanks Craig for the time you took to reply. Back to my #3 questions about the four large fastners, is this what you would do or is this how they are? Of the four on mine, two are definately non-original and the other two have no inscription whatsoever on the heads. They look like they had chrome(?) plating at one time. I am trying to confirm whether these two are to stay and get rejuvinated or trashed. These are the ones that I am trying to determine if they belong.

Thanks.

john

Image
PF Coupe
User avatar
carello
Posts: 203
Joined: Sat Apr 22, 2006 12:52 pm
Location: eastcoast
Contact:

Re: Horn Detailing

Post by carello »

John Vardanian wrote:Thanks Craig for the time you took to reply. Back to my #3 questions about the four large fastners, is this what you would do or is this how they are? Of the four on mine, two are definately non-original and the other two have no inscription whatsoever on the heads. They look like they had chrome(?) plating at one time. I am trying to confirm whether these two are to stay and get rejuvinated or trashed. These are the ones that I am trying to determine if they belong.Thanks.john
Hi John, We need input from others on this. All i can say for sure on Fiamm mounting is-
My 68 Miura Fiamm compressor and trumpets are mounted with rusty, lo grade 8mm nuts and bolts where as all else is hi grade bolts and nuts. Naturally i thought the previous owners was SFB and this would be corrected.

I open a new Fiamm kit from 1972 and guess what? The nice little sealed paper bag of hardware and .....The same exact bolts and nuts! 2 of the nuts are zinc plated, the bolts looks like maybe chem treated.

Fiamm forever,
Craig
Attachments
FiammMountBolts2.jpg
FiammMountBolts2.jpg (61.31 KiB) Viewed 11843 times
John Vardanian
Posts: 1908
Joined: Wed Sep 04, 2002 12:13 am
Location: San Francisco Area

Re: Horn Detailing

Post by John Vardanian »

Perfect! Thanks Craig for the '72 bolt pictures. These bolts are identical to the two in my (lesser quality) photo. This confirms that the two bolts are to stay and get plated. When I get home I'll see if the nuts have the little stamping like the ones in your photo. Thanks again.

john
PF Coupe
User avatar
carello
Posts: 203
Joined: Sat Apr 22, 2006 12:52 pm
Location: eastcoast
Contact:

Re: Horn Detailing

Post by carello »

John Vardanian wrote:Perfect! Thanks Craig for the '72 bolt pictures. These bolts are identical to the two in my (lesser quality) photo. This confirms that the two bolts are to stay and get plated. When I get home I'll see if the nuts have the little stamping like the ones in your photo. Thanks again. john
Hi John, Now that you have this Fiamm compressor apart, we need some dimension for considering spare parts, canabalizing parts and the like.
compressor -
1) height and diameter of the vane rotor.
2) length of the main compressor body.
3) size of the vanes.

trumpets -
1) markings inside the flare? TA? TB? and other cast marks?

anything else you might think notable
Thanks
Craig
Attachments
rotorcloseup7341.JPG
rotorcloseup7341.JPG (80.53 KiB) Viewed 11762 times
John Vardanian
Posts: 1908
Joined: Wed Sep 04, 2002 12:13 am
Location: San Francisco Area

Re: Horn Detailing

Post by John Vardanian »

Craig,

Here are the measurements:

1) height and diameter of the vane rotor: 19mm x 34mm
2) length of the main compressor body: 93mm
3) size of the vanes: 19mm x 20mm or, 19mm x18mm + the width of the bull noses on each side
4) markings on the trumpets: The shorter one has the letter "S" embossed in the mouth. The longer one has none, but has the letter "D" stamped at the base a couple of inched north of where the threads start.

Incidentally, I noticed an interesting feature in the mouth of the trumpets. There are a series of embossed "keeps" to allow a filter ring to snap in.

john
PF Coupe
User avatar
carello
Posts: 203
Joined: Sat Apr 22, 2006 12:52 pm
Location: eastcoast
Contact:

Re: Horn Detailing

Post by carello »

John Vardanian wrote:Craig,Here are the measurements:
1) height and diameter of the vane rotor: 19mm x 34mm
2) length of the main compressor body: 93mm
3) size of the vanes: 19mm x 20mm or, 19mm x18mm + the width of the bull noses on each side
4) markings on the trumpets: The shorter one has the letter "S" embossed in the mouth. The longer one has none, but has the letter "D" stamped at the base a couple of inched north of where the threads start.
Incidentally, I noticed an interesting feature in the mouth of the trumpets. There are a series of embossed "keeps" to allow a filter ring to snap in. john
John, the measurements seem to indicate the compressor for your 309 is the same as my 8D except the color and id tag are different. "the same" may not be the right words, "same dimensions for those pieces" would be more accurate.
I have a scan of my "S" trumpet below. My longer trumpet (203mm) has a raised S on it. The other trumpet (197mm) is same, simply no raised S. Can you give a measurement on your trumpet lengths?

I am finding that the 2000 serie horns that i originally thought might be good for trumpet parts on a Road Master are a different smaller thread (17x1.0 instead of 19x1.0) so the trumpets, nuts and plastic chrome pieces will not work.

Is Jon Brent still around? He has good photos on his website, but i have some questions.
Craig
Attachments
TrumpetFlareSdim60.jpg
TrumpetFlareSdim60.jpg (36.65 KiB) Viewed 11649 times
John Vardanian
Posts: 1908
Joined: Wed Sep 04, 2002 12:13 am
Location: San Francisco Area

Re: Horn Detailing

Post by John Vardanian »

Hi Craig,

The horns, one is 20mm and the other is 25mm head to toe.

john

Image
PF Coupe
John Vardanian
Posts: 1908
Joined: Wed Sep 04, 2002 12:13 am
Location: San Francisco Area

Re: Horn Detailing

Post by John Vardanian »

Sorry Craig,

Obviously, I meant 200mm and 250mm, respectively.

john
PF Coupe
User avatar
carello
Posts: 203
Joined: Sat Apr 22, 2006 12:52 pm
Location: eastcoast
Contact:

Re: Horn Detailing

Post by carello »

John Vardanian wrote:Sorry Craig, Obviously, I meant 200mm and 250mm, respectively. john
Hey, i thought i was the only dyslexic tosper. I am sure yo meant 502 and 500 as they are close in legnth.
:lol:

If possible, we need a close up of the paint under the glued id tag. Or simply a close up of the whole cap. how did you get this tag off?
Craig
Attachments
CapfromIMG_1775.jpg
CapfromIMG_1775.jpg (82.86 KiB) Viewed 11589 times
User avatar
carello
Posts: 203
Joined: Sat Apr 22, 2006 12:52 pm
Location: eastcoast
Contact:

Re: Horn Detailing

Post by carello »

John Vardanian wrote:Hi Craig,The horns, one is 20mm and the other is 25mm head to toe.john
John, these shiny red trumpets appear to have been refreshed. Last time they looked scratched up. What the details?
Craig
Attachments
oldhorntrumpets309.jpg
oldhorntrumpets309.jpg (69.46 KiB) Viewed 11591 times
John Vardanian
Posts: 1908
Joined: Wed Sep 04, 2002 12:13 am
Location: San Francisco Area

Re: Horn Detailing

Post by John Vardanian »

Hi Craig,

A good way to remove the plaque is to overheat the cap gently. The epoxy holding the plaque has a hardened chewing gum consistency that tends to soften with heat. If you don't have a narrow putty knife, make one from a butter knife. Don't use a razor blade becasue the plaque is thin and you might damage it.

This is the best picture I have so far. If you want another let me know and I'll shoot one tonight.

As for the trumpets, I stripped the old red paint, placed each trumpet in the chuck and spun at high rate and polished with Hepic Semichrome.

The new paint is quite light in color, so to get the deep red tone you'll need to apply many coats. For best results keep the nozzle about 3 inches to the trumpets and keep hand moving swiftly. One trick... paint the trumpets once-twice then turn them upside down and paint again once twice. Then again, right side up and paint once twice, and so on. I have about 10-12 coats on the above pictures. For outstanding results the paint needs to run just barely. After you're done keep in furnce room (suspended) for a few days.

john

Image
PF Coupe
User avatar
carello
Posts: 203
Joined: Sat Apr 22, 2006 12:52 pm
Location: eastcoast
Contact:

Re: Horn Detailing

Post by carello »

John Vardanian wrote:Hi Craig,A good way to remove the plaque is to overheat the cap gently. The epoxy holding the plaque has a hardened chewing gum consistency that tends to soften with heat. If you don't have a narrow putty knife, make one from a butter knife. Don't use a razor blade becasue the plaque is thin and you might damage it.This is the best picture I have so far. If you want another let me know and I'll shoot one tonight.
As for the trumpets, I stripped the old red paint, placed each trumpet in the chuck and spun at high rate and polished with Hepic Semichrome.The new paint is quite light in color, so to get the deep red tone you'll need to apply many coats. For best results keep the nozzle about 3 inches to the trumpets and keep hand moving swiftly. One trick... paint the trumpets once-twice then turn them upside down and paint again once twice. Then again, right side up and paint once twice, and so on. I have about 10-12 coats on the above pictures. For outstanding results the paint needs to run just barely. After you're done keep in furnce room (suspended) for a few days.john
John , what red translucent paint are you using? Craig
User avatar
carello
Posts: 203
Joined: Sat Apr 22, 2006 12:52 pm
Location: eastcoast
Contact:

Re: Horn Detailing

Post by carello »

John Vardanian wrote:Hi Craig,A good way to remove the plaque is to overheat the cap gently. The epoxy holding the plaque has a hardened chewing gum consistency that tends to soften with heat. If you don't have a narrow putty knife, make one from a butter knife. Don't use a razor blade becasue the plaque is thin and you might damage it.This is the best picture I have so far. If you want another let me know and I'll shoot one tonight.
john[
John, i wanted to confirm that the black paint you find in inaccessable areas is just "flat black" on the Fiamm black compressors, so the need for a picture was to look carefully and closely at this "under the label black paint".
thanks
Craig
Attachments
1962Fiamm_Ad.jpg
1962Fiamm_Ad.jpg (64.86 KiB) Viewed 11557 times
Post Reply