Hello,
Has anyone noticed if there a small ball at the end of the armature shaft? I am not talking about the ball at the top of the same shaft that locks the blower rotor in place. This is a smaller ball that may fit into a receptacle hole at the bottom of the shaft. Thanks.
john
Horn Detailing
-
John Vardanian
- Posts: 1908
- Joined: Wed Sep 04, 2002 12:13 am
- Location: San Francisco Area
Re: Horn Detailing
PF Coupe

Re: Horn Detailing
It is there, i believe, on all these vertical compressors. Here is an 8D MC/1 armature end.John Vardanian wrote:Hello,Has anyone noticed if there a small ball at the end of the armature shaft? I am not talking about the ball at the top of the same shaft that locks the blower rotor in place. This is a smaller ball that may fit into a receptacle hole at the bottom of the shaft. Thanks.john
Craig
- Attachments
-
- Ballend_7349.JPG (101.33 KiB) Viewed 12214 times
-
John Vardanian
- Posts: 1908
- Joined: Wed Sep 04, 2002 12:13 am
- Location: San Francisco Area
Re: Horn Detailing
Perfect! Thanks Craig. This ball was knocking around in the box of parts and I wondered where it came from. It was a pure guess on my part that it might be from the bottom of the shaft. Thanks for confirming.
Now that it is all painted and ready to assemble, I am finding that once the two (bottom) acorn nuts are tightened, the armature binds. To get it to spin under power I need to loosen the acorns quite a bit. Something is not right. Any thoughts?
john
Now that it is all painted and ready to assemble, I am finding that once the two (bottom) acorn nuts are tightened, the armature binds. To get it to spin under power I need to loosen the acorns quite a bit. Something is not right. Any thoughts?
john
PF Coupe
-
Rudy van Daalen Wetters
- Posts: 1206
- Joined: Thu Jan 22, 2004 5:53 pm
Re: Horn Detailing
John,
Are there any spacers involved?
Rudy van Daalen Wetters
1963 GTE s/n 4001
1966 330 GT s/n 8705
Are there any spacers involved?
Rudy van Daalen Wetters
1963 GTE s/n 4001
1966 330 GT s/n 8705
-
John Vardanian
- Posts: 1908
- Joined: Wed Sep 04, 2002 12:13 am
- Location: San Francisco Area
Re: Horn Detailing
No spacers.Rudy van Daalen Wetters wrote:John,
Are there any spacers involved?
Rudy van Daalen Wetters
1963 GTE s/n 4001
1966 330 GT s/n 8705
PF Coupe
-
Rudy van Daalen Wetters
- Posts: 1206
- Joined: Thu Jan 22, 2004 5:53 pm
Re: Horn Detailing
Copper shims on each end cover?
I am looking at the exploded view of a compressor
on another page of this thread.
Rudy van Daalen Wetters
1963 GTE s/n 4001
1966 330 GT s/n 8705
I am looking at the exploded view of a compressor
on another page of this thread.
Rudy van Daalen Wetters
1963 GTE s/n 4001
1966 330 GT s/n 8705
-
John Vardanian
- Posts: 1908
- Joined: Wed Sep 04, 2002 12:13 am
- Location: San Francisco Area
Re: Horn Detailing
There are no shims. I'll have to look more tonight and see if it's just a question of setup during assembly.Rudy van Daalen Wetters wrote:Copper shims on each end cover?
I am looking at the exploded view of a compressor
on another page of this thread.
Rudy van Daalen Wetters
1963 GTE s/n 4001
1966 330 GT s/n 8705
john
PF Coupe
-
Rudy van Daalen Wetters
- Posts: 1206
- Joined: Thu Jan 22, 2004 5:53 pm
Re: Horn Detailing
All screws of equal lenth? My thought being, they are to
'bottom out" at a certain point to resist over tightening.
Rudy van Daalen Wetters
1963 GTE s/n 4001
1966 330 GT s/n 8705
'bottom out" at a certain point to resist over tightening.
Rudy van Daalen Wetters
1963 GTE s/n 4001
1966 330 GT s/n 8705
Re: Horn Detailing
John, the field and bottom may have two locations, so trying 180 out might solve. i think Rudy has a good point on the acorns bottoming. Here is photo of my hardware. The center bushing( or rotor end bushing) may be a ball bushing, and may be stuck. Must have been my Lucas fan motors that had micro thin copper washers on the armature, i don't see any here on the compressor armature. Could be the Bakelite bottom is not seating due to paint on the case.John Vardanian wrote:Perfect! Thanks Craig. This ball was knocking around in the box of parts and I wondered where it came from. It was a pure guess on my part that it might be from the bottom of the shaft. Thanks for confirming. Now that it is all painted and ready to assemble, I am finding that once the two (bottom) acorn nuts are tightened, the armature binds. To get it to spin under power I need to loosen the acorns quite a bit. Something is not right. Any thoughts? john
you may need to clean the armature bushing surfaces with some oil and 600 or 1000 paper.
Craig
- Attachments
-
- Hardware_7347.JPG (104.11 KiB) Viewed 12183 times
Re: Horn Detailing
John, maybe the loose ball for the brush end of the armature is not seating far enough in and is causing a length problem.
Craig
Craig
-
John Vardanian
- Posts: 1908
- Joined: Wed Sep 04, 2002 12:13 am
- Location: San Francisco Area
Re: Horn Detailing
I took things apart and reassembled carefully, and the little gremlin must have slipped out because it's all good now.
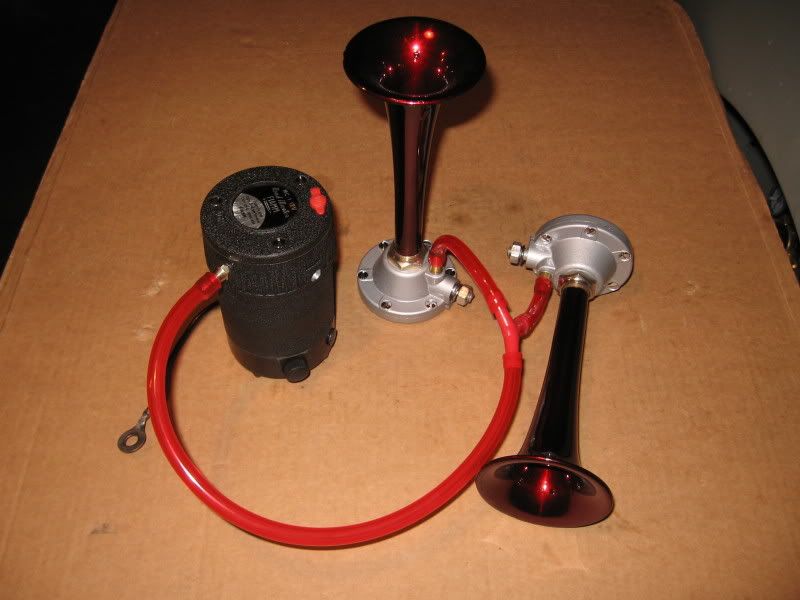
I'd like to thank everyone, especially Craig, for helping me along. I am now officially sick of all Ferrair horns. This is going into a box and I do not want to see it again until it's time to hang it on the car. The two brakets that are absent here are in the ever-growing bin of parts to be plated.
Thanks again.
john
PF Coupe
Re: Horn Detailing
John, Fantastic job, thanks for the photos. You are going to have to fog some flat black over all the horn equipment as right now they going to steal attention away from the engine. 
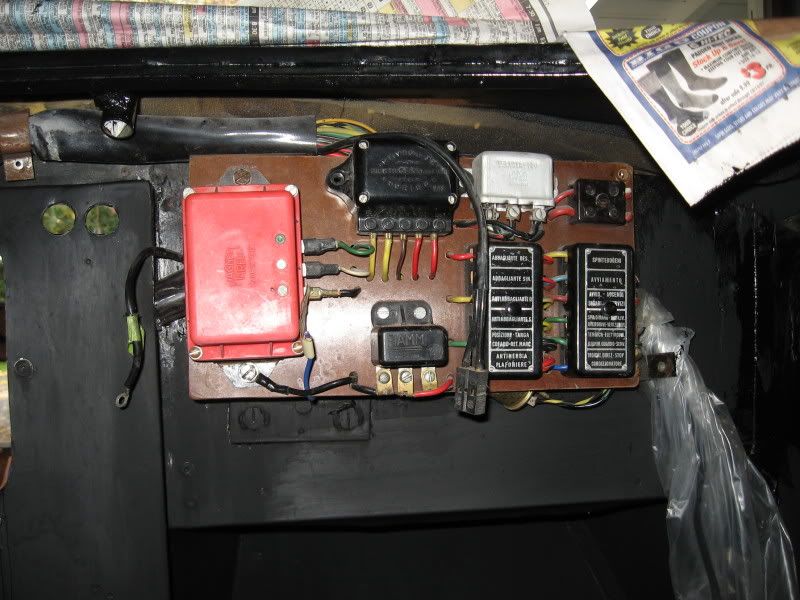
Is there a FIAMM relay in your set of horn stuff? Is it the same black plastic we see later in the 60's? screw terminals, riveted terminals, flag terminals? This is an eBay photo of a later model relay with TBG cast marks which are not seen on earlier relays.
Craig
Is there a FIAMM relay in your set of horn stuff? Is it the same black plastic we see later in the 60's? screw terminals, riveted terminals, flag terminals? This is an eBay photo of a later model relay with TBG cast marks which are not seen on earlier relays.
Craig
- Attachments
-
- 100_4680.jpg (54.9 KiB) Viewed 12112 times
-
Rudy van Daalen Wetters
- Posts: 1206
- Joined: Thu Jan 22, 2004 5:53 pm
Re: Horn Detailing
John,
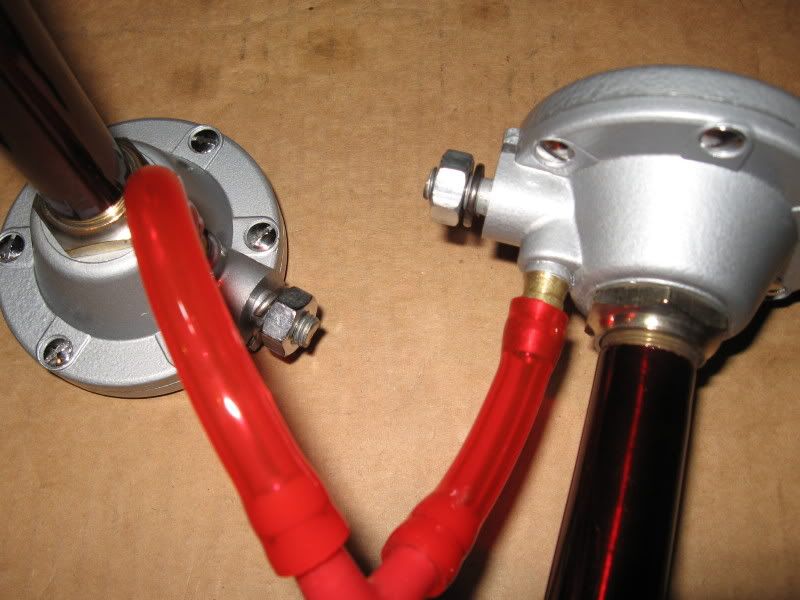
Are those the original screws or replacements?
They look great, but what will prevent them
from oxidizing right away? Beautiful job.
Rudy van Daalen Wetters
1963 GTE s/n 4001
1966 330 GT s/n 8705
Are those the original screws or replacements?
They look great, but what will prevent them
from oxidizing right away? Beautiful job.
Rudy van Daalen Wetters
1963 GTE s/n 4001
1966 330 GT s/n 8705

Re: Horn Detailing
John,
First off, great job! If you keep this level of detail up, you're going to have a fantastic Lusso!
I'm looking for a couple opinions.
1. I took off my horn trumpets to refinish them again. This will be the third time on my quest for the right color! John's horns look like the alloy horns were polished before laying down a translucent red paint.
When I was painting 3553's horns, the alloy was too corroded to polish, so I painted the horn bodies with silver paint first. The Tamiya paint is pretty close.
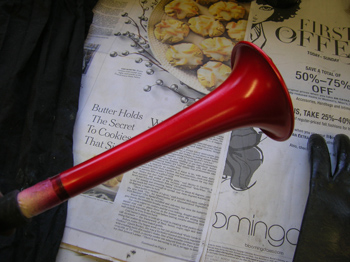
My horns are in better shape, so I'd like to polish them, but I noticed the paint on my horns chipping off very easily. This might be from the paint not having enough "tooth" to grab on to. Thoughts?
2. Is that new red hose for your horns. Was the original translucent?
Tom
First off, great job! If you keep this level of detail up, you're going to have a fantastic Lusso!
I'm looking for a couple opinions.
1. I took off my horn trumpets to refinish them again. This will be the third time on my quest for the right color! John's horns look like the alloy horns were polished before laying down a translucent red paint.
When I was painting 3553's horns, the alloy was too corroded to polish, so I painted the horn bodies with silver paint first. The Tamiya paint is pretty close.
My horns are in better shape, so I'd like to polish them, but I noticed the paint on my horns chipping off very easily. This might be from the paint not having enough "tooth" to grab on to. Thoughts?
2. Is that new red hose for your horns. Was the original translucent?
Tom
'63 330 America #5053
-
John Vardanian
- Posts: 1908
- Joined: Wed Sep 04, 2002 12:13 am
- Location: San Francisco Area
Re: Horn Detailing
Hi Guys,
Thanks for the vote of confidence. The answer to your questions…
Rudy, the screws are stainless steel. I could only find the metric thread in 12mm shank. I had to shortening them from 12mm to 10mm then fix the threads, then polished the heads on a spinning rubber pad so they looked like the original. The originals screws are nickel plated steel. I may have these re-plated along with other things (no doubt some will get lost), but for now the SS screws allow me to wrap up the job and set it aside.
Tom Y, if you looked at a previous picture I have posted here where things are spread on a green towel you’ll see the state of the trumpets before I applied the paint. I spun them on the lathe while polishing them with Hepic Semichrome. Then washed and degreased with lacquer thinner. The paint I used is called “Dupli-Color”. It first comes out of the can in a gaudy pinkish red, but by the time the 10th–12th coat goes on it looks the right tone of red. The paint has to go on thick so it’s on the verge of running. You’ll need to apply two coats about 3” away from the trumpets, turn the trumpets upside down, then two more coats, then over and over.
Craig, here’s a picture of my control panel showing the horn relay.
Thanks.
john
PF Coupe