THE VINTAGE FERRARI SPECIALIST

Ferrari 330GT Carpet Heel Pad

January 13, 2024


One of the final details I had to correct before sending a SI 330GT 2+2 to Cavallino was correct a minor issue with the heel pad. This car was restored several years ago, and the heel pad was incorrect. The car scored 99.5 out of a 100 points with this issue being the only deduction.

The heel pad previously installed was actually commonly found on a 275GTB or Lusso, but not on a 330GT 2+2. I always explain when restoring these cars, to keep in mind which factory assembled the car, and use the same materials commonly used by that factory. Many Vintage Ferraris were designed by Pininfarina, but not all of them were built by Pininarina. Scaglietti was contracted to build Lussos and 275GTBs with the designs of Pininfarina. Each factory had different techniques and materials, so using a Scaglietti heel pad on a Pininfarina built car is a common mistake. I see this happen often with upholsterers, so I try my best to keep in touch with my upholsterer throughout their time with the car. Upholsterers often work on many different cars, not just Ferraris, and may not keep accurate notes on the details on each make and model. Whenever I take a car to my upholsterer, I review these details or provide the specific details to avoid these oversights.

I have found original heel pads installed on many Pininfarina built cars with this “basket weave” pattern molded into the surface of the heel pad. It’s rubber, or vinyl material, and I have confirmed this with other owners of original cars with surviving heel pads.

My friends in the Ferrari restorations business directed me to a company that reproduced the exact heel pad by taking a mold off and good original example and could supply reproductions. As much as it pained me to tear out the nicely installed and finished heel pad installed on this 330GT, correcting the 1/2 deduction on this 330 was important to the owner, so here we are!

330GT Fresh Air Vents


Near the front shock towers inside the wheel wells are brackets that secure the large air hoses that supply fresh air to the passenger compartment. The remnant of the bracket was still on the car when the last piece broke off from being bent one time too many.

I fabricated brackets to replace the old ones by copying what was left of the old one, and welded the nuts to the bracket like the original one.

After cutting off the old bracket, I cleaned the area up and welded on the new brackets. I painted the area with paint and added some rubberized undercoating to match the original factory finish in the same sloppy manner in which it was originally applied!

Fixing Dino Sticky Shifter and a Sagging Seat


After a Fall driving season, the owner of the low mileage Dino we bought out of Oakland returned for some more work. I wasn’t expecting the car back at my shop so soon, but since the car was going to stored for the winter, the owner decided to have a few things done so it was ready to drive when the warm weather returned.

As I was unloading the car off the transporter, I found the shifter to be a little sticky. It was the same feeling I got from a shifter in a GTC a few months ago that simply needed a cleaning and some lubrication. The temperature that day below freezing when the Dino came off the truck, so the problem went away after the car warmed up inside my shop, but I wanted to make sure this wasn’t going to be a problem in the future. The first step was to remove the seats to get access to the shifter mechanism.

Once the seats and console were out of the way, I was able to access the shifter mechanism. I cleaned out the old grease and dirt, and applied some new grease so the shifter would work smoothly in all temperatures.

When the seats came out of the car, I noticed the telltale sign of original seat foam by the crumbs left by the seat foam on the carpets.

One of the things on the list of “to-dos” was to see if anything could be done about the sagging driver’s seat. The foam was getting old and was loosing some of its spring, so the driver’s bucket seat felt more like a bucket than a seat!

The original leather seats on this car were nearly perfect and I wanted to preserve them the best I could, but also try to fix the problem without destroying the originality, so I added some foam to the seat bottom and replaced some of the old support straps that were allowing too much of the seat to sag.

Looking closer at the seat, I realized almost all the driver’s weight was held by three straps, and through the years, the foam, and these three straps had become loose and unsupportive. The straps I used were wider than the original straps, so with the extra layer of foam, the seat felt much better.

They say a picture is worth a thousand words, but sometimes a video does a even better job! Here’s the video of the repair I did with the Dino seats!

330GT Dash Details

January 1, 2024


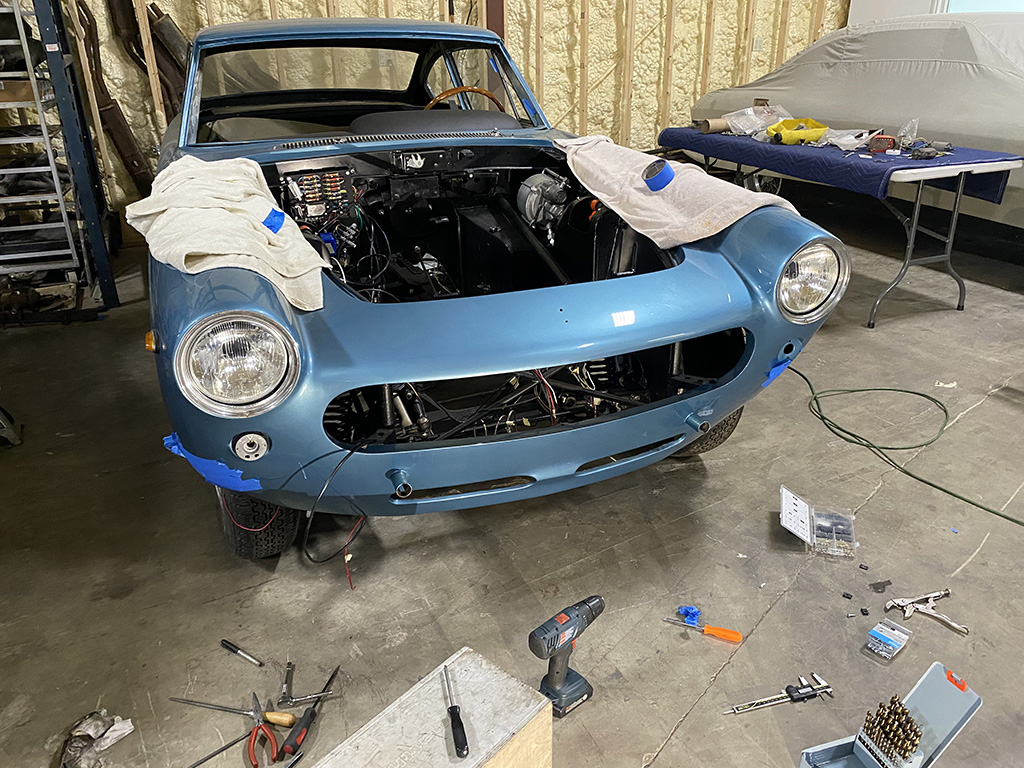
Throughout the restoration of this Blue Sera 330GT 2+2, I have found a lot of parts exposed to a lot of moisture, so a lot of parts on this car were rusty and corroded, but that didn’t seem to be the case with the dash. The vinyl on the top of the dash was in nearly perfect shape. Normally, the exposure to the sun and heat will shrink and dry out the vinyl and cause it to pull away from the edges of the dash structure. Luckily, this dash was all intact, and looked like it only needed a thorough cleaning. I took a toothbrush and carefully scrubbed the ingrained dirt out of the texture of the vinyl and treated the surfaces.

The wood veneer was also in good shape, but a little dry. I rubbed in some tung oil into the wood to rejuvenate the wood. It started to look a lot less chalky and came back to life. After the oil soaked in, I wiped off the excess.

The vent rings were cleaned and I polished the chrome trim rings. Re-chroming these wasn’t necessary as the chrome was in very good condition.

I disassembled the center gauge cluster to clean the lenses and test each gauge. The clear plastic lenses on this gauge cluster had small scratches from years of cleaning with a dry cloth. I removed the plastic lens and polished out the scratches before putting everything back together.

2023 Pledge Drive Thank You!


The 2023 Annual TOMYANG.NET Pledge Drive has come to an end, and I want to thank all of you that contributed. Your contributions help maintain this website, along with my other endeavors on YouTube and other platforms. All of this content take time and energy to share with you and create a space for reference, help, and simple entertainment. Your help is greatly appreciated in more ways than you know. I sincerely thank you along with everyone else who benefits from the support you gave!

Altimara
Arthur
Becker
Bernacci
Brunelle
Buurman
Castrogiovanni
Christ
Corbet
Cranshaw
Cuccio
Evelev
Gaeta
Garcia
Gardiner
Greenspan
Hallowell
Irvine
Jacobsen
Klion
Lenger
Lindman
Marsh
Mayo
Meltzer
Moak
Mongillo
Montini
Olsen
Palmer
Phillips
Phillips
Ruth
Scott
Travers
Vardanian
Waller
Wilson
Wrigley

Ferrari 330GT Gauges

December 23, 2023


The gauges on the 330GT I’m restoring looked to be in pretty good shape except for some cosmetic issues like a dirty and fogged lens. The dirt would be easy to remove from the large gauges since the lenses were glass, but the fog was on the inside of the gauge.

To disassemble the speedo and tachometer of these cars required carefully prying back the tabs of the chrome ring. Care had to be taken not to overwork the tabs so I only bent back the tabs enough to release the lens, and then carefully bent back without snapping them off.

Besides the dirty lenses, the chrome surround was a little dirty, so I gave it a good cleaning and polishing.

The clarity was renewed on the Speedo!

Thanks again to everyone who donated to the annual Pledge Drive. With the amount of places to spend your time on the Internet like Facebook, Instagram, and TicTok, I appreciate you still find time to come and look at this website and the content I’m putting on YouTube. It’s largely free, but I appreciate the value you see when you take the extra effort to contribute this one time a year I ask for your support. Your contribution adds to the motivation I have to keep this community alive and continue to attract new fans and enthusiasts to the Vintage Ferrari world. We all have a legacy to preserve, and you’re all a big part of this community! Thank you.


Ferrari 330GT Rear Suspension

December 15, 2023


It was time to address the rear suspension on the 330GT restoration, and it started with the rear leaf springs.

The rubber spacer blocks were hard as a rock, so I ordered replacements and cleaned all the attachment hardware.

There were signs that one spring was disassembled once before as it was missing the plastic liner that normally allowed the spring leaves to slide against each other. As I disassembled each leaf, I made small marks so I could keep the individual parts oriented in the same position when it came time to put everything back together.

The leaves were cleaned, painted, and reassembled with new liner material. I cut the reliefs in the plastic liner matching the remnants of the original pieces. I added some grease between the leaves to give everything an extra layer of lubricity!

We’re halfway through my annual TOMYANG.NET Pledge Drive, and I want to thank everyone who has contributed to the support of this website. There isn’t a day that doesn’t go by without me thinking about this website, YouTube Channel, or content surrounding my job working on Vintage Ferraris. It may sound obsessive, but you also benefit from always having Vintage Ferrari content at your fingertips! I speak to lots of people involved with Ferraris everyday, so I can bring you insight to this business, and trends that you may not know. Restorers, owners, buyers, and enthusiasts use this website everyday whether it’s for entertainment, or help with fixing a car that I have done before and wrote about on this blog. Your contribution to this website shows me you have benefited from this content in some way or form, and the community continues to benefit from your participation. I thank you!


Front Burner for a GTE

December 9, 2023


Many of you may have seen this blue GTE in the background of my shop on my YouTube videos. It’s been at my shop for all too long, and some of it has been out of my control. It came to me from another shop, and I’ve spent the last few years trying to hunt down missing parts, and getting parts to fit. Projects like these can really eat up a lot of time on the phone calling vendors all over the world chasing dead ends for rare parts. How do you charge the customer for several hours on the phone when nothing turns up from the searching? I conscionably couldn’t run up the hours looking for parts so I resorted to looking for parts when I could, or when I had free time. This had adverse the affect of stalling forward progress. Luckily I managed to make some headway recently on getting some much needed parts and have decided to give a concerted effort to completing this car.

The brakes on this car nearly completely plumbed, except for the lines to the master cylinder. Before I could run these lines, I needed to pull the pedal box out and get it serviced.

It was obvious this pedal box may not have been out of this car since it was built, so it was pretty well caked in dirt and debris.

It already started to see improvement after a power washing.

The clutch pedal rod showed a little corrosion, but everything was in good shape.

These pedal boxes are pretty overbuilt compared to the Porsche under floor mechanisms, but that means rarely are the bearings worn out in the Ferraris. A good cleaning and repacking of the bearings and rotating parts, and I had everything working as good as new.

I painted all the parts with the appropriate silver and semigloss black paint, and this pedal box was ready to go back into service for another several decades!

We’re a third of the way through the 2023 TOMYANG.NET Pledge drive and I want to thank you for the people that have already contributed. Your support shows me you read this blog and appreciate it’s existence. Social media has changed the landscape of how we consume media, and it seems more and more, we are distracted by so many places to be entertained. I have found the casual posts and interactions on Facebook fun (if we’re not friends, make a friend request, but don’t be offended if I don’t immediately respond!), but just like my Instagram posts , they seem a little too temporary. I realize that’s the impermanence of the social media, but this blog seems a little more permanent. Thank you for supporting it.


Front Hub Retaining Rings

December 5, 2023


I needed to rebuild the front hubs on the 330GT I’m restoring. There were some design changes in the hubs from early 330GTs to late 330GTs, and these were evidently the later hubs since they came off a SII 330GT. Earlier hubs had a felt seal and a slightly smaller rear bearing that carried over from the 250 hubs, but later ones like this went to a more modern lip seal to keep the grease in place. Behind the grease seal were two locking rings that secured the bearings, and I needed to make a tool to remove this locking ring.

Since I wasn’t able to find a tool that could drop into the hub to remove the locking ring, I decided to make one from scratch. I turned a piece of steel to the correct diameter and drilled four holes to match the holes in the locking ring. These holes would accept hardened drill rod to index in the ring and I welded a large bolt to the center of the tool so my impact gun could try to break the locking ring free.

The locking ring was pretty tight, and I manged to break a couple of pins from the force, but eventually, the first locking ring came out.

The problem was I machined my tool to reach the first locking ring, but there was a second one further down inside the hub, and my tool was too wide to make it past the threads securing the first locking ring.

I put the took back on my lathe and took some more material off to fit into the second step so the second locking ring would come out.

These hubs were handed, so one side would turn counter clockwise to release, while the other one would turn clockwise to release.

When I got all the locking rings apart, I could see someone had taken one of the hubs apart before, and probably didn’t have a tool to do the job because the holes in the locking ring were pretty beat up. Luckily, I didn’t do more damage to these rings since I now I have a nice tool to get the job done. When it was done, I threw the tool in my drawer full of specialty tool wondering how many years from now that I’ll be needing it again!

I posted a video version of this blog post here.

Thank you again for donating to the Annual Pledge Drive. Posts like this which discusses solutions to Ferrari specific issues are why I think it’s necessary to keep a website like this going. I have new people contacting me all the time because when they do a search for some esoteric Ferrari issue, this website pops up. I don’t claim to be the most knowledgeable person when it comes to Vintage Ferraris, but if I learn something, I’m happy to share it with the wider world. I hope you have all benefited from this and I appreciate it when you show your appreciation!


Ferrari 330GT Steering Shaft Parts

December 3, 2023


It was time to start on restoring the steering on the SI 330GT restoration and it began with cleaning the rust and corrosion on the steering shaft. This was a little more rusty than normal with some deep pits.

I disassembled the little u-joints, cleaned up all the little needle bearings, greased all the parts and reassembled.

I made new cork gaskets to replace the deteriorated seals that were originally installed, so we should be good for a couple more decades of service!

The next thing that would need addressing was the turn signal stalks.

The stalks on this car were particularly rusty, so they will need to be rechromed.

The stalk bases were showing the usual signs of shrinkage where the aging plastic cracks from age.

One stalk base had already cracked all the way through and broke off the stalk.

I usually send the whole unit out to ODD Parts in Sonoma CA for repair. I could spend the time removing just the stalk mechanism from the steering column, but then I would have to reinsert the wires in their corresponding plugs, so I let ODD parts do the whole service and return it to me for installation.

Thank you to all the early contributors to my annual TOMYANG.NET Pledge Drive. It’s nice to know people are still reading this Blog! I sometimes feel like I’m doing a late night radio broadcast sending this blog out to the ether not knowing exactly who is still listening. I’ve been doing it for so long that I often feel something is missing when I don’t write to this blog so I may never stop, but it’s nice to know you appreciate the effort!