THE VINTAGE FERRARI SPECIALIST

Ferrari 365GTC/4 Exhaust and Motor Mounts

February 24, 2024


It was time to address the exhaust on the 365GTC/4 I have at the shop. The center mufflers on this car were pretty rotted out and were probably filling the passenger compartment with fumes and CO.

The mufflers were rotting from the inside out due to moisture from the exhaust collecting inside the cans and slowly rusting the mild steel mufflers. Most of the steel was paper thin, so it was time for new mufflers.

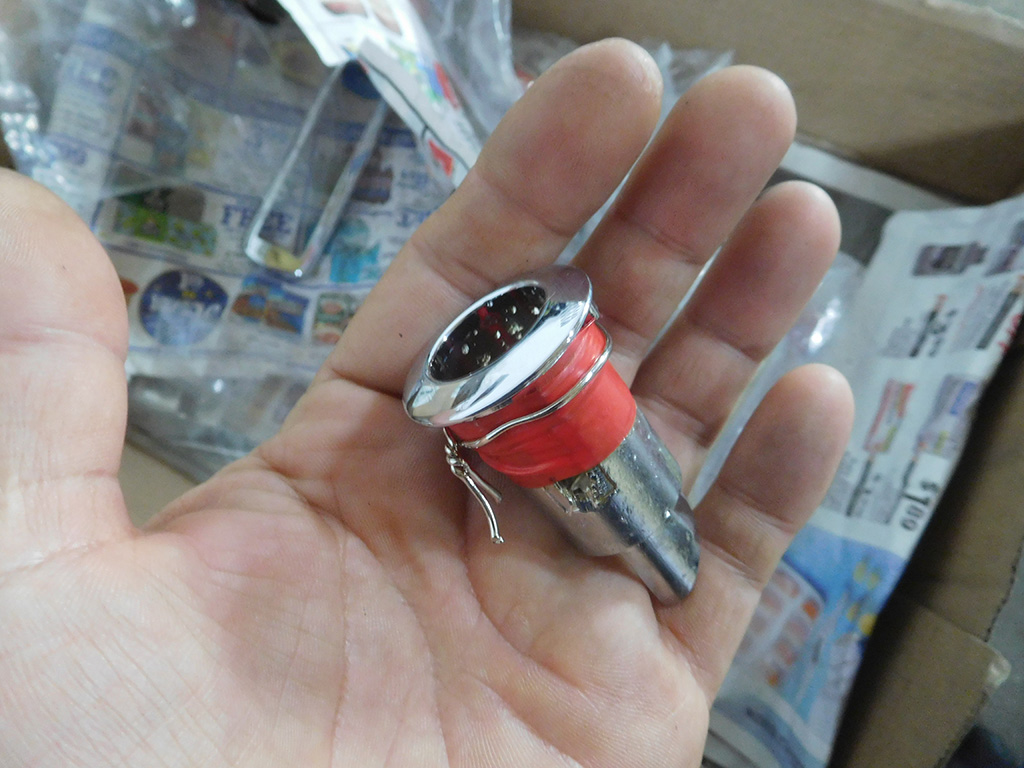
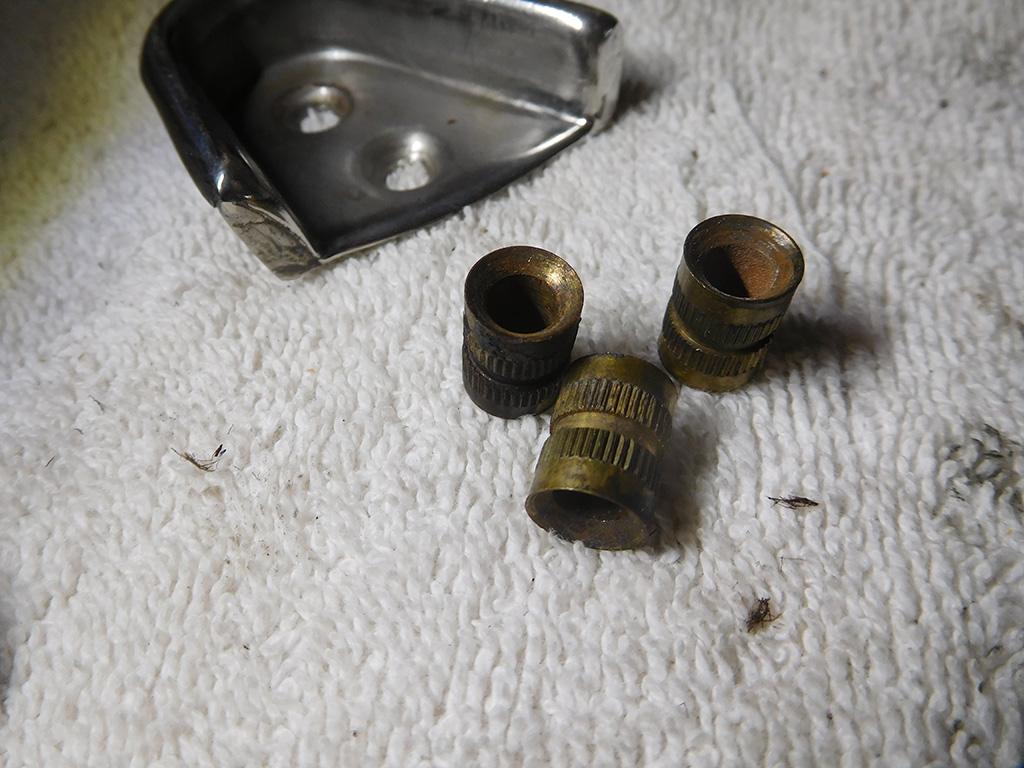
I threw all the exhaust bolts and brass nuts into my vibratory tumbler to clean them up. I’m not making a show car, but it will make assembly of the exhaust system much easier with clean hardware.

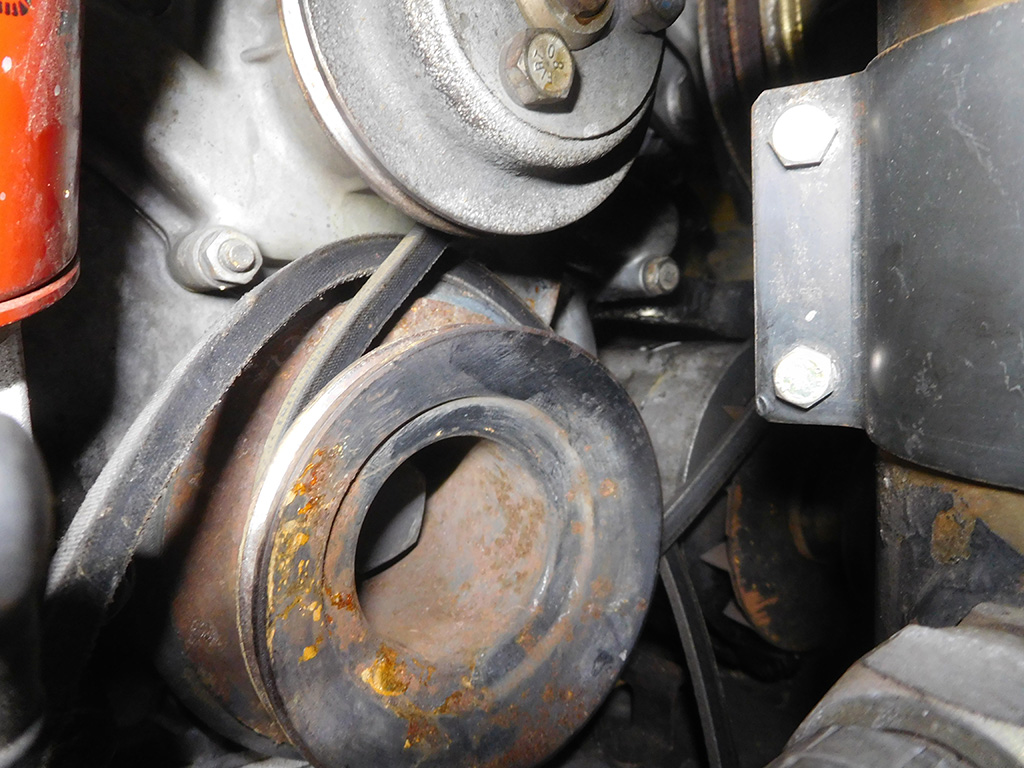
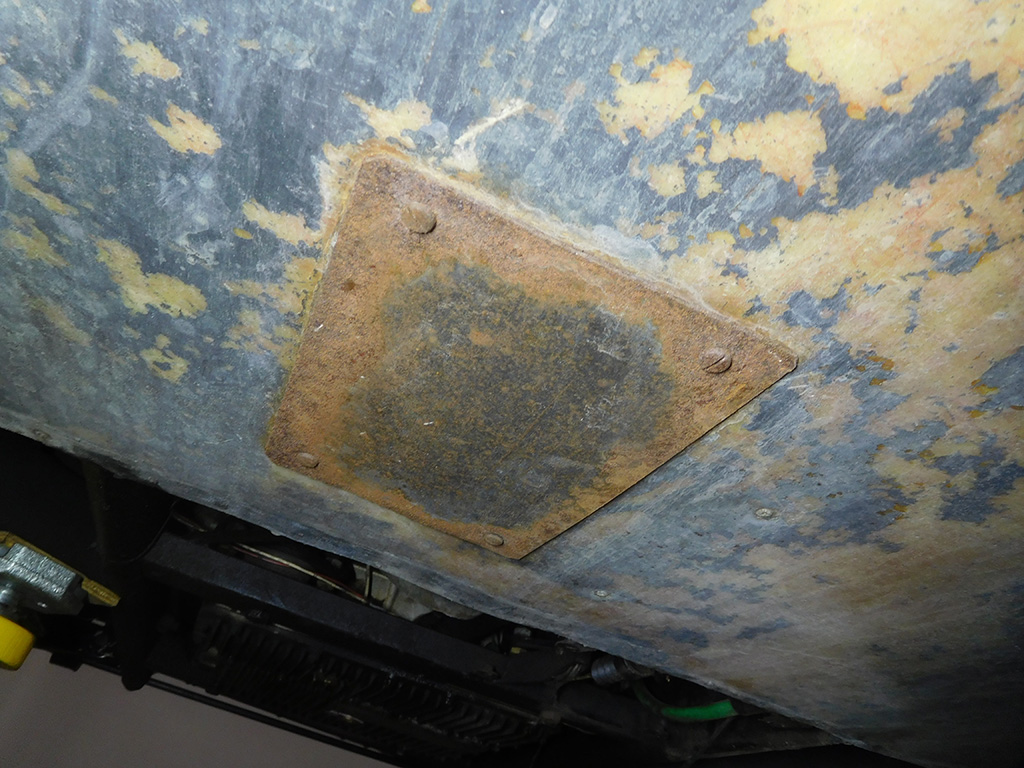
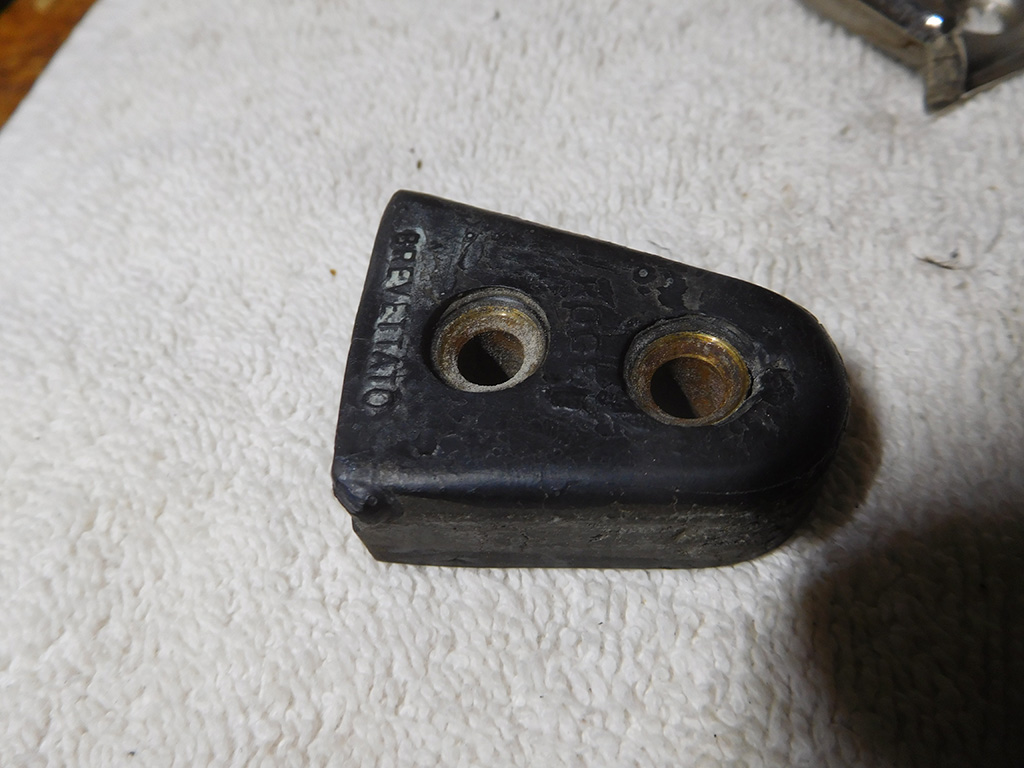
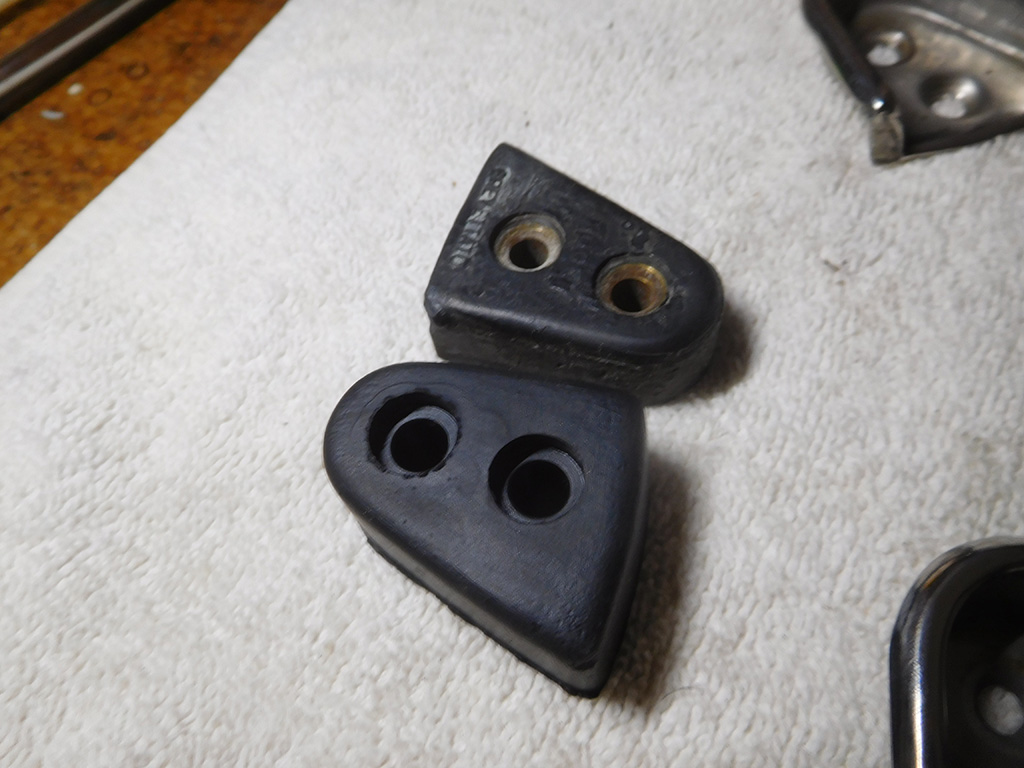
As I was disconnecting the exhaust, I looked up at the headers and found the rubber motor mounts were pretty dry rotted and collapsed.

The left one was no better, so now was the time to try and get these out and replaced. I’ve gotten this type of motor mount out of other Vintage Ferraris, but have not done it on a C/4. The usually just enough clearance to jack the engine up to remove the motor mount bolted to the engine taking the bracket and the rubber insulator. With the assembly out of the car, you can unscrew the large insulator, but there is usually not enough room to clear the studs with the bracket attached to the engine.

Unfortunately, with the C/4, the engine would not move high enough to clear mount studs so I had to remove the exhaust headers. In order to access the nuts holding the headers in place, I had to remove the air cleaner assembly. In order to remove the air cleaner assembly, I had to remove all the velocity stacks to release the air box. You can see how the C/4 always offers this cascading issue of access to the engine based on the carburetor set up!

I lucked out when I found I could access the header bolts without removing the carburetors after the air filter assembly as removed. This saved a lot of time and disassembly that often comes with a C/4!

I managed to remove the rear exhaust header and loosening the front set of headers enough for the engine to move up a fraction of an inch more so I could get the motor mount out.

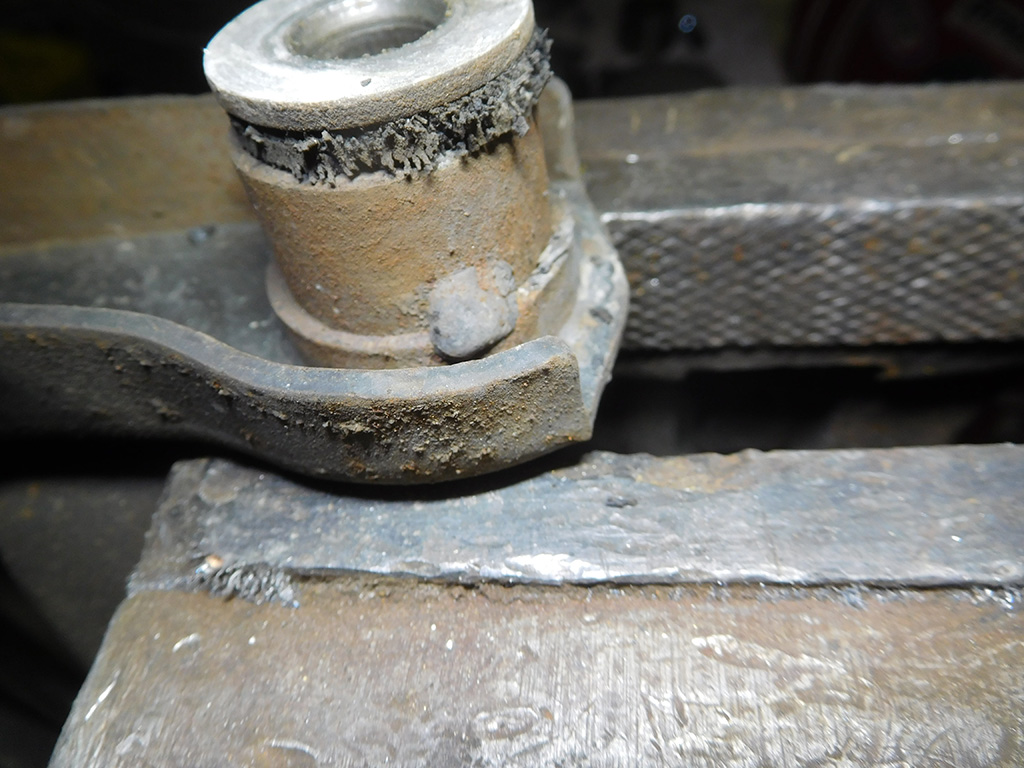
As much of a pain in the butt this was to get this stinking motor mount out, it was a much needed job. These mounts sit right below the exhaust headers and are exposed to a lot heat. Even with a heat shield installed, these mounts won’t last forever.

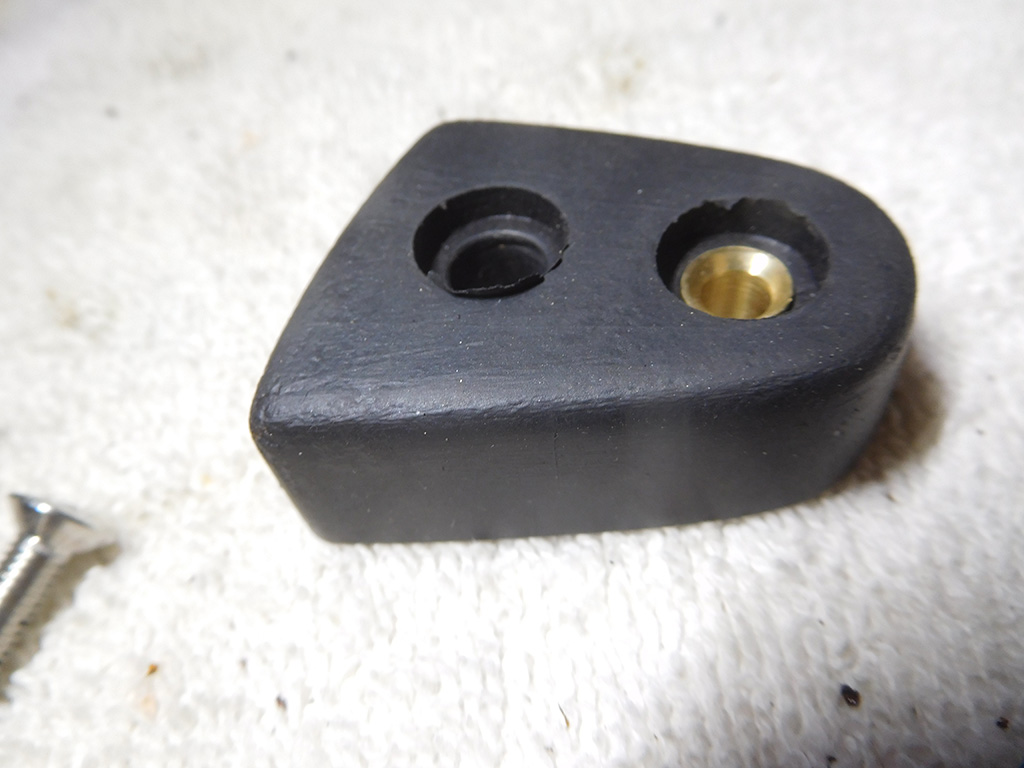
My parts supplier first sent me the wrong motor mount so after a delay of several days, I finally got the correct motor mount. Of course the new one was a little thicker than the collapsed motor mount I removed, so I had to get creative to get the new one back in place. After jacking the engine as high as I could in the car, I took a ratchet strap and pulled the mount down into place to line up the bolts on the side of the block and the chassis. It wasn’t easy, but I got them both back into place!

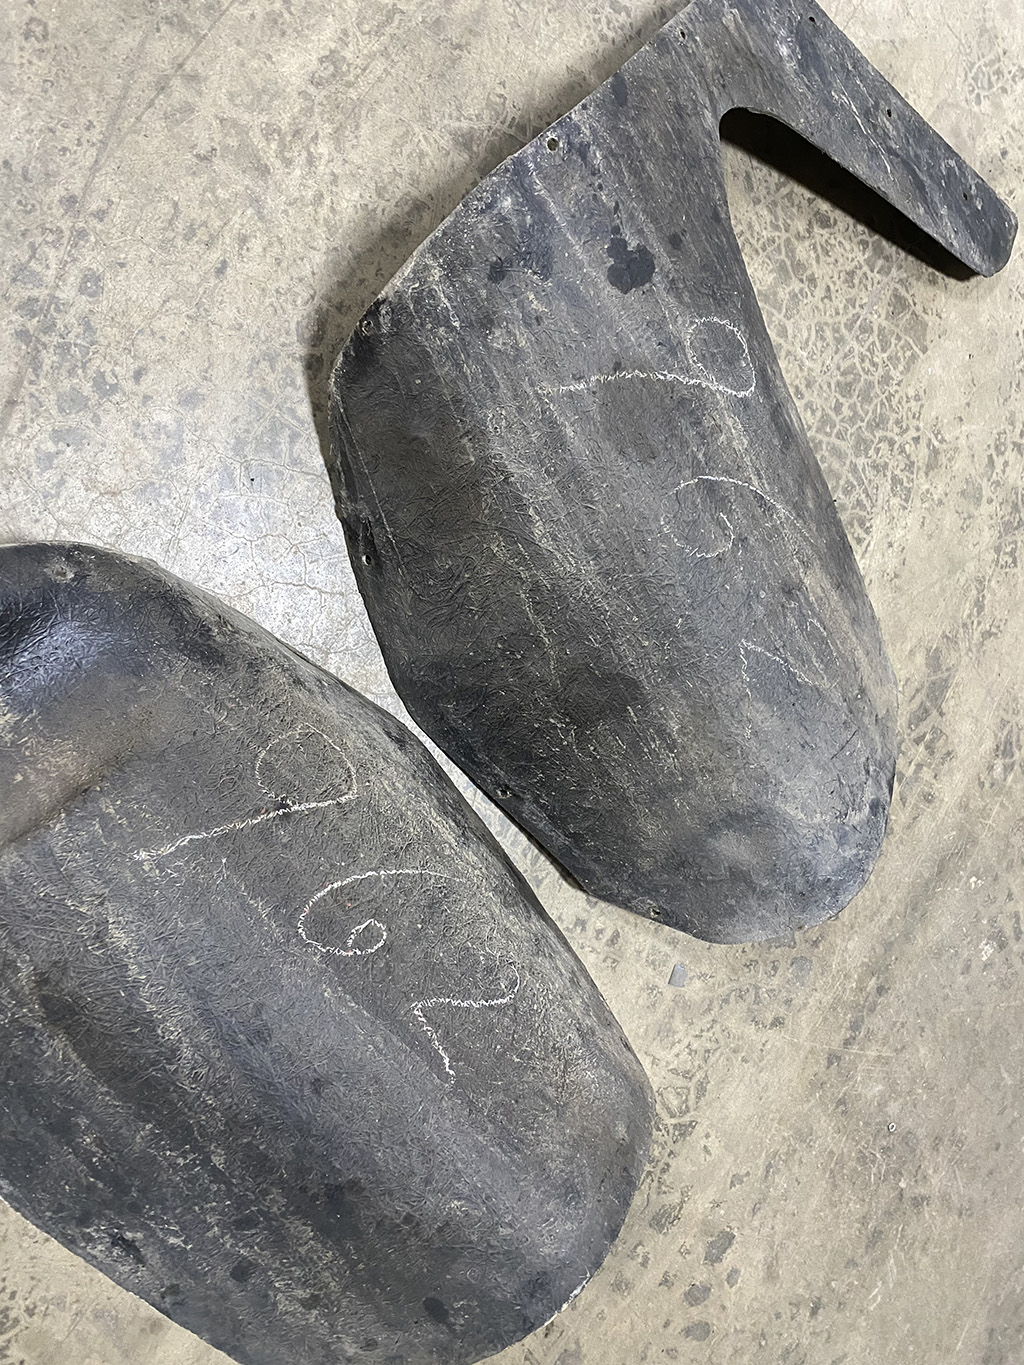
My exhaust vendor is going to custom fabricate a new center section to replace the rotted mufflers for this car, but he’s been back logged with work for over two months. He was about to begin work on the system, and I sent him pictures of the one I removed with measurements of where the hanger straps are located.

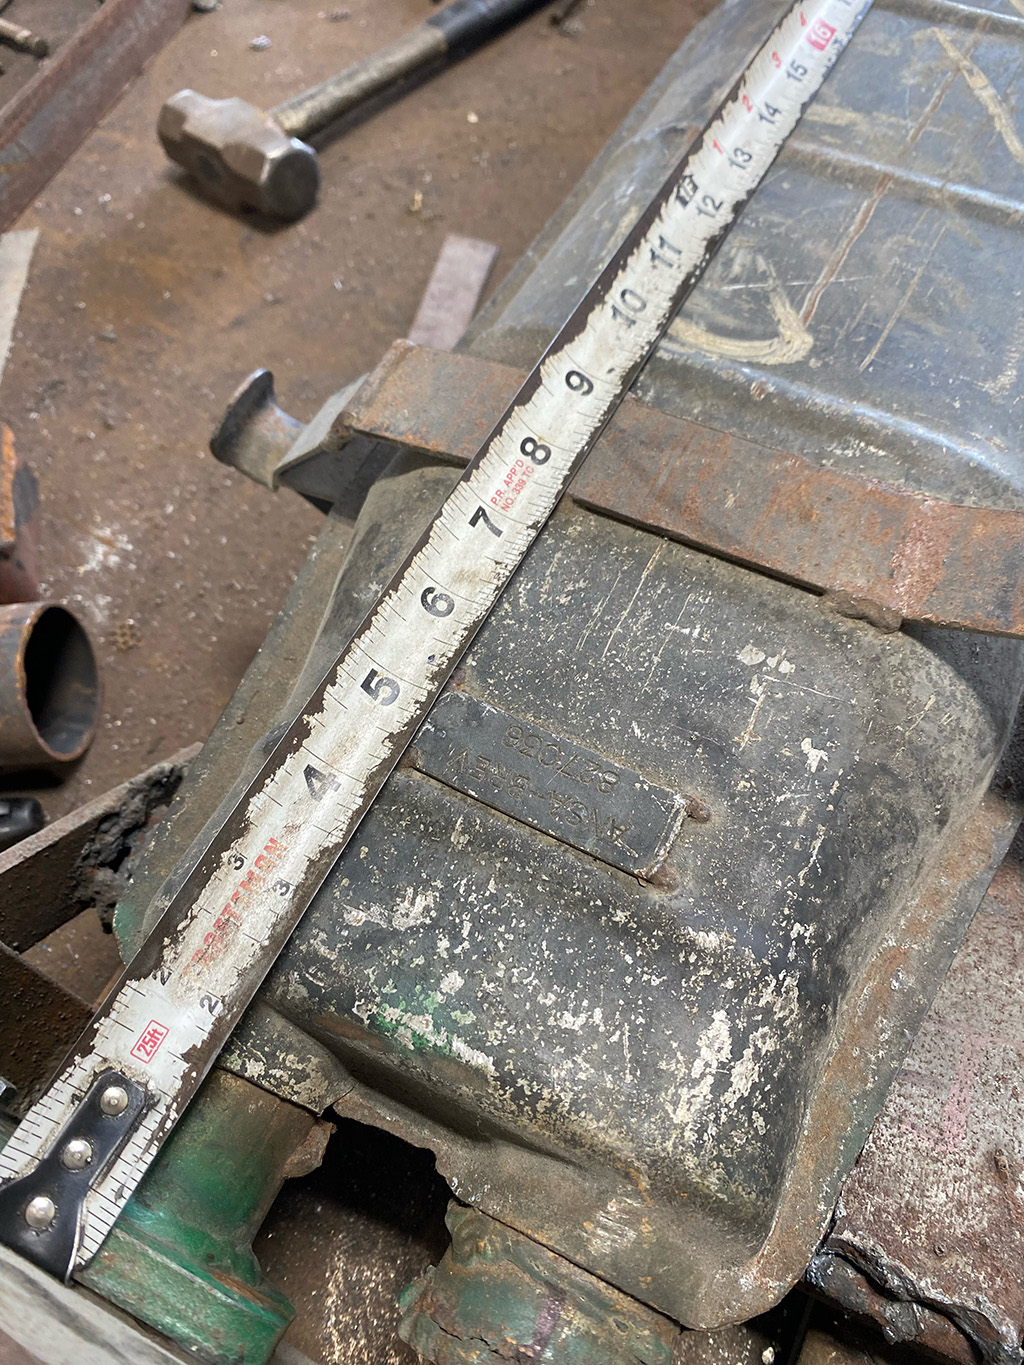
He has a USA version of the muffler I need that he uses as a template to fabricate a new one, but his straps are 1/2 different than the location of the one I just took off. This half inch may not seem like a lot, but this exhaust is hung on the car with large rubber o-rings that don’t stretch much.

There are three sets of straps welded to the muffler, and all the ones on this car lined up perfectly with the corresponding hooks on the car.

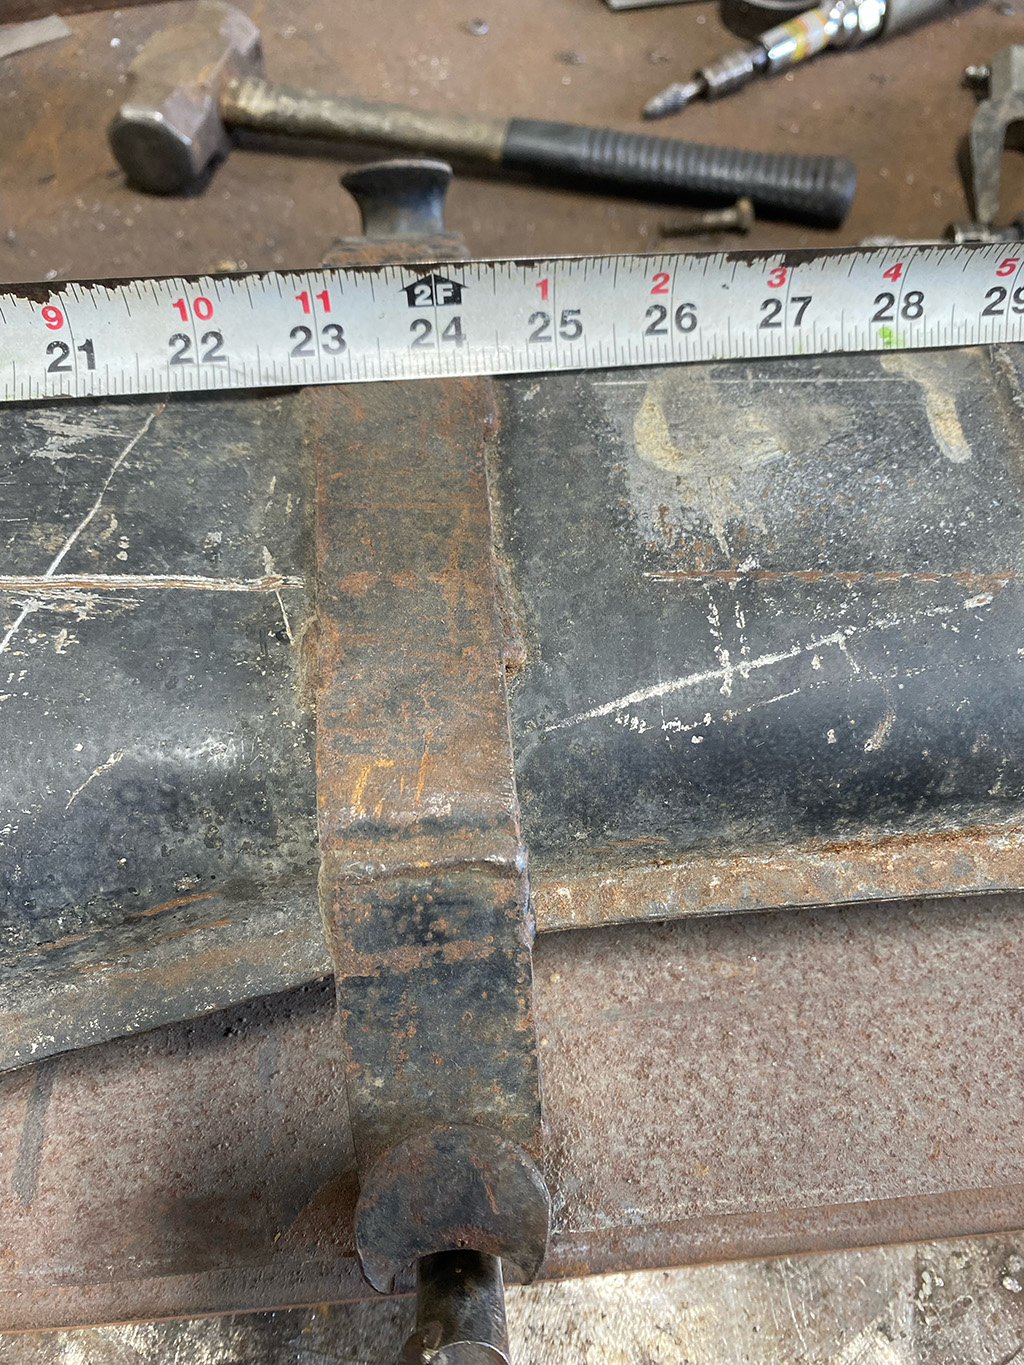
The second strap my exhaust guy has was 3/4-1 inch off, so I decided to have him tack weld the straps according to my measurements and once I have the muffler fitted to the car, I’ll permanently weld them in place. He usually tack welds the flanges in place so I can get the connections perfect, so I guess we’ll have a little more welding to do with these straps.

Dino Belts

February 19, 2024


Replacing the A/C belts on this Dino reminded me why I usually specialize on a particular model and age of Ferrari. My cut off is the early 70s and Dinos are at the edge of my range because their design start to show why I don’t prefer to work on later cars. Access to some of the components can be tight and a pain in the butt.

Ferraris used two belts on the air conditioning compressor, and mounted the compressor facing the engine tucked in a notch cut out in the passenger side fuel tank. I took this picture when I removed the two A/C belts to remind me the sequence I needed to follow to get the two belts back on the car, because if one is completely installed, the second one will not go on unless it’s partially installed. Even following this technique, the belts have to be “walked” onto the pulleys by turning the engine by hand because even with the tension adjustment at full slack, the belts won’t simply slip on.

Don’t worry, I cleaned up the rust on the lower pulley!

I’d say it was definitely time for new belts!

Original Dino Details

February 17, 2024


The front suspension rebuild was moving along nicely on this 17K original mile Dino.

As I worked on this car, I loved discovering the little details that have been preserved through the years. The rear splash shields from the rear wheel wells still showed the original grease pencil markings of the Scaglietti build number.

Pininfarina and Scaglietti used this build number to keep track of all the parts used to assemble these cars. These were often (not always) sequential to the build order but were not matched to a particular Serial Number. Since these cars were hand fitted, sometimes a splash shield had to be filed down to fit a wheel opening or a door panel had to be cut down to fit a door that was a different size. This number helped factory workers keep the hand fitted parts with the same car. These numbers are very helpful in confirming body panels and parts fitted to the car are the same as when it left the factory. This matching it not precise, and I have found many discrepancies with internal assembly numbers, but generally, they help confirm an original car.

There are a couple inspection covers under this Dino that may look pretty rusty, but look like they have never been removed from the car. I started to remove them but found the original slotted screws seized in place. Any more force and I knew they were going to strip, or shear, so I left them alone for now. I cleaned off the surface rust and painted the panel for now.

The underside of this car may look bad to the untrained eye, but I see a lot of low mileage originality. The semi-gloss paint applied to the large sheet of fiberglass forming the flat floor of this car shows only one layer of paint with the raw fiberglass showing through.

I finished installing the suspension and rebuilt steering rack, and scheduled an appointment for an alignment.

330 Locks and Chrome


I met with my plater to look over some parts that he’s in the process of chrome plating. I’ve been working with him for over a decade, and he’s become pretty familiar with the details of Ferrari parts, but there are always new issues to look at. Once the original chrome and nickle layers are stripped, he needs to surface finish each part and polish the parts before reapplying the plating. Sometimes he has to confirm which surfaces are seen to save time buffing and polishing a side that will never be seen.

The door handles were made out of a pot metal, but he adds a layer of copper before surface finishing. You can see there are still some imperfections on the edge of the handle receiver that needs just a little more work before this part moves on to polishing and plating.

I took the finished trunk lock back to my shop to install on the car. Speaking of pieces of chrome that are not seen, the only part that is seen is the ring around the push button lock for the trunk. The rest of the lock body is plated but is just the rough casting.

I made sure, however, the locating tabs were nice and sharp so they would index correctly with the trunk surface.

The trunk skin on this car was replaced, but luckily, the under structure revealed the original placement of the notch.

I carefully filed out the notches so the trunk lock would fit perfectly back in the hole!

Seeing the progress on the chrome plating, I needed to get to work cleaning out some of the fixtures that the chrome pieces will mount to and one of them was this license plate light fixture. A quick trip to the media blast cabinet, and there piece were cleaned and ready for service.

I’ll have to find a replacement lens, however, as one of them was cracked. I have a good one to copy if I find reproductions are not available.

Dino Rack and Pinion

February 10, 2024


With the suspension coming apart, it was time to take care of the steering on this car as well. With such low mileage, the tie rod ends were showing no play at all and could have probably been reused, but one of the rubber boots was torn and finding new boots was more challenging than simply replacing the whole tie rod end. It seemed more practical to replace these now, with everything else so an alignment would be done once and not again for a very long time.

I was surprised with only 17K miles on the odometer that the steering rack was showing wear, but I guess it’s a design flaw that wears a bushing inside the steering rack. When I disassembled the rack, I found the bushing completely gone, so a new piece was pressed into place and bored and honed so the shaft would move freely and yet show no play. I would imagine this replacement is an upgrade to what was originally inside.

There were some light marks on the rack from the missing bushing, but it was only superficial and polished out.

The rack itself was in perfect condition, so I was able to put everything back together and put this unit back into service. I had a couple of options repairing the steering, and one of them was to completely replace the rack with a new unit. The price was a little cheaper than the labor for me to disassemble the original rack and rebuild it, but the replacement would have not looked exactly like the original unit. I know it’s a component that can’t easily be seen, but it was nice to save the original unit and not throw it in the trash. I’ve been more conscious of our disposable society, and ease of ordering parts rather than fixing what’s broken. The replacement rack and pinion might have been cheaper, but at what cost? I think about the box, the fuel, the delivery guy, and the trash, all involved to save me the work of replacing a small plastic bushing. I know I’m in the wrong industry to try and save our planet, but I don’t have to subscribe to some of the things that seem wasteful!

Another example of saving shipping were these rubber insulators for the steering rack mounts. They looked like they were made out of natural rubber, and often deteriorated pretty quickly.

I keep some flat rubber sheets that I used to cut out gaskets instead of ordering new ones. I just needed new shaft gaiters and everything was ready to go back into the car!

Ferrari 330 Brakes and Engine Progress

February 8, 2024


I needed to address the brake master cylinder and how I was going to rebuild it. After pulling it apart, I found the internals to be in decent shape. The bore of the master cylinder showed some pitting, so I sent it out for sleeving. This master cylinder had a step bore with one measuring 7/8 of an inch and the rear measuring 1 inch. The. one inch bore looked good, so I had the brake sleeving shop sleeve the 7/8 inch bore with a stainless sleeve.

I carefully lined up the internal pistons and springs so they wouldn’t go out of order. obviously, any mix up of the parts would affect the way the brake system worked, so keeping everything in the correct order is paramount! When the seals and rebuilt M/C arrive, I’ll put the unit back together.

I stopped by the machine shop to check on the progress of the 330 engine and the machining.

The cranks and rods are coming along.

Here’s the video of my visit.

Dino Suspension

February 3, 2024


It was time to address the suspension on the low mileage Dino I had at my shop. Despite the lack of miles the rubber bushings were showing their age on the suspension.

After 50 years the rubber was dry rotting on all corners of the car.

After removing the suspension arms, I had to press out the old bushings, but first I had to cut the welds that Ferrari used to tack the bushings in place.

I sent the control arms out for powder coating and when they came back after a couple of weeks, I started the process of putting it all back together!

Cavallino 2024


The trip to Cavallino began a few days before I left for Florida when I had to load the car onto the truck headed to Palm Beach. There was a couple of inches of snow on the ground in NY, and the temps were well below freezing. I had the car detailed a sealed the week before, but planned on having someone in Florida touch up the car the day before the show.

With the show on a Saturday, I left early on Thursday morning expecting to get to Florida by lunch time, but the weather and the airlines had other plans, and one of them was to keep me in Charlotte for 7 hours after delaying my connecting flight by 5 hours!

I unloaded the cars on Friday, and with the help of my friend Eddie Fuiza, we covered the cars in plastic the night before the show. Eddie details a lot of cars in the South Florida area, and I was lucky enough to have him add my car to the several cars he was prepping for Cavallino. His foresight saved me from having the car rained on overnight. I arrived at the Saturday show day around 6 am.

It paid off arriving early, as I was able to park the PF Coupe on the top lawn at Cavallino, wipe her down one last time, and prep her for judging!

I was showing two cars this year, and I ran back to park the 330GT 2+2 with the other 330GTs in the class.

I had one last minute problem when we spotted the glove box door light was burned out. Of course the one extra festoon bulb I brought as a spare was too long to replace the one that burned out. Luckily Steve from Atlas Motors saved the day by having the right bulb for me! Thanks Steve!

Not only did Steve help me with my burned bulb, he was also generous enough to help another friend of mine on the show field. I met Mark from Toronto last year at the Montreal FCA meet and this year he was helping a friend show a 512BB. The car was fresh from a restoration, and they realized they had forgotten the Pininfarina Badge that is usually mounted on the lower panel on the right fender. We discussed solutions the day before the show, and I had an idea.

Since Steve works at Atlas Motors down in Boyton Beach, I asked if he could look in his stash of used parts to see if he had a spare badge and to bring it to the show on Saturday. It wasn’t brand new, but at least it better than having an empty space for the badge. Thanks again Steve!

I was so busy running back and forth between the two cars I was showing that I barely had time to look at the cars! I was happy and excited to be showing two cars, but I missed not having to work when I could really enjoy this show!

It all paid off when we won a Platinum with the 330GT 2+2 again. Rocco was very happy, and I feel this is probably the nicest SI 330GT in the world!

The car I was most happy about achieving Platinum success was the 250 Pininfarina Coupe. We finally were recognized for the hard work and progress we made with this car. I found this car in 2019, packed all the parts in Detroit, shipped it overseas to Latvia, traveled and consulted in the restoration, had it shipped back to me in the States, and prepped it for Concours Level Judging, so it was very rewarding to have finally won.

Platinum winners were asked to drive up to the reviewing stands to receive our trophies, and behind all the smiles, I was stressing a little bit. Here’s why.

I was told the week prior, the owner had decided to fly the car back to his home in the UK. Besides handling the logistics of handing the car off to the shipper after the show, one thing I had to do was make sure there was very little fuel in the car for air travel. Knowing this, I had below 1/4 tank of fuel in the car when I shipped it to Florida. I drove the car from the truck to the parking lot, from the parking lot to registration, and then onto the show field. I calculated I had enough fuel to get the car off the show field and back on the truck, but had not accounted for waiting in line to receive our award! As I was smiling and waving to the reviewing stand, I hoped we wouldn’t run out of fuel in front of all these people! Luckily, we made it, and even had enough to put her on a the truck the next day. Whew!

It was a such a relief to have won, and to have been a part of this journey!

I am always flooded with a mixed bag of emotions whenever I finish a car. On one side, after spending so much time around one car, I am glad to not have to work on it again, but I also feel I will miss the car because it had been so much a part of my life. The owners of this car were pleased and told me they would be interested in doing another car and showing it. Now it’s up to me to find another project car. I would love to stick with a 50s-60s Vintage Ferrari. My short list would be Boano, Lusso, or maybe a PF Cabriolet, but I’m open to suggestions. The search begins…

Door Bumpers

February 1, 2024


I had to address the door bumpers for the 330GT restoration. The old ones were rock hard and needed replacing.

The new ones leave a lot to be desired. The have the general shape, are made out of rubber, but that’s about where it stops as a reproduction. They’re thicker, and missing the brass bushings inside to keep the retaining screws from bottoming out. These were not simple bolt on pieces!

I pressed out the original bushings in the original bumpers and inspected their design. I was missing a couple of bumpers on this car, so I had to make some replacements from scratch.

I pressed the new bushings in place after sanding the rubber bumper down to the proper thickness.

Before installing them on the car, I chased the threads on the nuts to clean out the paint left by the painters.

Stuck Bolts

January 19, 2024


I had to disassemble the driveshaft rubber doughnut for the 330 so I could clean up the hardware and eventually replace the guibo joint, but a couple of bolts were stuck. Usually, these bolts will come out with a light hammering but when they’re really stuck, hammering the end of the bolt risks mushrooming out the end, making it harder to remove, and ruins the threads.

The other end was not square to the bolt I wanted to press against, so I had to juggle a couple parts and sockets to hold everything together straight and press down with the hydraulic press. I work at my shop by myself, and it’s times like these where I could have used an extra pair of hands to hold things in line as I pressed the bolt out.

The bolts finally moved with a violent pop in the press as the rust let loose. I will apply a “courtesy” layer of anti-seize on these bolt for the next mechanic that has to remove them!